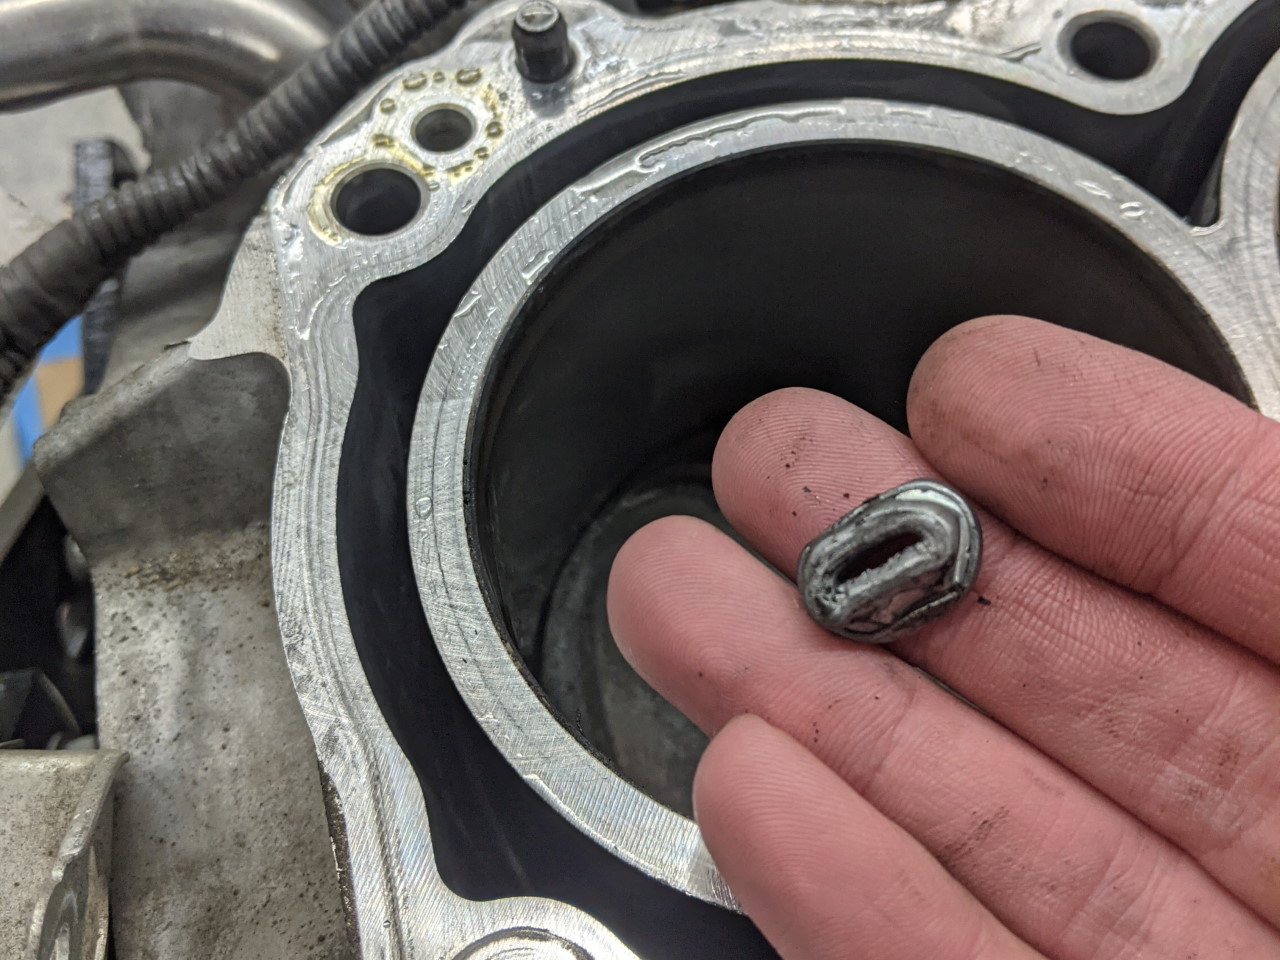
OK, confession time. Earlier this spring while working on another project, I did something dumb. Possibly the dumbest "little mistake" I have ever made while working on a car. While re-installing the lower intake runners on the 2GR-FE, I lost a nut. I'm sure you can guess where it went...
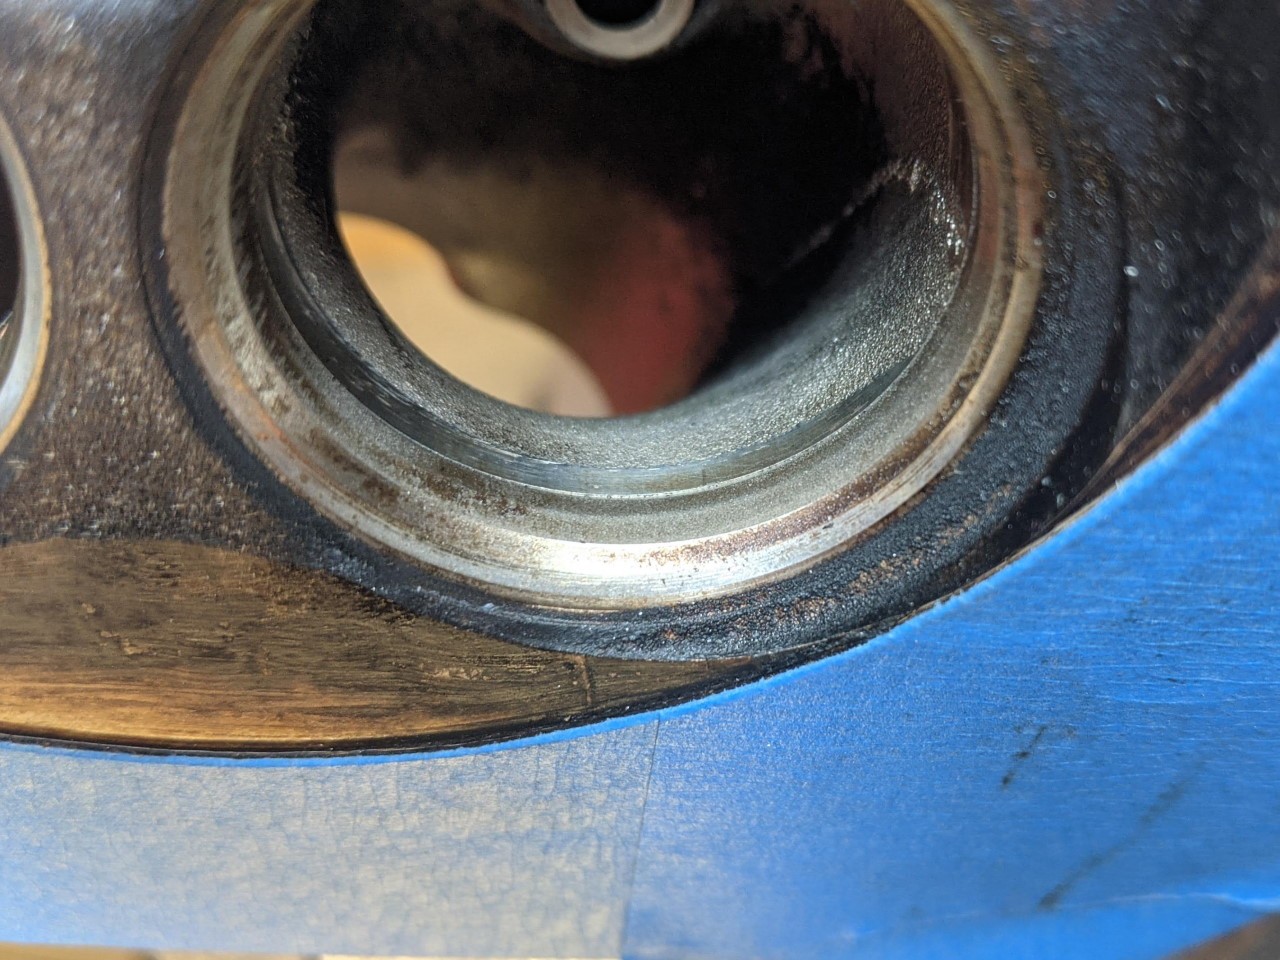
Yep, it fell down into the intake port for cylinder #5! The amazing thing is, it rode around on top of the intake valve for several hundred miles and probably a couple dozen startups without causing any problems. Then one day I pulled the car out of the shop to do a little work on my wife's car. When I went to start it that evening, it turned over half a revolution and went "clunk". Kinda seemed like a dead battery. After that it wouldn't turn over at all. I troubleshot it like a dead battery for at least an hour, tried charging the battery, jump starting it, etc. No good. It was getting late so I rolled it back into the shop and left it for another day. The next day I continued to troubleshoot as if it was a dead battery. In fact my battery WAS dead, the excessive current draw from cranking against a seized motor had ruined my Anti-Gravity battery. Finally I put a wrench on the crank pulley and discovered that it would turn a total of about 330°, either direction, and then stop SOLID.
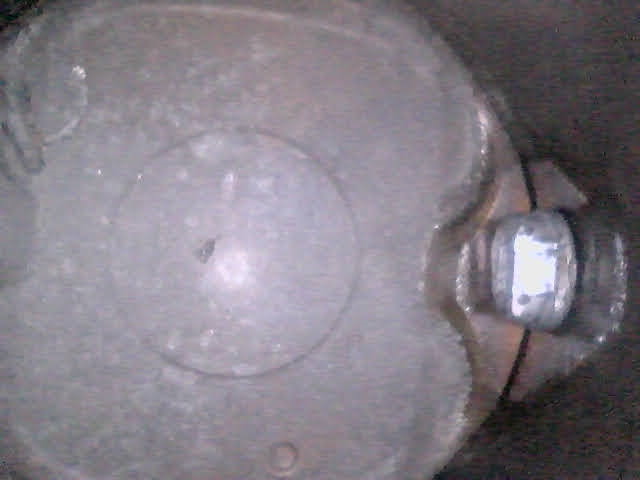
I picked up a cheap inspection camera and started checking things. Pulled the oil pan and looked for anything blocking the crank. Checked for clutch issues through the clutch fork hole. I checked the cylinders as well, but couldn't see the problem. Finally pulled the transmission thinking it might be a clutch issue. Nothing. So I pulled the motor. And THEN on another check of the cylinders with the inspection camera, finally found the nut...
I attempted to get it out through the spark plug hole, but it wouldn't fit. And I didn't think I had much chance of getting it to come back out through the intake valve. Plus I wanted to check for damage.
The Tear Down
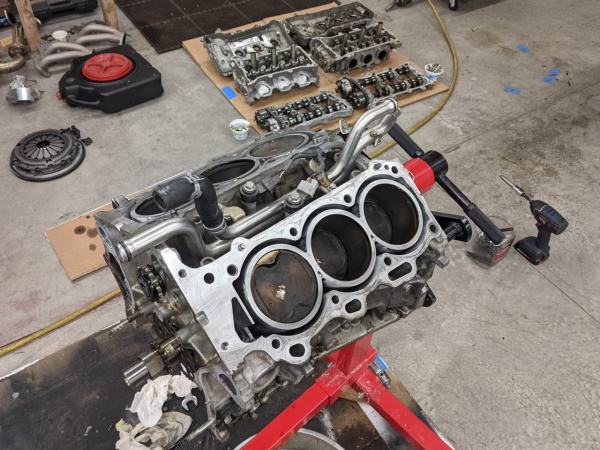
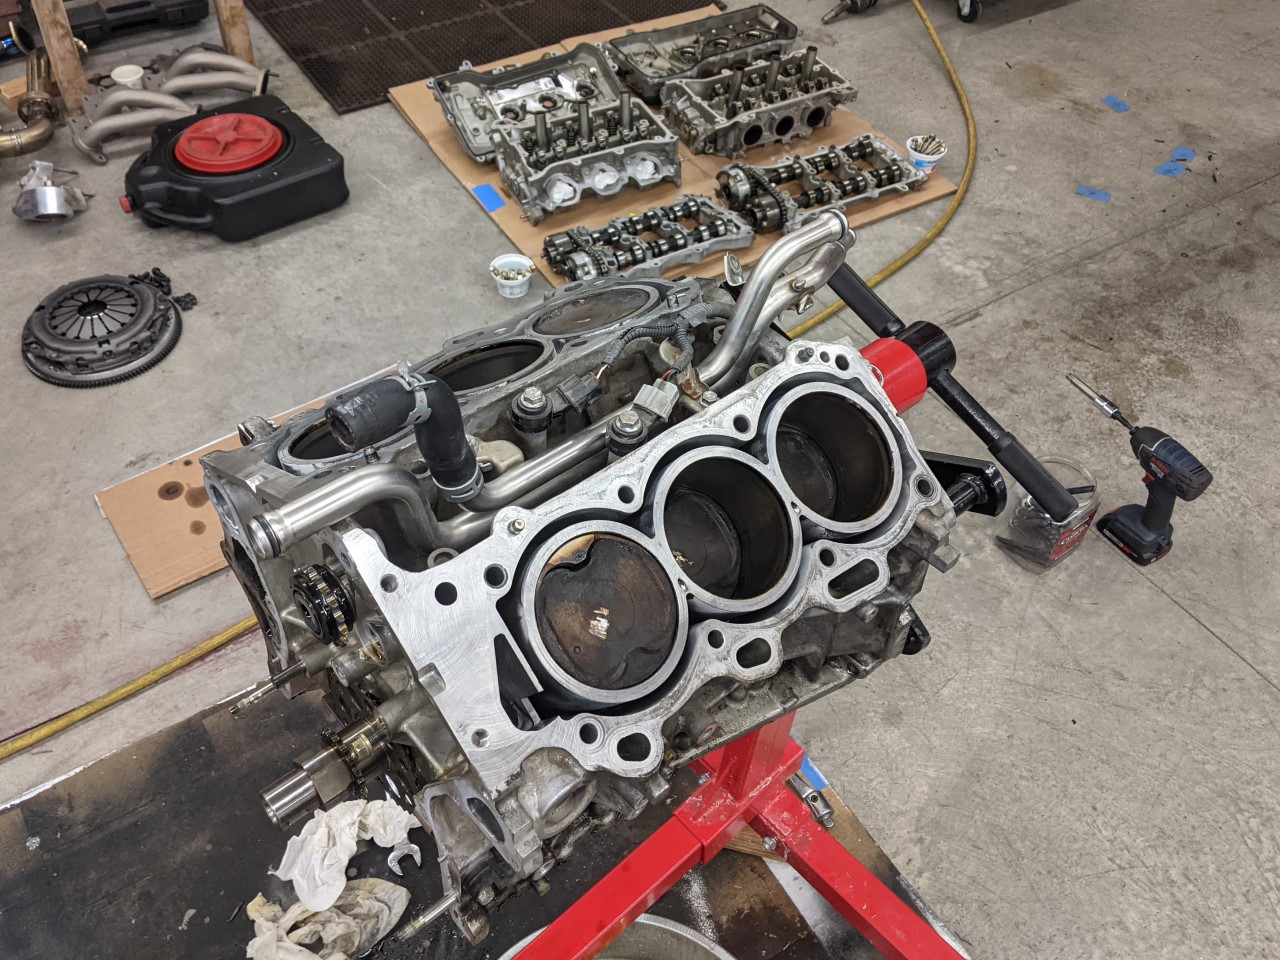
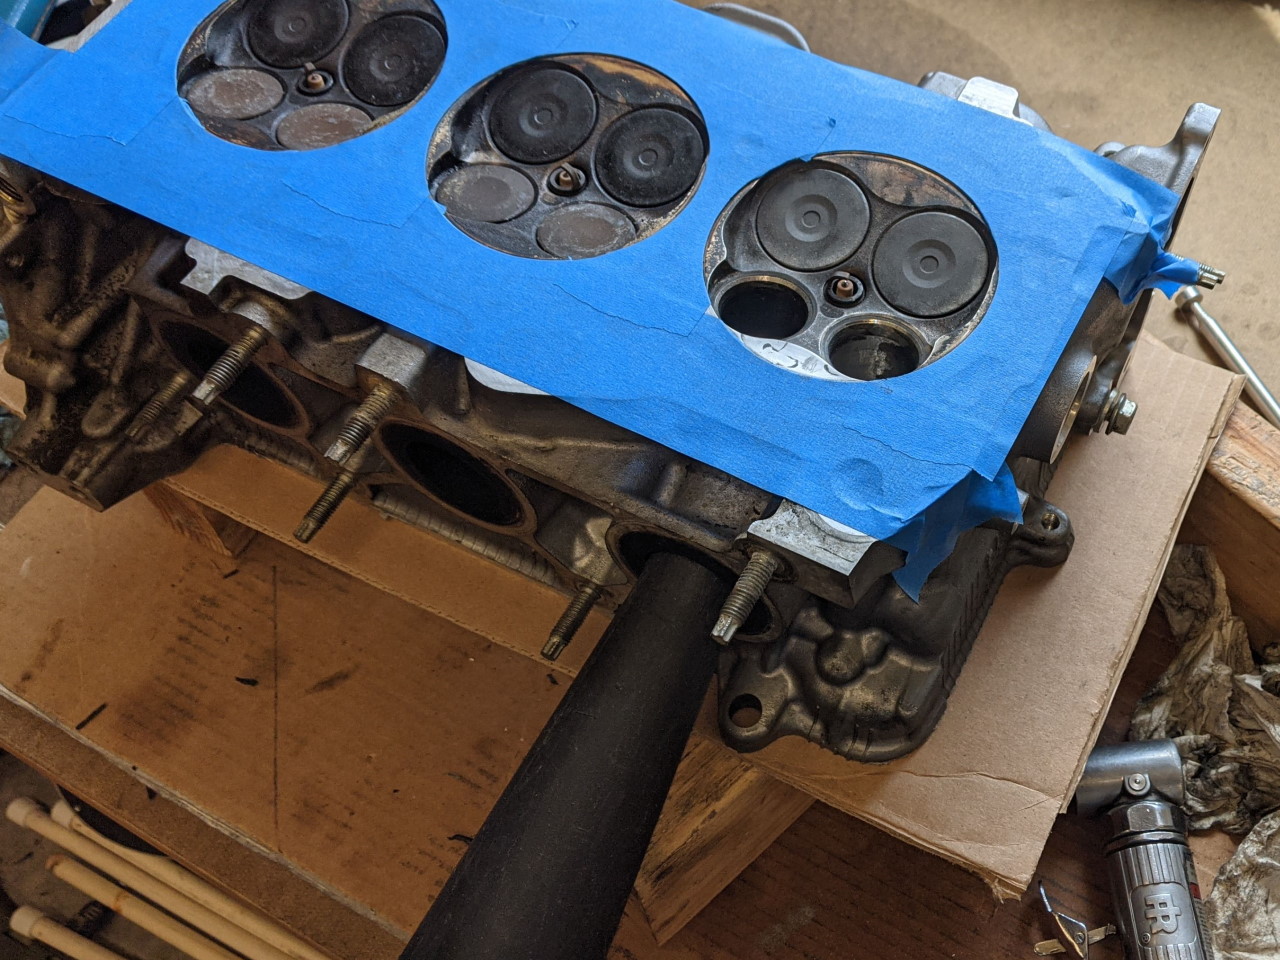
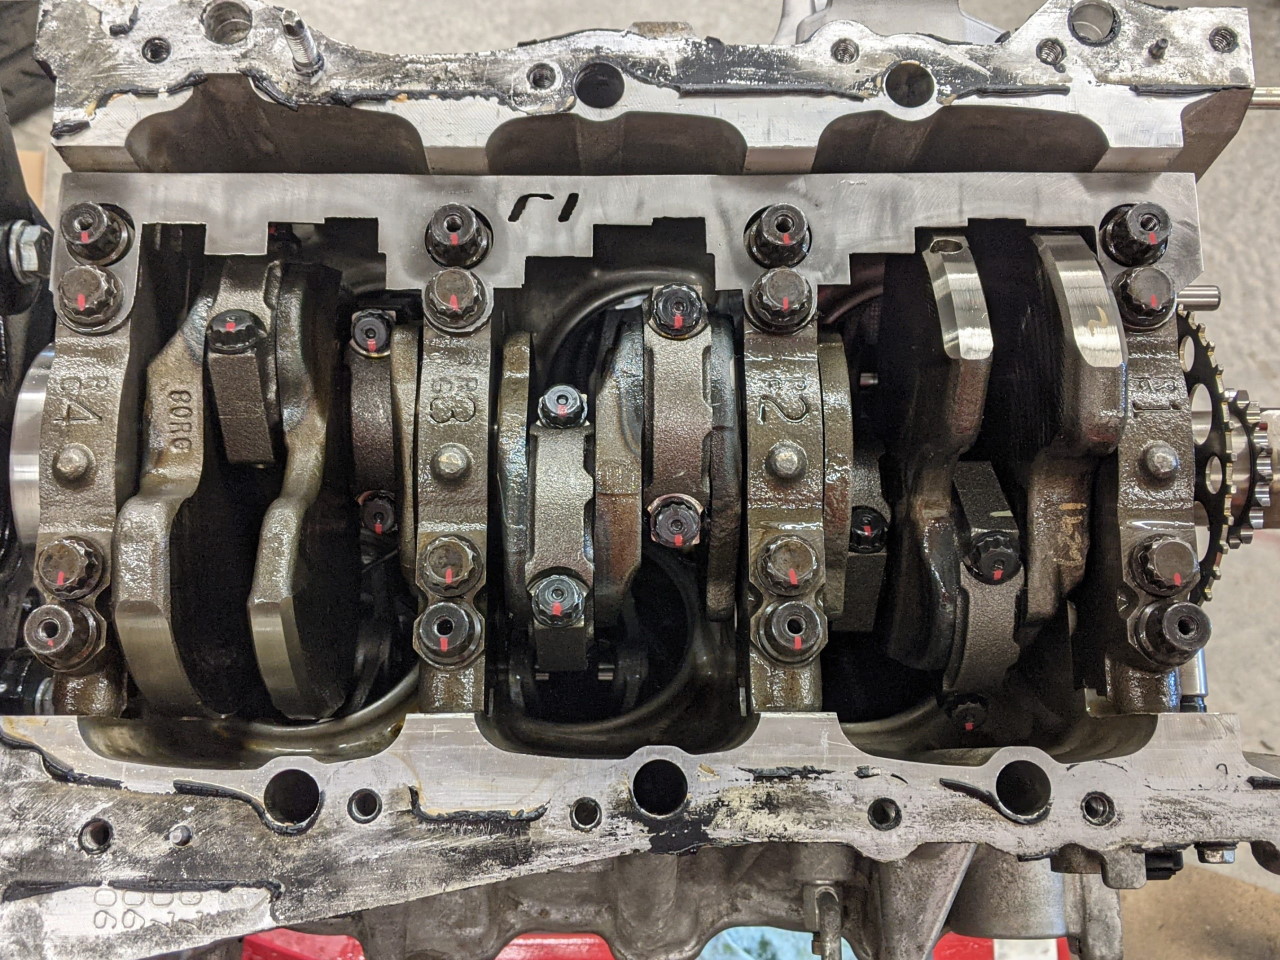
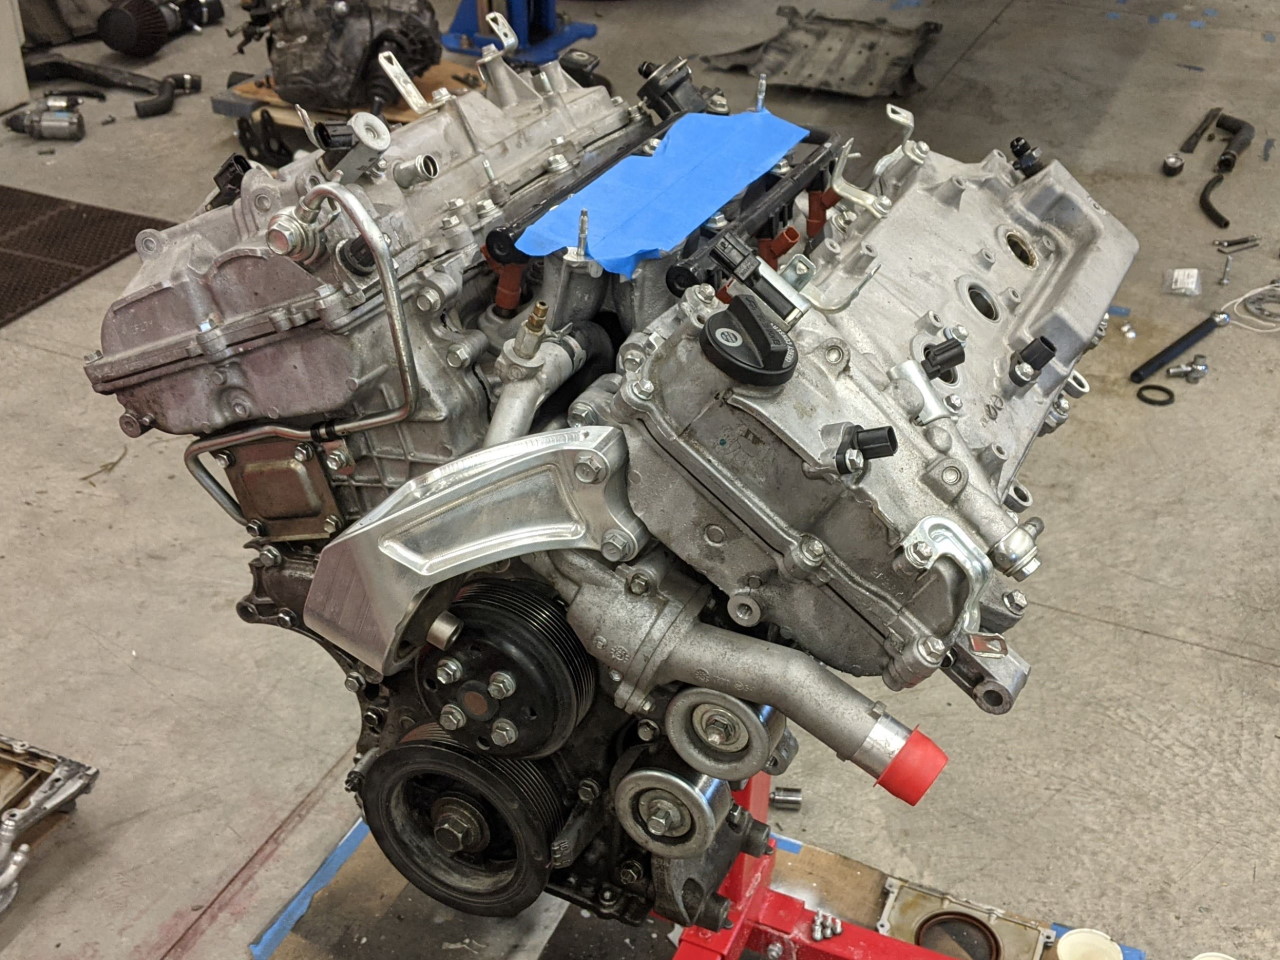
So I started taking the motor apart. Getting the heads off on the 2GR means removing basically every piece that bolts to the block. Timing cover has to come off to remove the timing chain, and to get the cover off the oil pan has to come off. And to access the head bolts the cam carrier section of the head has to be unbolted from the head. Pretty well torn down at that point.
 |
 |
And, here it is.
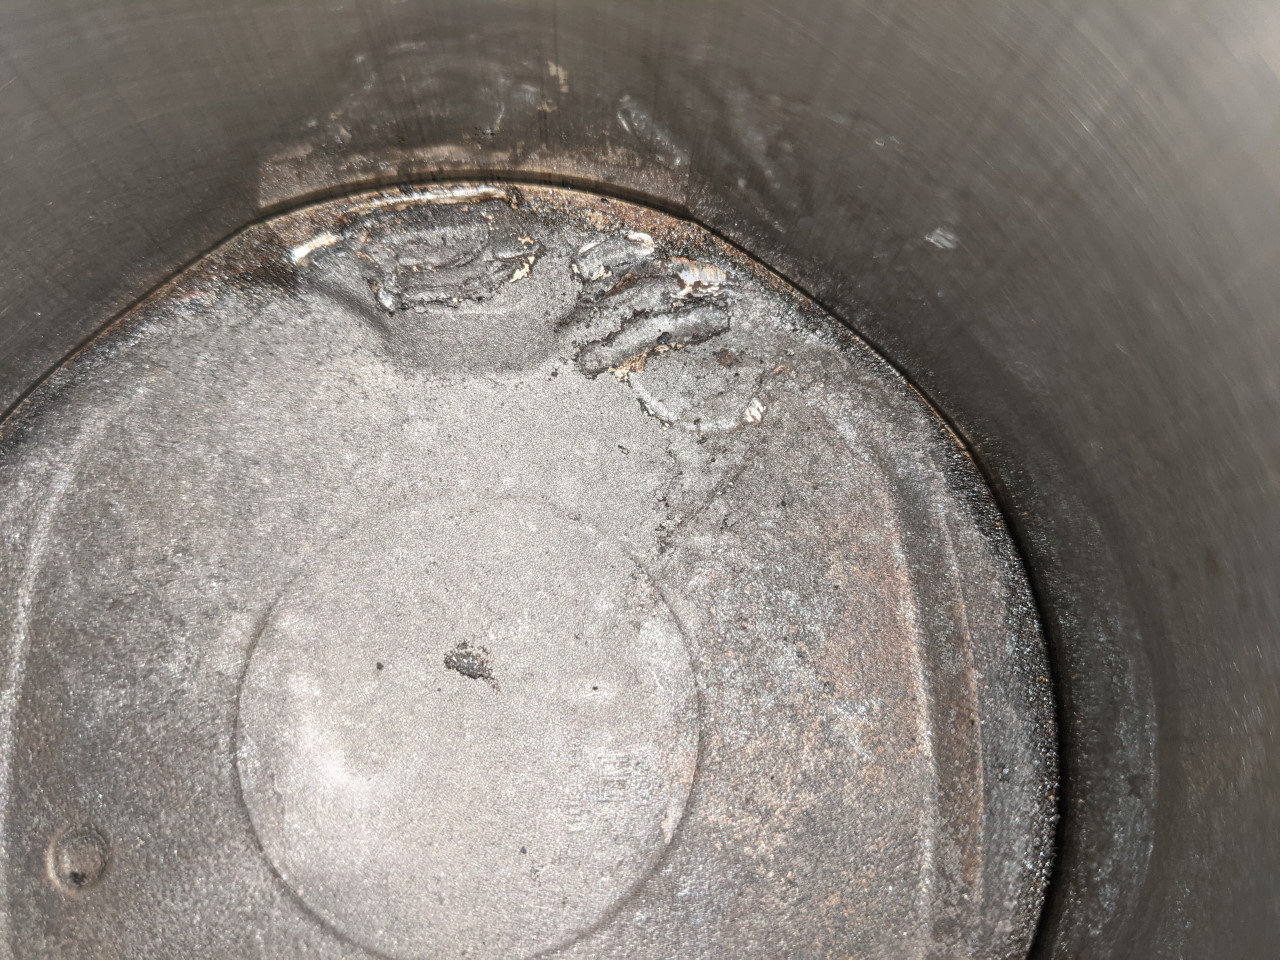
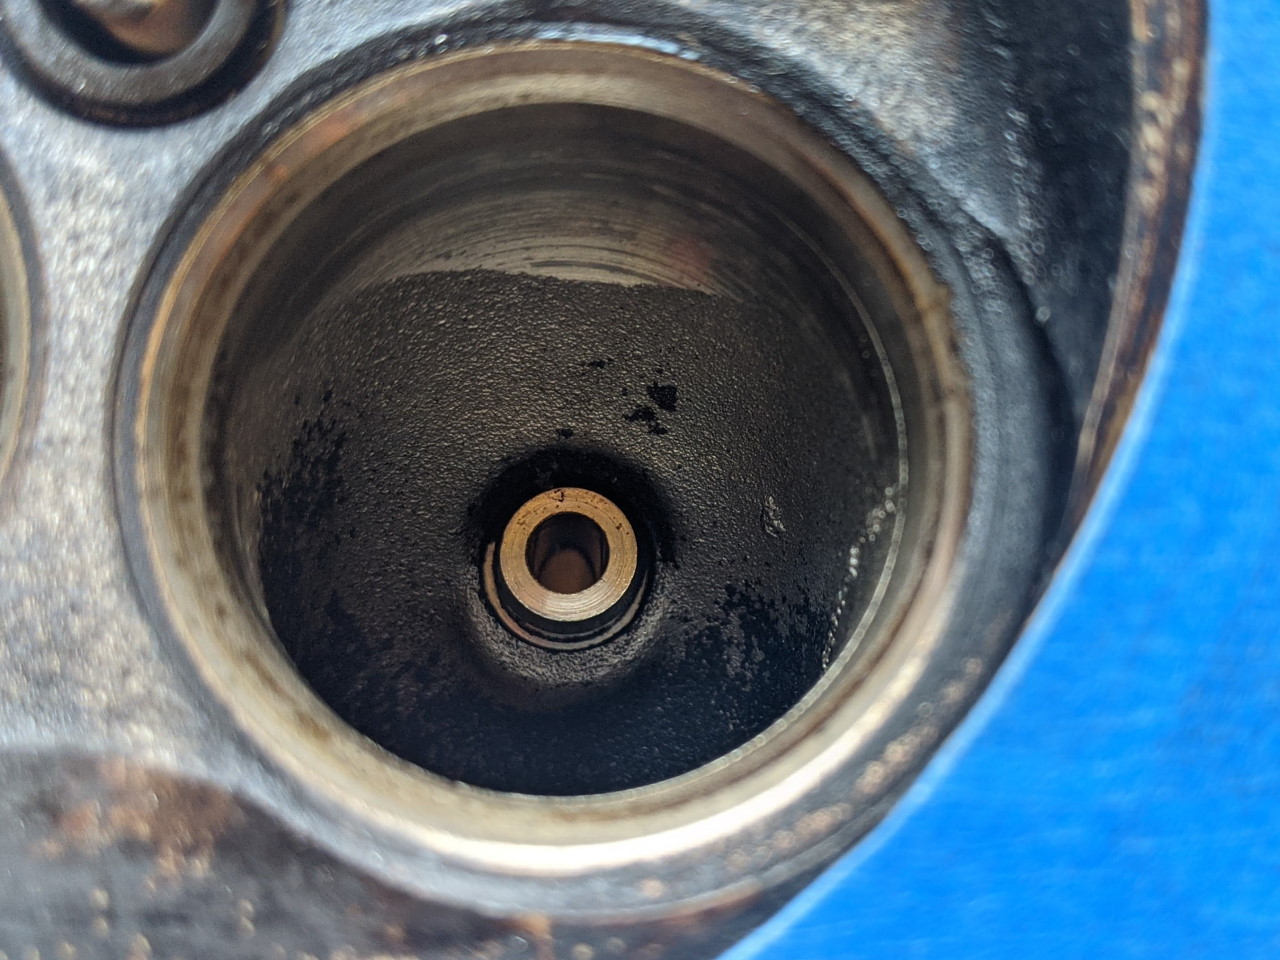
Luckily the engine never actually ran with the nut in the cylinder. Just turned over 3/4 of a revolution and stopped. So the damage was relatively minor. Some dents in the top of the piston and some matching dents in the head. But considering how smashed the nut is, the damage to the aluminum parts was surprisingly light. I will blend the dents in the head out with some fine sand paper and hope for the best.
 |
 |
Had I been able to get the nut out without pulling the head, I probably would have just run it, and my guess is it would have run fine. But since I'm into it this far, might as well try to make it better "while I'm in there". Famous last words right?
The Plan
The plan, hatched through a lot of discussion on the Frankenstein Motorworks Discord server, was to swap the pistons out for those from a 2GR-FXE from a hybrid Highlander. That would bump the compression ratio from the stock 10.8:1 to 12.5:1. My theory was that if the stock 10.8:1 compression was OK on 87 octane fuel, then 12.5:1 didn't seem terribly unreasonable for premium fuel. Plus the stock ECU is really good at tuning ignition timing up to the knock limit, so it should be able to handle this. That's the hope anyway!
For anyone interested in doing the same, here is a list of all of the part numbers that I purchased for this project. Note that the pistons come in three versions (A,B,C) with slightly different wrist pin sizes to match the rod. The pistons are marked on top, you can see in the picture above where I had scraped the carbon off of one to reveal the letter. I replaced all of the critical gaskets and seals inside the motor, plus the front and rear main seals and the water pump gasket. Other external stuff like valve cover gaskets, things that are relatively easy to replace and easy to see if they leak, I didn't bother with.
I ended up ordering them off Amayama (along with all of the gaskets and seals that I would need). Even with international shipping, it was cheaper than the US dealers I had checked with. At $54 each for the pistons plus $190 for a set of rings, OEM high compression pistons are about half the cost of aftermarket pistons! Of course one of them was back ordered... but a month and a half later my pistons finally arrived!
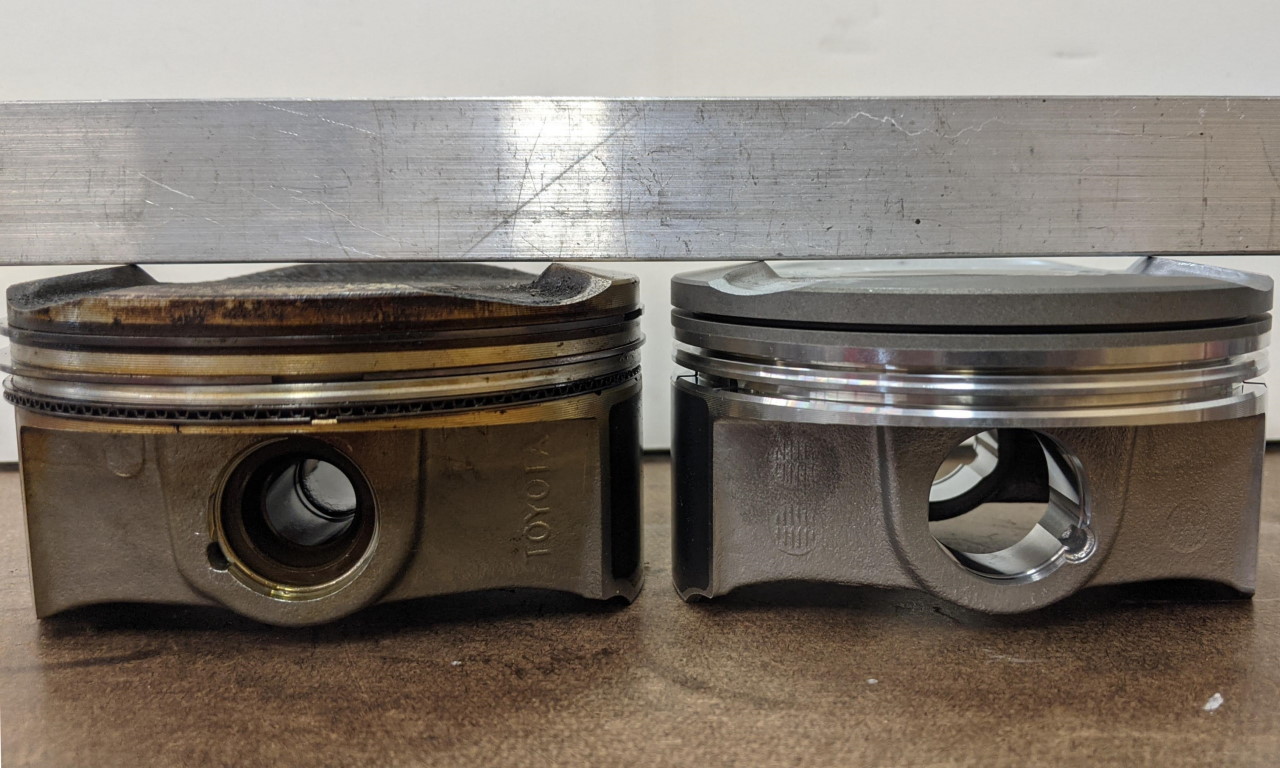
Here's one of them side by side with a stock 2GR-FE piston. The crown is approximately 1.3mm higher than on the stock pistons. Putting the numbers into a compression ratio calculator, 1.3mm across the entire 94mm piston diameter would give the expected 1.7 point bump in compression ratio. Obviously it's not the entire diameter that is raised by that amount due to the valve reliefs, but the squish areas are also a bit larger on the FXE pistons, which I expect makes up for it.
That was the plan anyway... an easy swap the pistons and put it back together project. But there's always...
Scope Creep
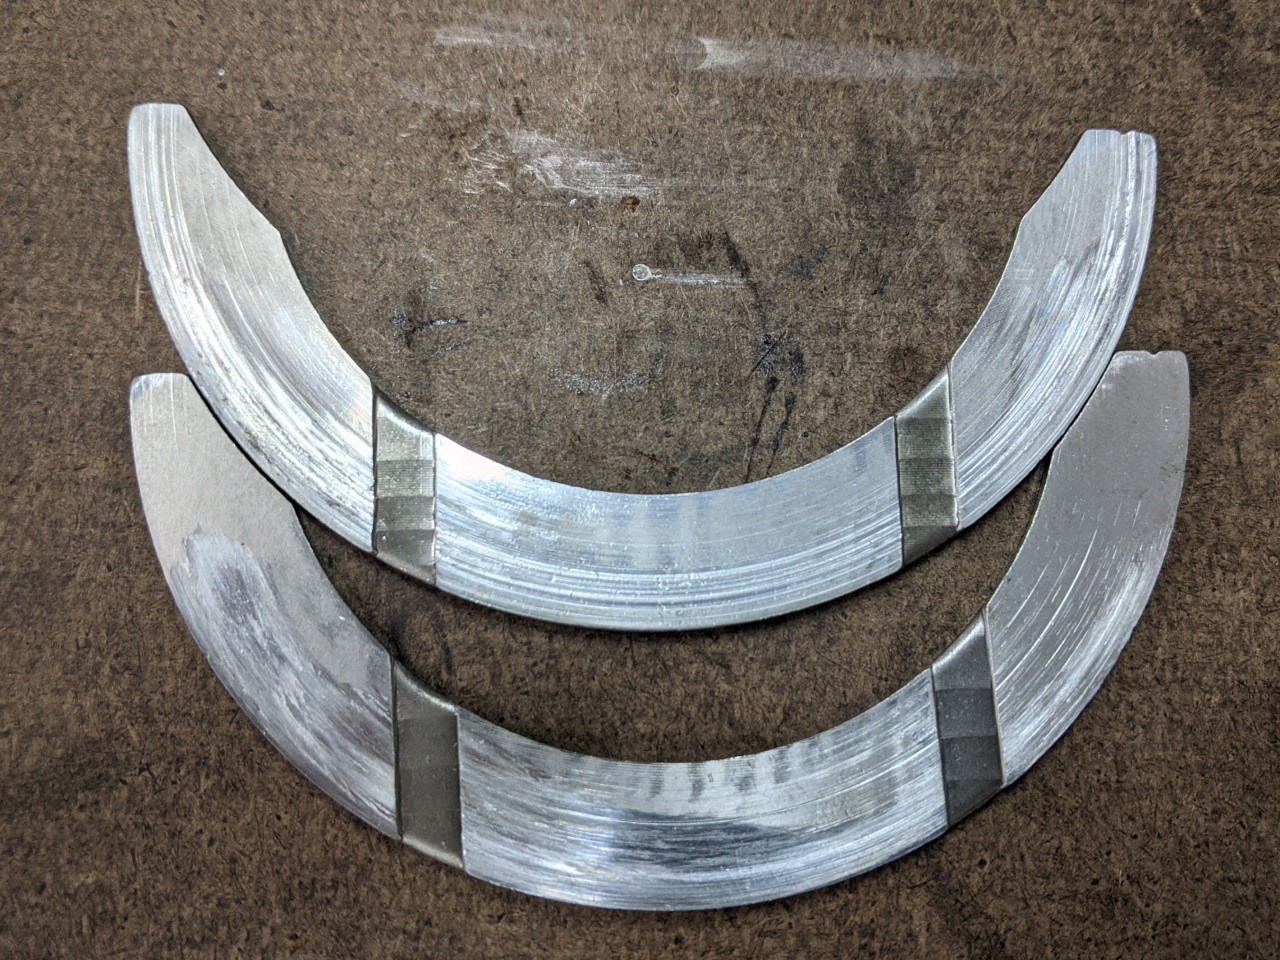
When I started swapping pistons, I found a couple of rod bearings that didn't look great. Not terrible, but bad enough that I didn't want to re-use them. The rest looked better, but several were still less than perfect. At that point, I decided to pull the crank as well and found at least one main bearing that I didn't love the look of. And the thrust washers were pretty rough as well. Luckily the crank looked fine. SO, all new bearings it is! In hind site it would have saved me a lot of time if I had checked the bearings earlier and ordered them at the same time as pistons and gaskets. But remember it was supposed to be just a quick piston swap and nothing more!
 |
 |
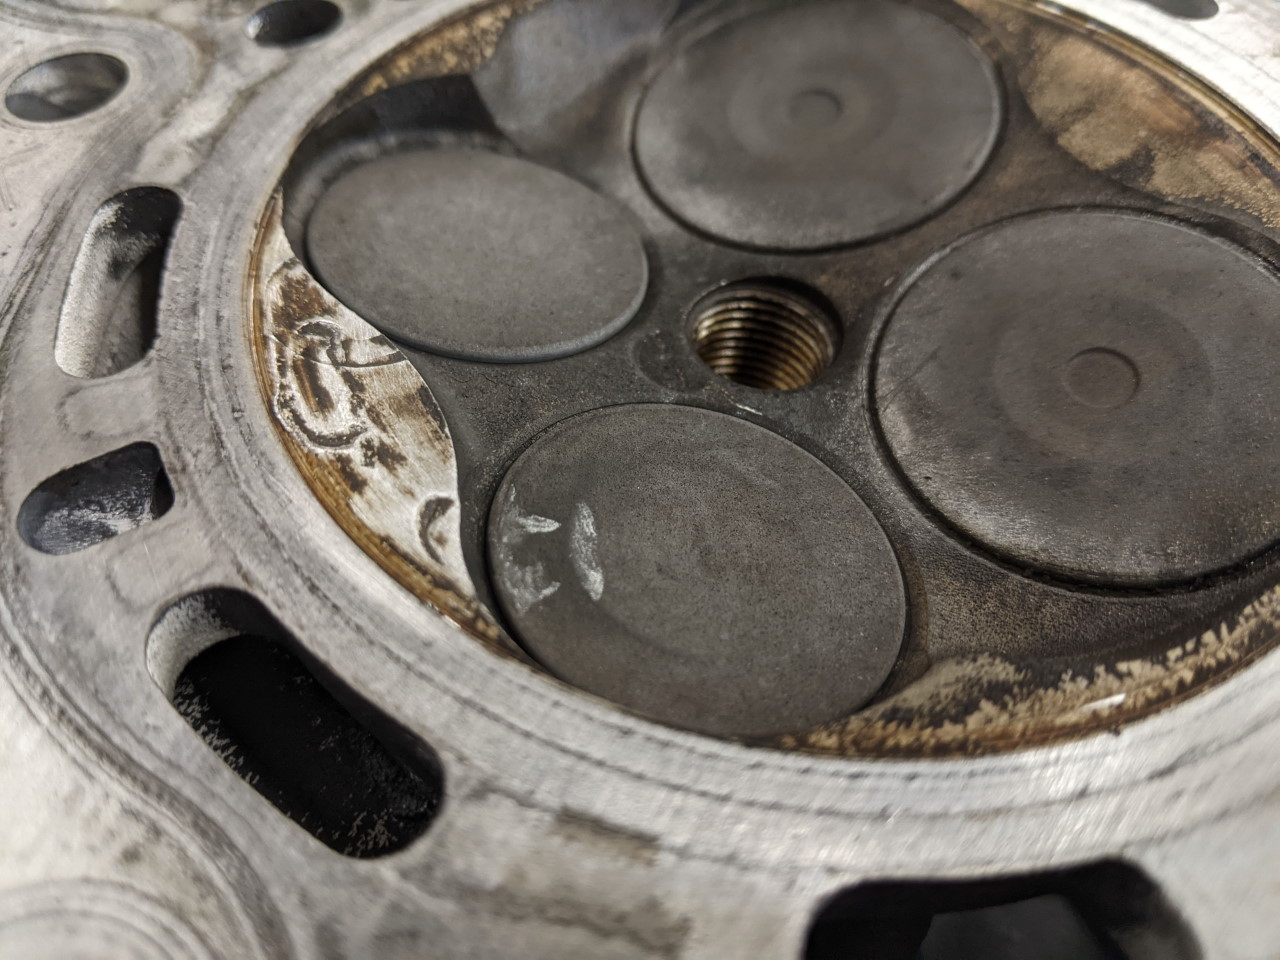
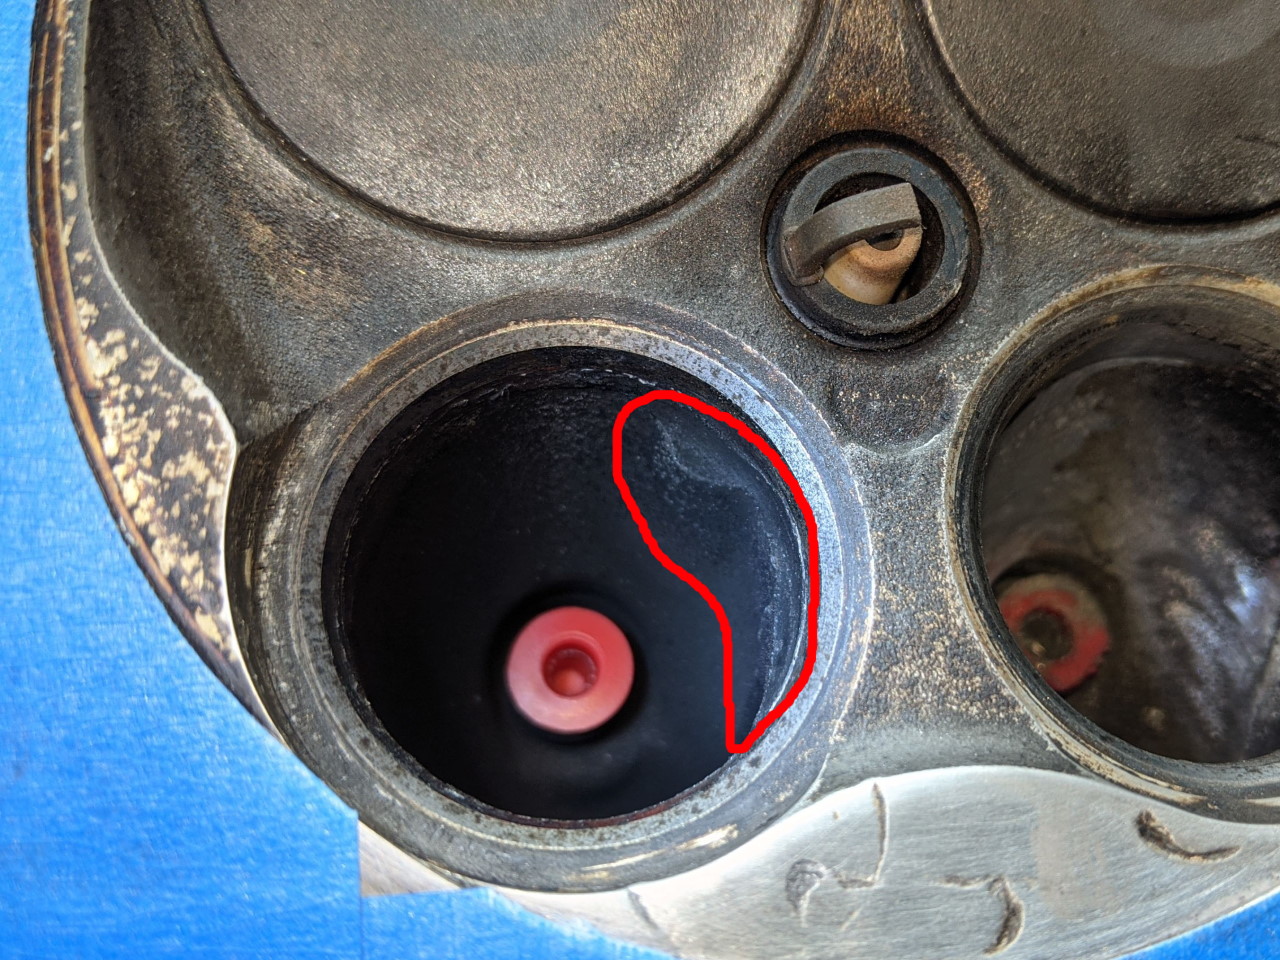
While waiting on new bearings, I pulled the valves from cylinder 5 to check for damage from when the nut went through. Luckily I didn't find any. However what I DID find was some mild pitting on the exhaust valve seats... So time to lap the valves. Also, I found an opportunity for some improvement in the form of a pretty large step just above the valve seat on the exhaust side. And since I was going to have to pull all the exhaust valves ANYWAY to lap them, might as well. Scope creep... Maybe it's worth 5hp?
 |
 |
A little work with a die grinder (carbide cutter to rough it in, and a 120 grit sanding roll to finish) smoothed that out nicely. I wasn't going for perfectly polished here, just better than stock. However I did work on them a little more after that second picture was taken. Be very careful here! One big nick to the valve seats or head gasket surface and you could easily trash the entire head.
While porting I covered the top of the head with a piece of cardboard and plugged the valve guides with #0 caplugs. I used a shop vac stuck in the port to suck all the dust and shavings out. Worked very well at containing the mess. Some recommend using WD40 to keep the sand paper from loading up, but I found that just caused the dust to stick, rather than getting sucked out by the vacuum.
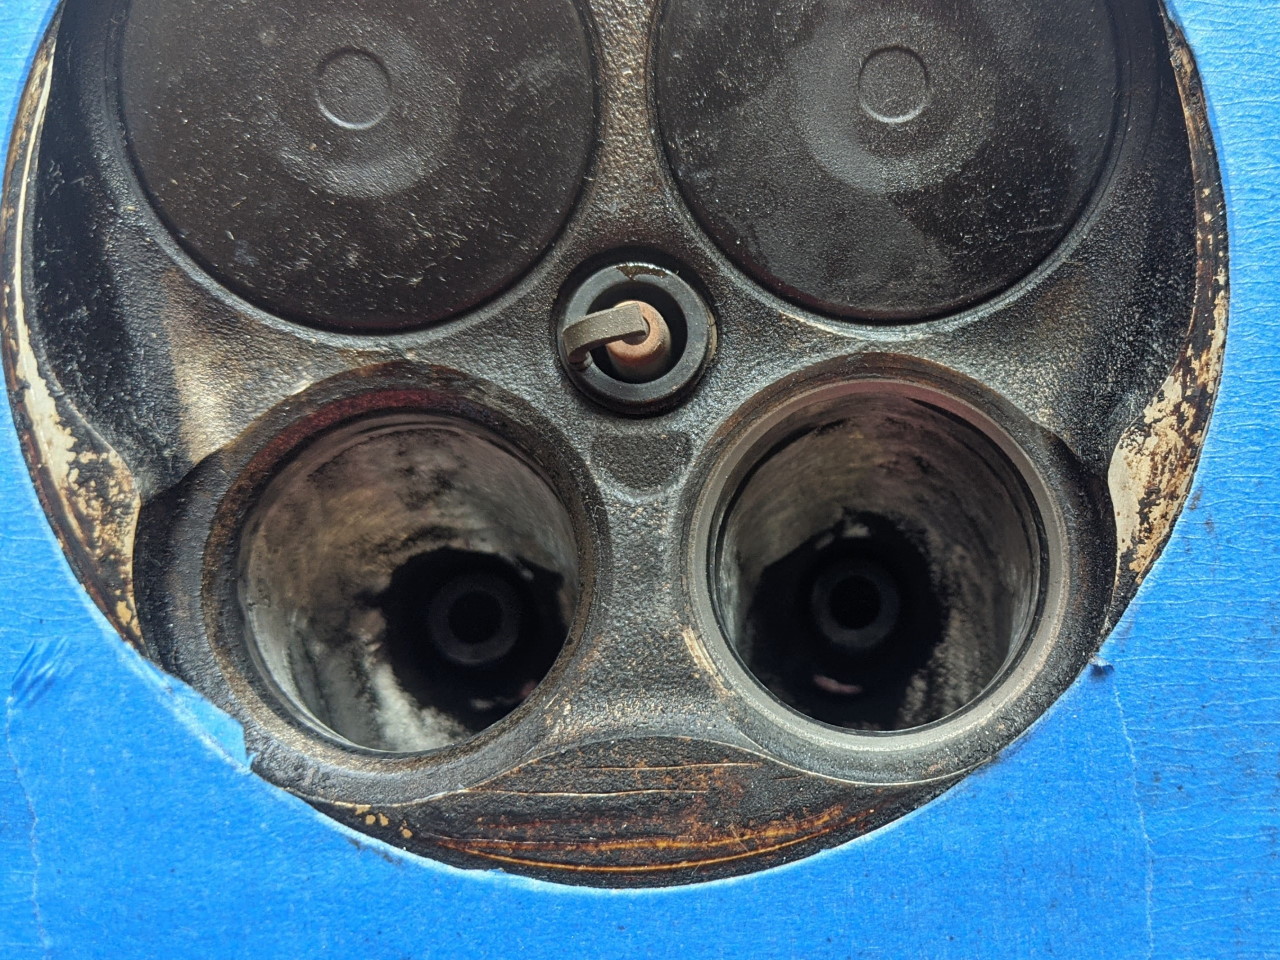
I chose not to touch the intake ports. I didn't see anything majorly wrong with them (no big steps, bumps, or anything like that), so I figured it would take someone who actually knew what they were doing to make any worth while improvements. Here's a couple pictures of the stock intake ports from the valve side.
 |
 |
With the porting work done I went back to the original reason I was in here, lapping the exhaust valves. I just did a simple hand lapping job with the old school suction cup style lapping tool and some Permatex valve grinding compound. A couple of minutes on each valve was all it really took. Here's a before and after.
 |
 |
Valve grinding compound is some seriously abrasive stuff! Not the sort of think you want anywhere near the inside of your motor. So after lapping I turned the head right side up and flushed out the valve guides with carb cleaner. Then I flipped it back over, plugged the valve guides again, and flushed the combustion chamber, valve seat, and exhaust port with more carb cleaner. With that done, I reinstalled all of the exhaust valves, and did one last cleaning step. Turns out acetone is pretty good at removing carbon. I filled each combustion chamber and let it soak for a few minutes, and the carbon build up most just wiped right off. This also gave me a chance to check the seal on the valves!

Putting it Back Together
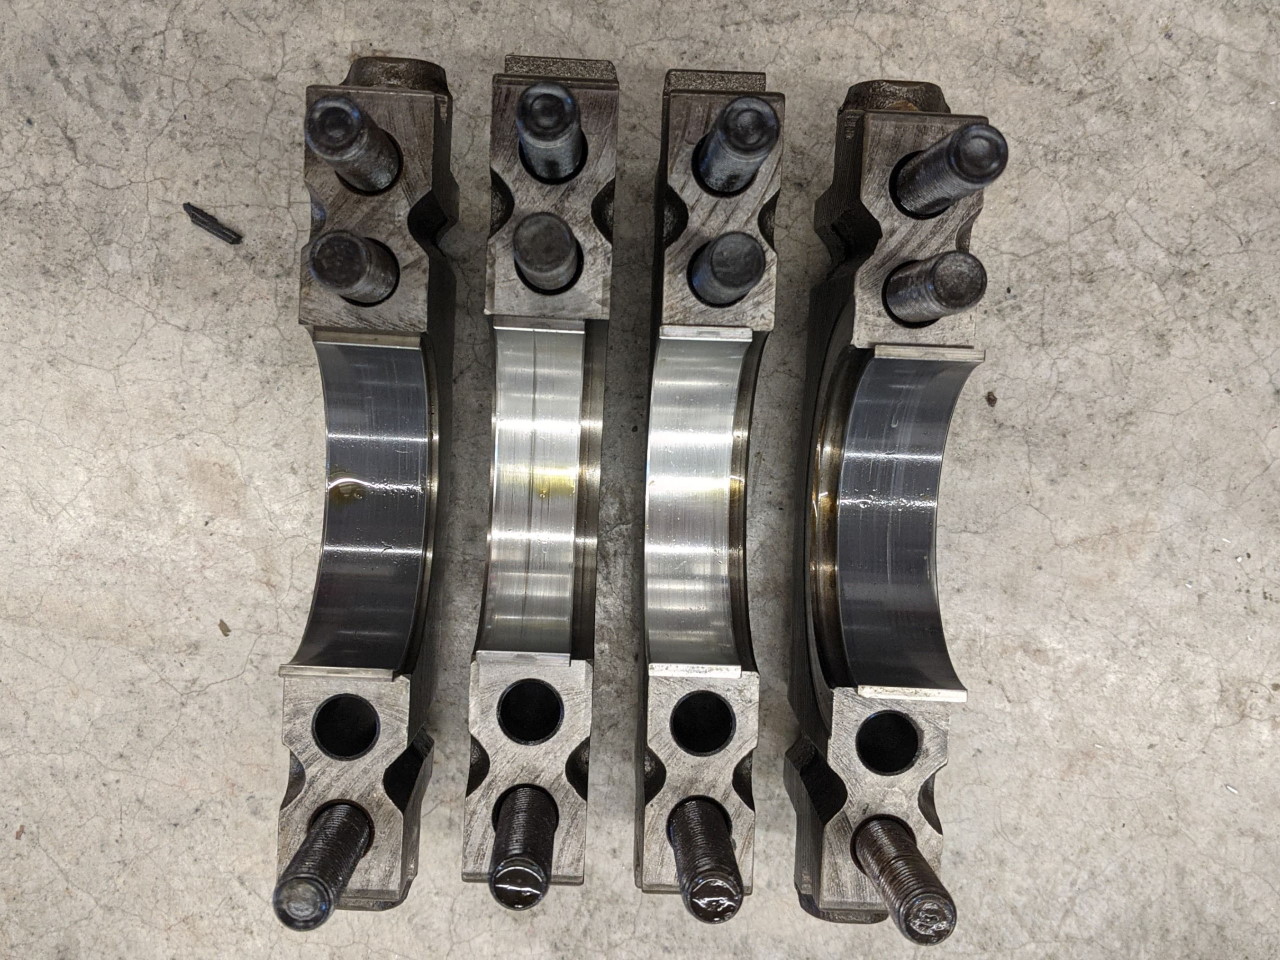
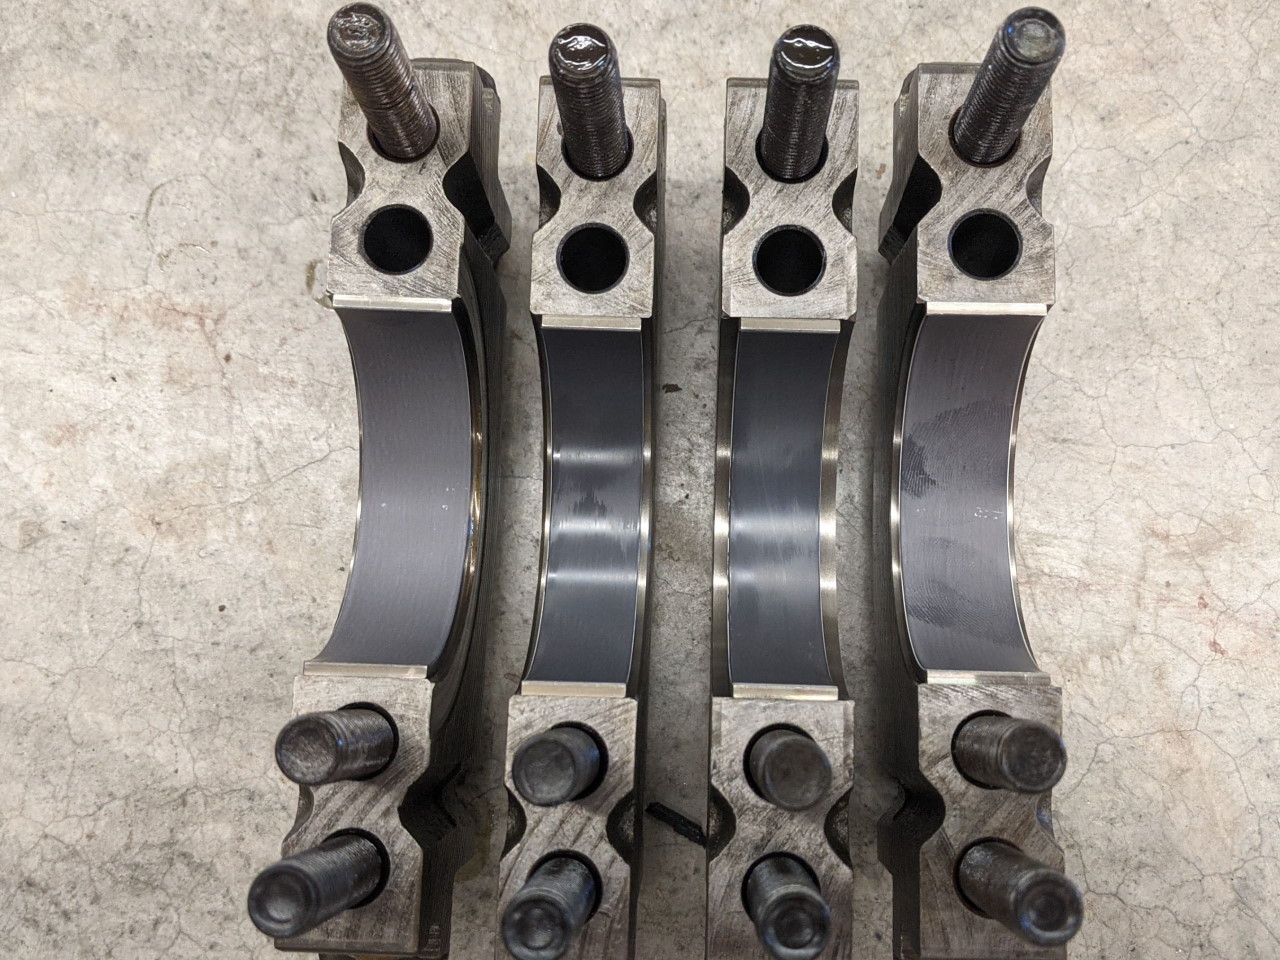
Assembly, as the Haynes manual always says, is the reverse of removal. Makes it sound so easy! This won't be a step by step guide on assembling an engine (that's what the service manual is for), just a few pictures of the process. Starting with the main bearings. The original ones in my motor were coated only on the lower bearings on mains 1 and 4. The rest of the main bearings and the rod bearings were all traditional uncoated bearings. However all of the original bearing part numbers superceed to the new coated bearing part number (for all locations). I believe the coated bearings are supposed to handle low oil pressure (specifically at startup) better, and Toyota switched to them due to the frequent starts that a hybrid sees. Seems like they might be better in a performance application as well.
I matched bearing dash numbers (bearing thickness) to the ones I removed. Or at least I intended to! Somehow between copying the part number out of my spread sheet and actually placing the order, the -03 rod bearings I meant to order were replaced with -01. These are slightly thinner, but the differences between the thicknesses on these OEM bearings are so small as to be almost insignificant. The increase in oil clearance between average #3 and #1 bearings is only about .00023" (and the standard nominal clearance is .0022) So I decided to just run them. Slightly larger clearance may actually be good for a performance application (it seems to depend on who you ask...)
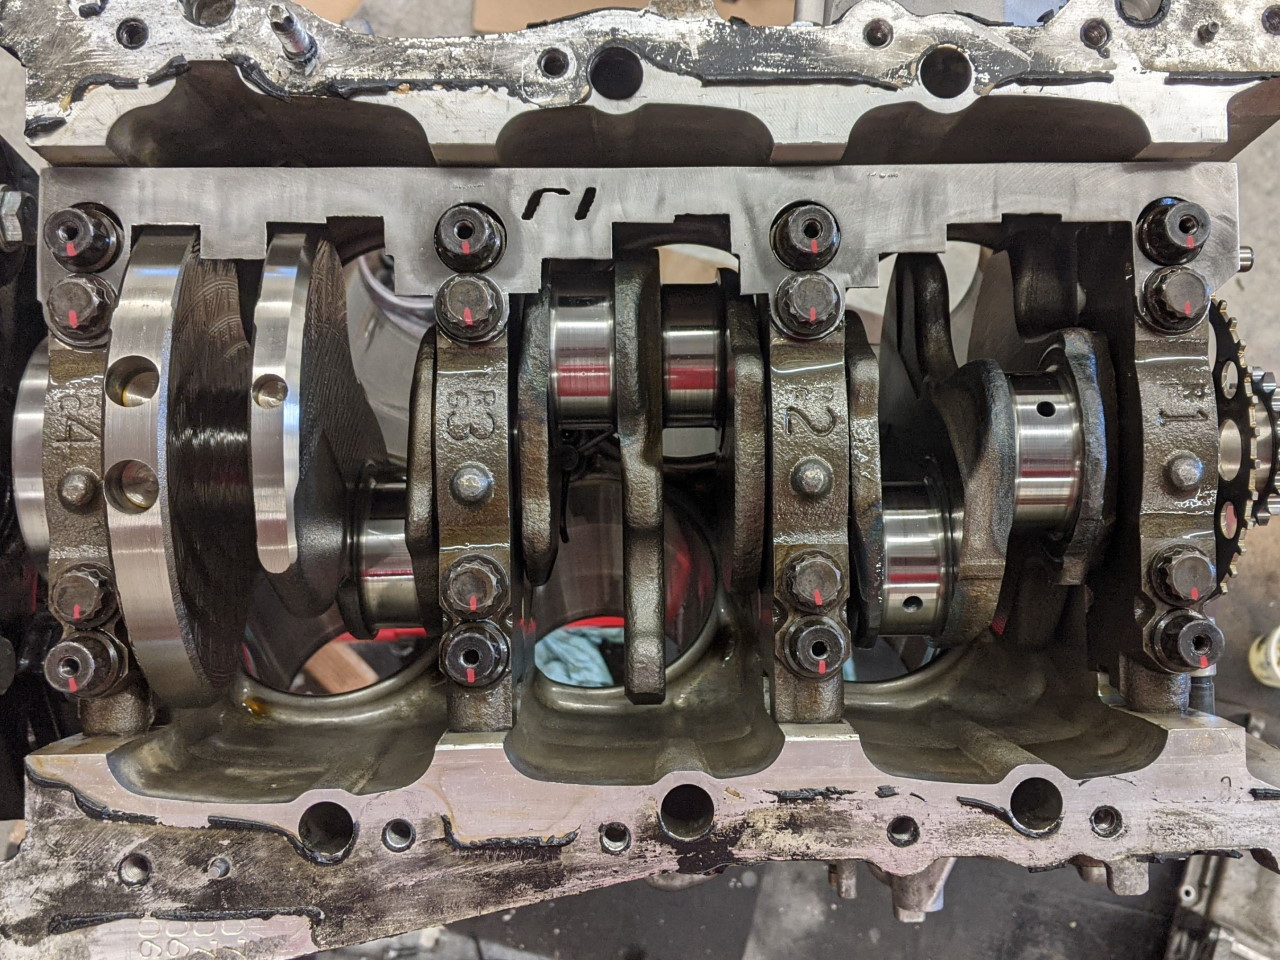
So, out with the old...
 |
 |
...and in with the new!
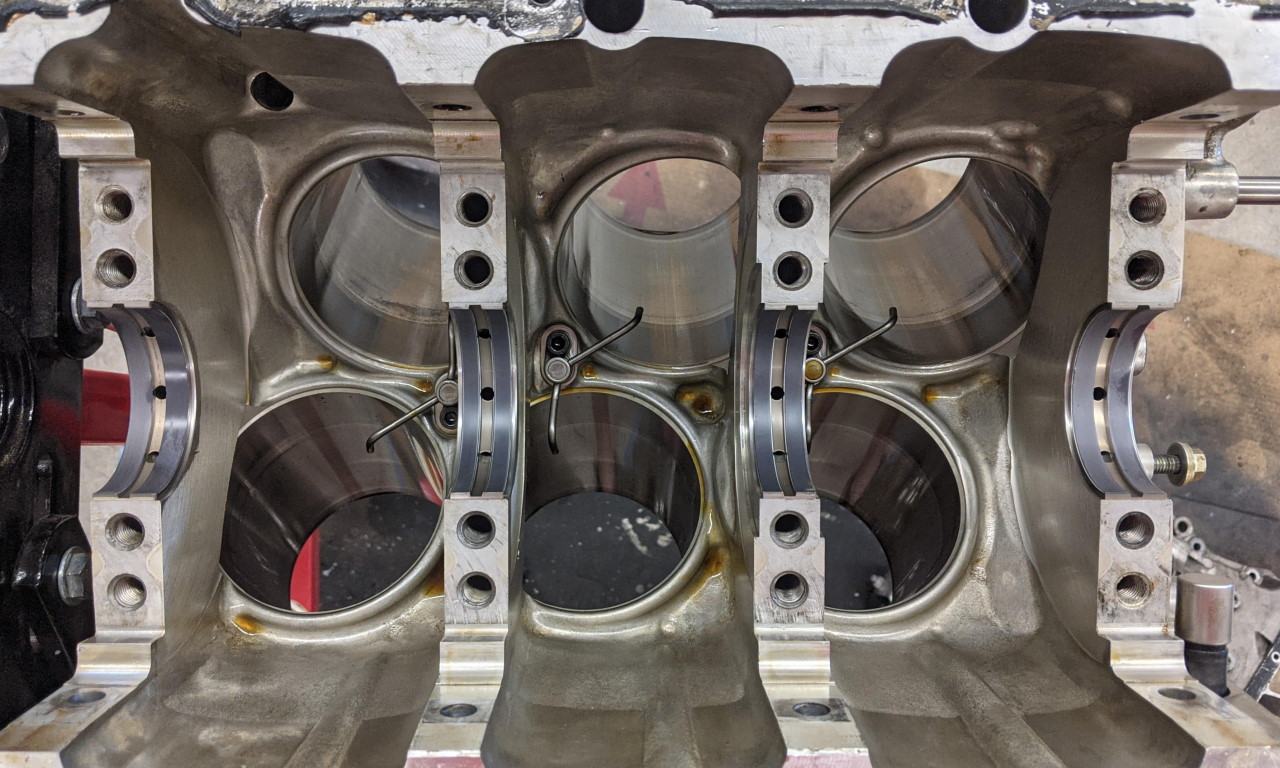
Torquing 6 bolt mains is a lot of work!
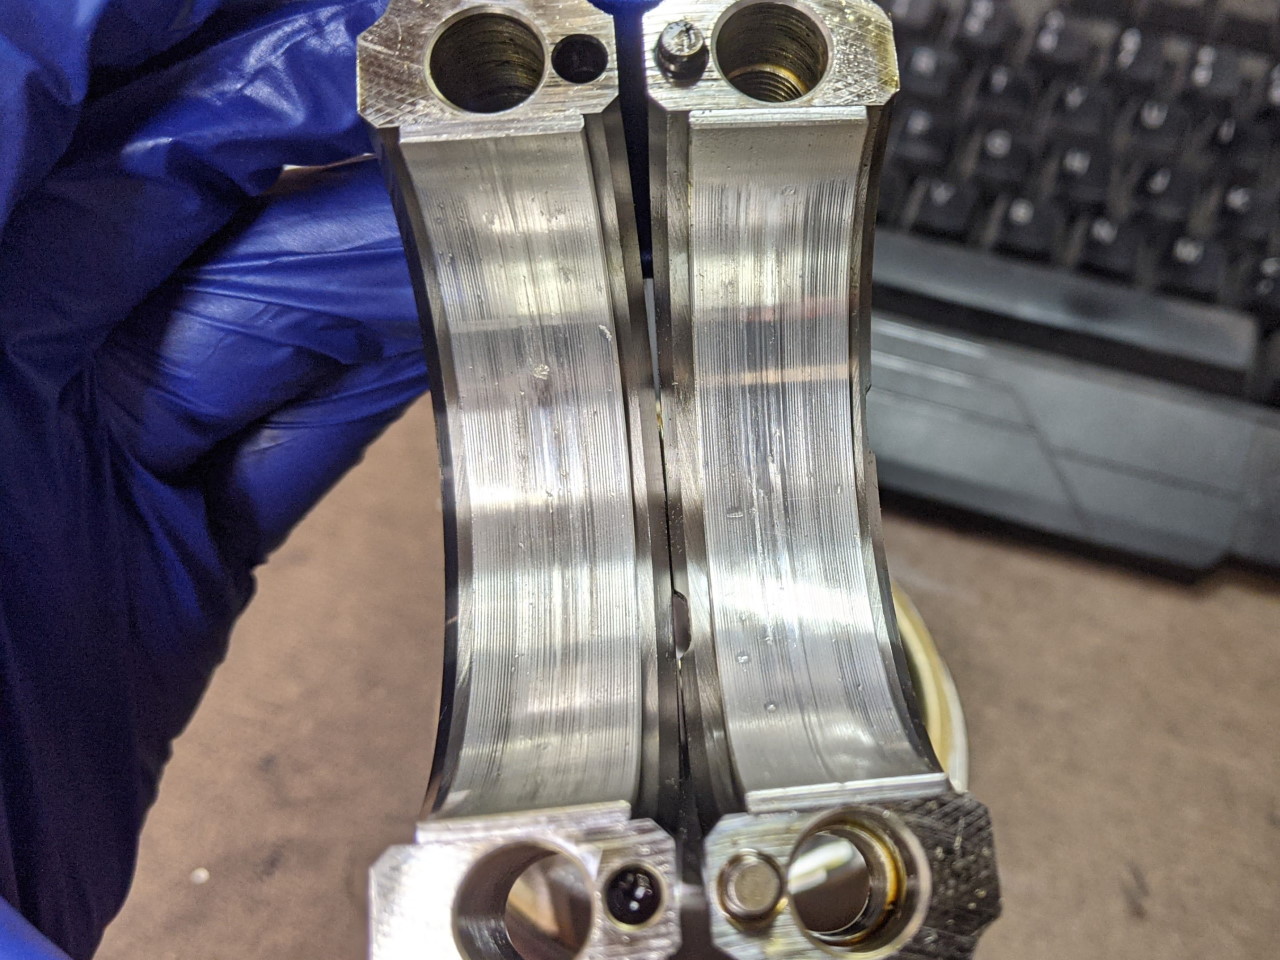
Pistons and rods installed. Sorry, I didn't really take any pictures of the process of installing the new rings on the new pistons, or swapping the rods over to the new pistons.
 |
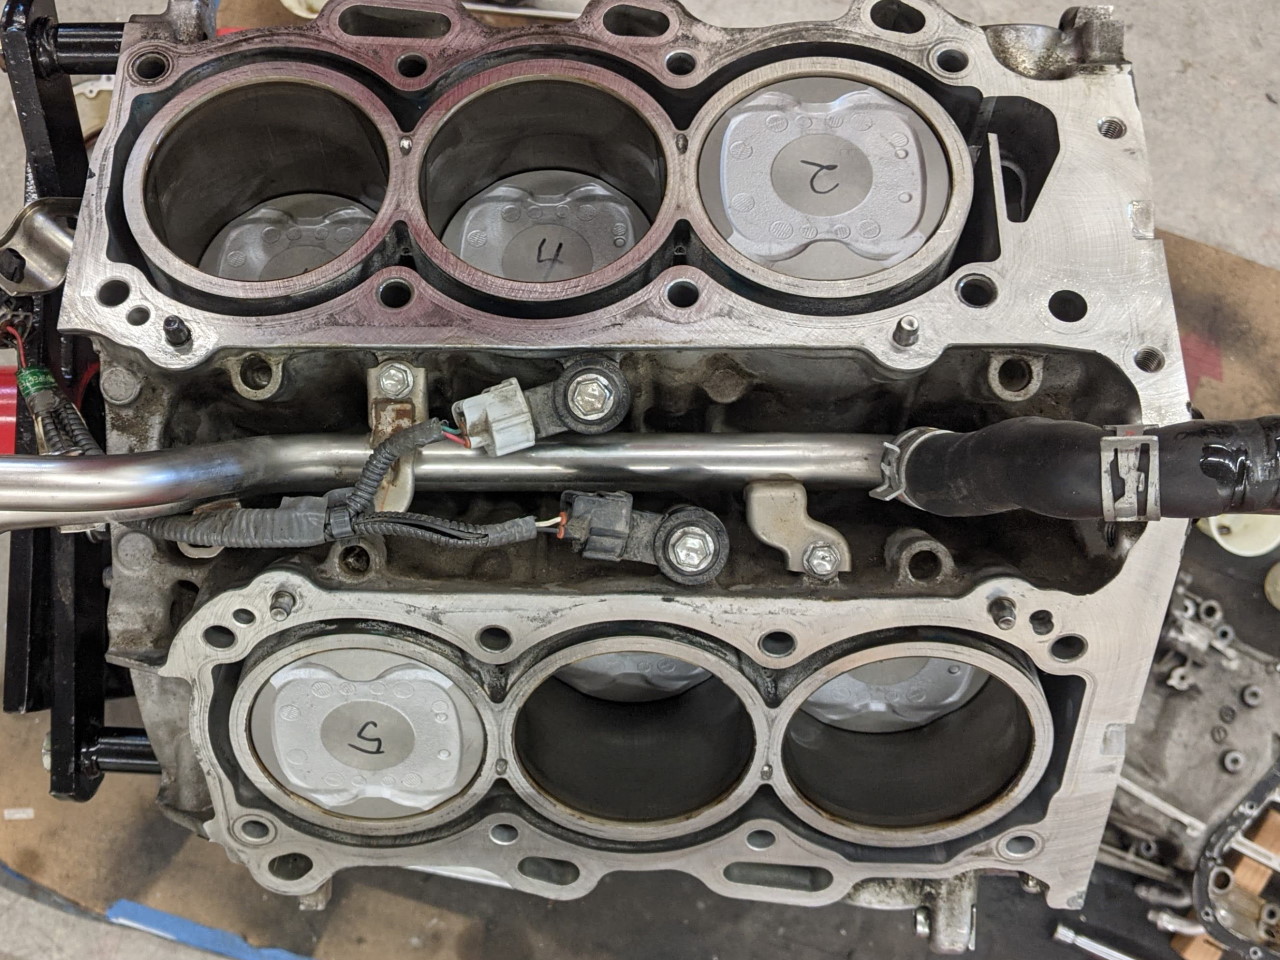 |
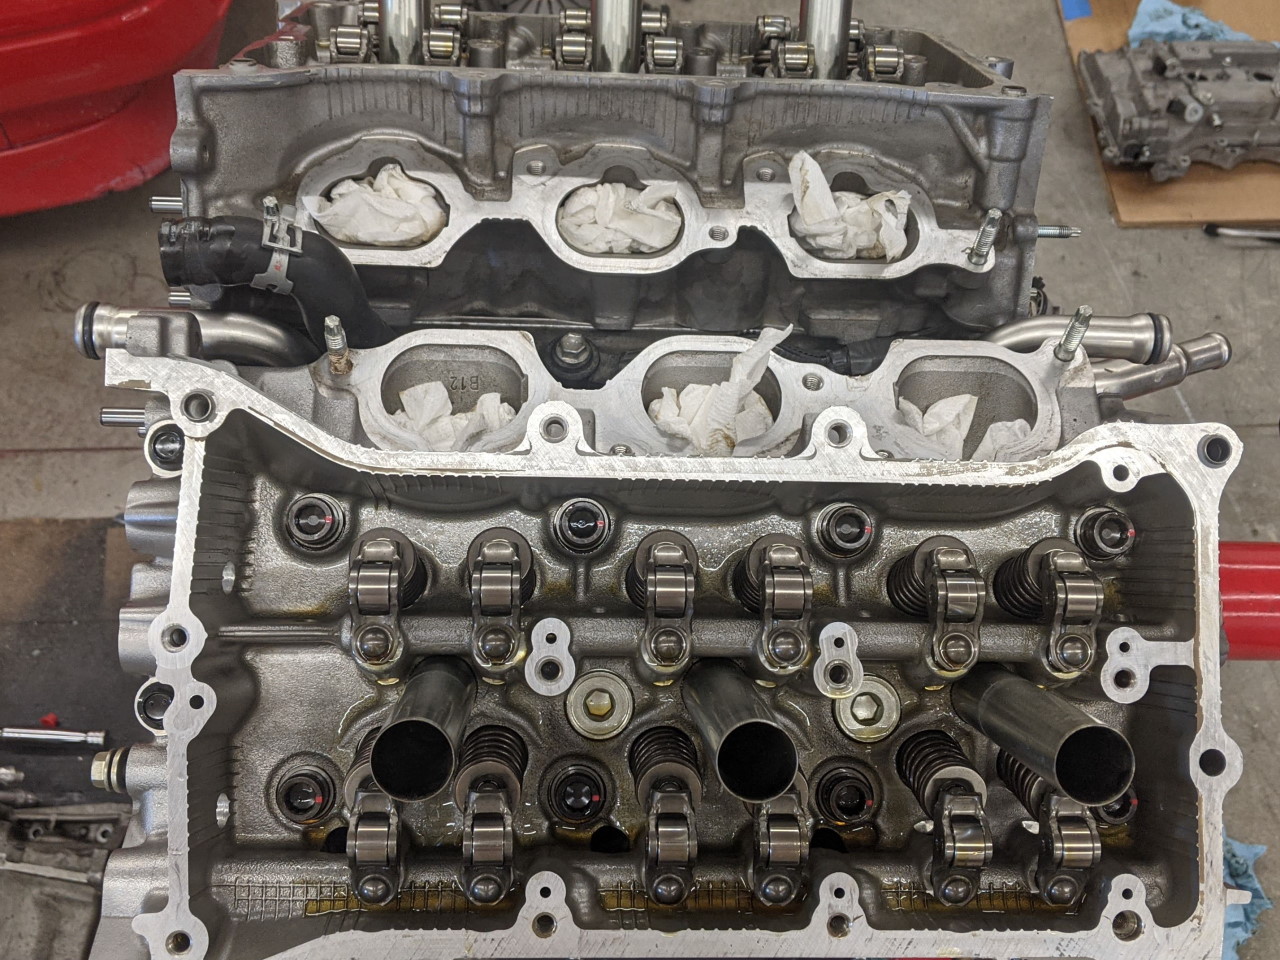
Heads on next, followed by the cams in the cam carrier. All of the critical bolts measured in spec (head bolts, rod bolts, main bolts) so I reused them all. No need to replace them if they don't need it.
 |
 |
One note on cam install / setting timing. Everyone comments that setting timing on the 2GR is confusing and vague, and it IS! But it's not as hard as it seems. For starters, go back to the disassembly section of the service manual, and note how it tells you to turn the bank 1 cams forward about 60°. This releases pressure on all of the valves. Bank 2 is already in a neutral position (no valves open) with cylinder #1 at TDC. Then as far as setting timing is concerned, just go by the paint marks on the timing chain, and the timing marks on the cam phasers and crank gear shown in the service manual. It's confusing because there are multiple marks on each cam phaser, AND they only line up with the marks on the head when viewed at the correct angles. But if you just make sure the painted links on the chain align with the proper marks on the gears, the timing should be right. Alignment to the marks on the block and head isn't actually important, just use the paint marks on the chain! The trickiest part (I thought) is turning the bank 1 cams back that 60° and getting the tensioner installed. It really wants to snap over and go too far. Don't use a ratchet for this, as you can't apply torque in both directions!
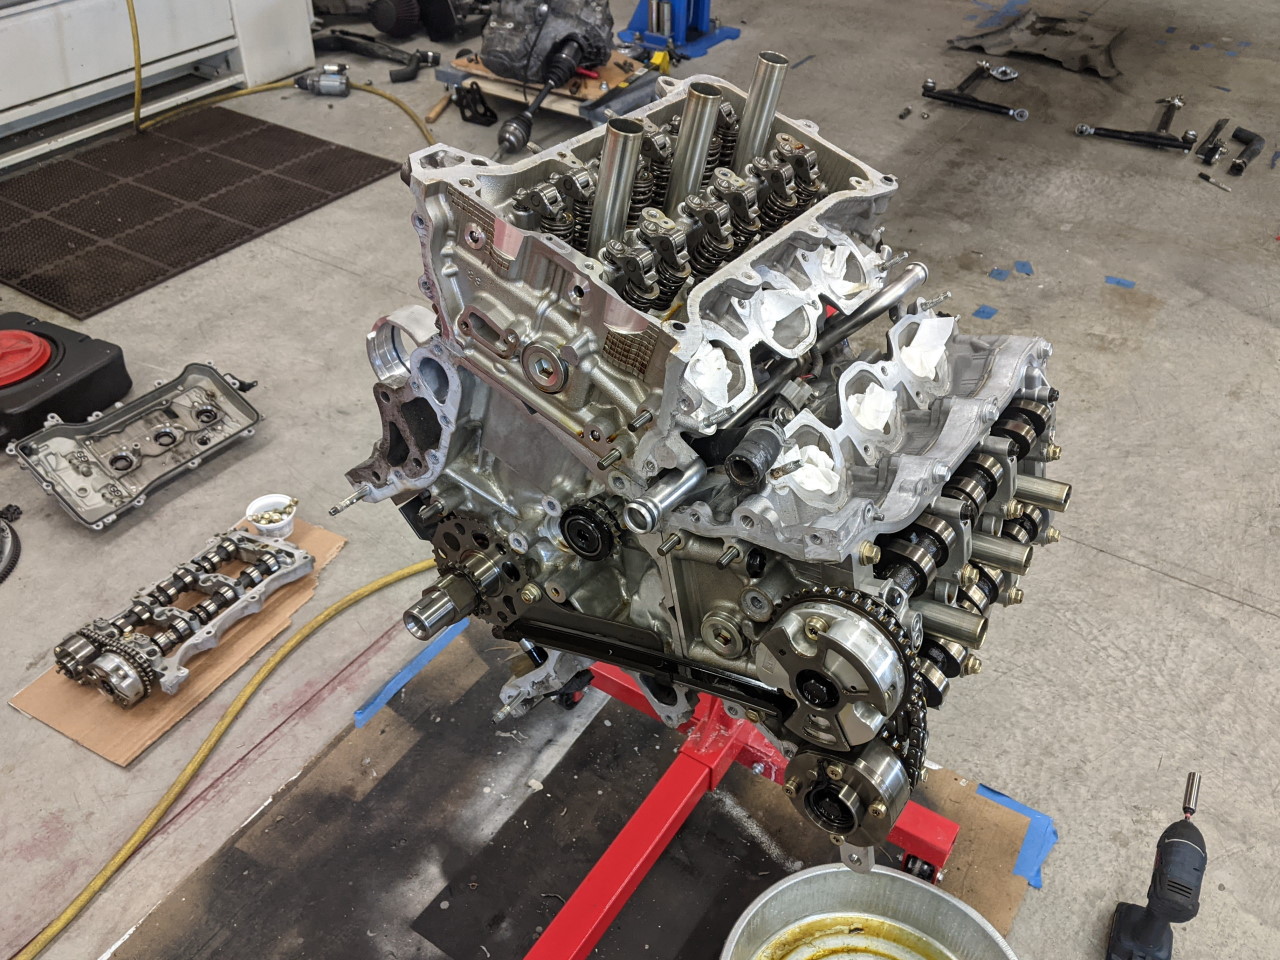
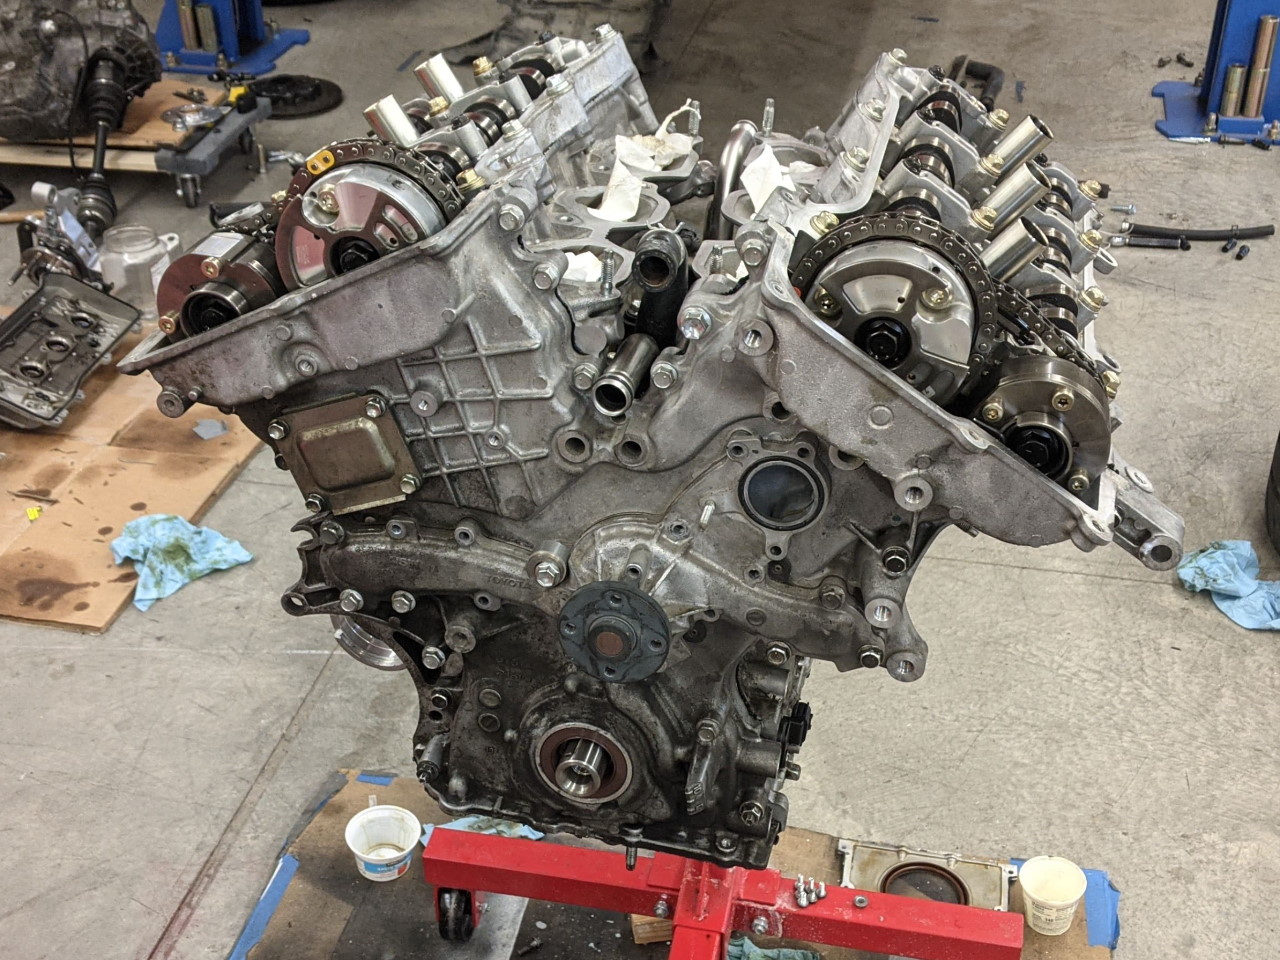
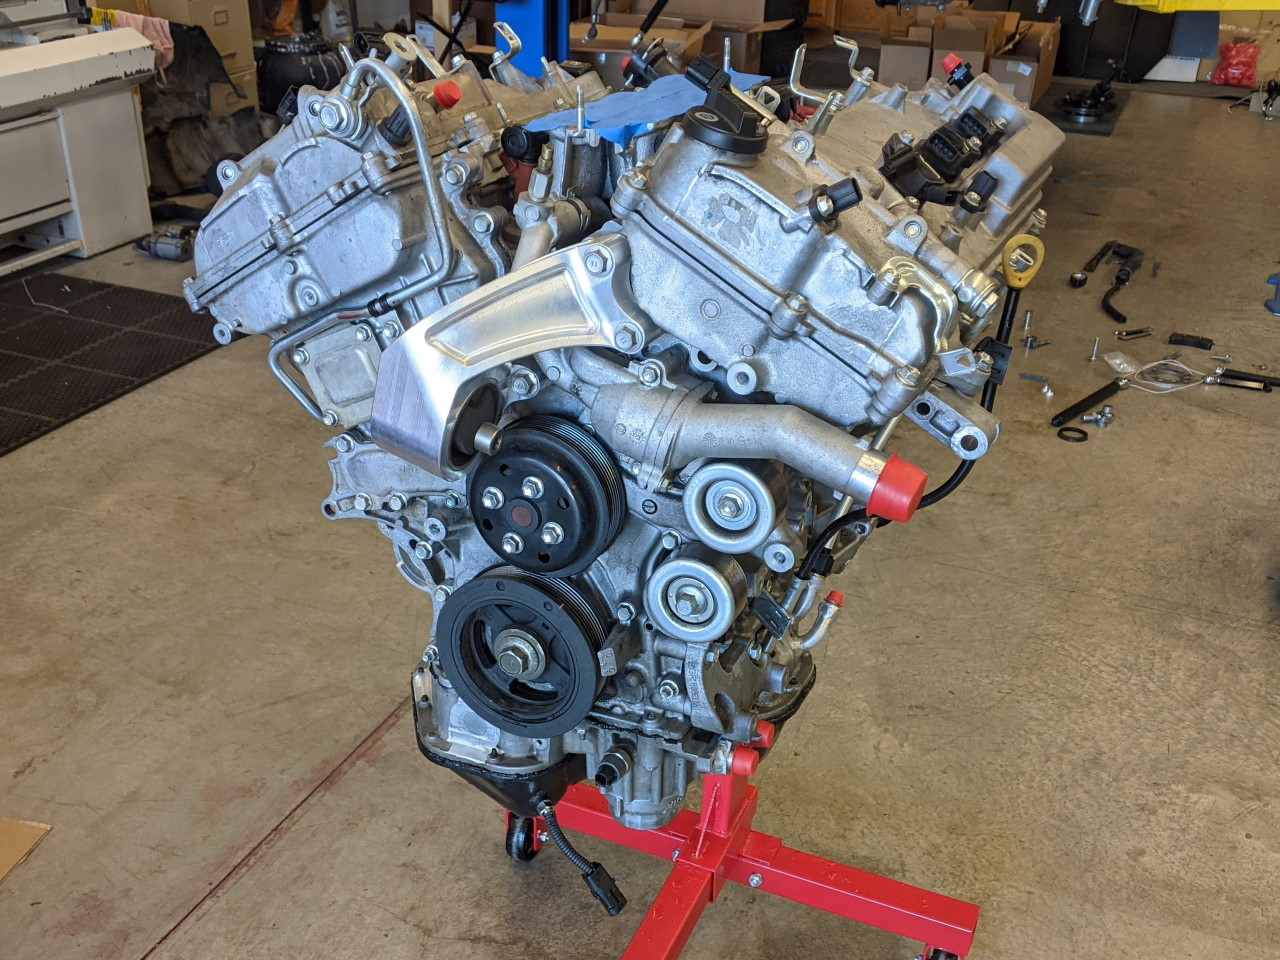
Timing chain, timing cover, and water pump installed, followed by the valve covers, and a bunch of other stuff.
 |
 |
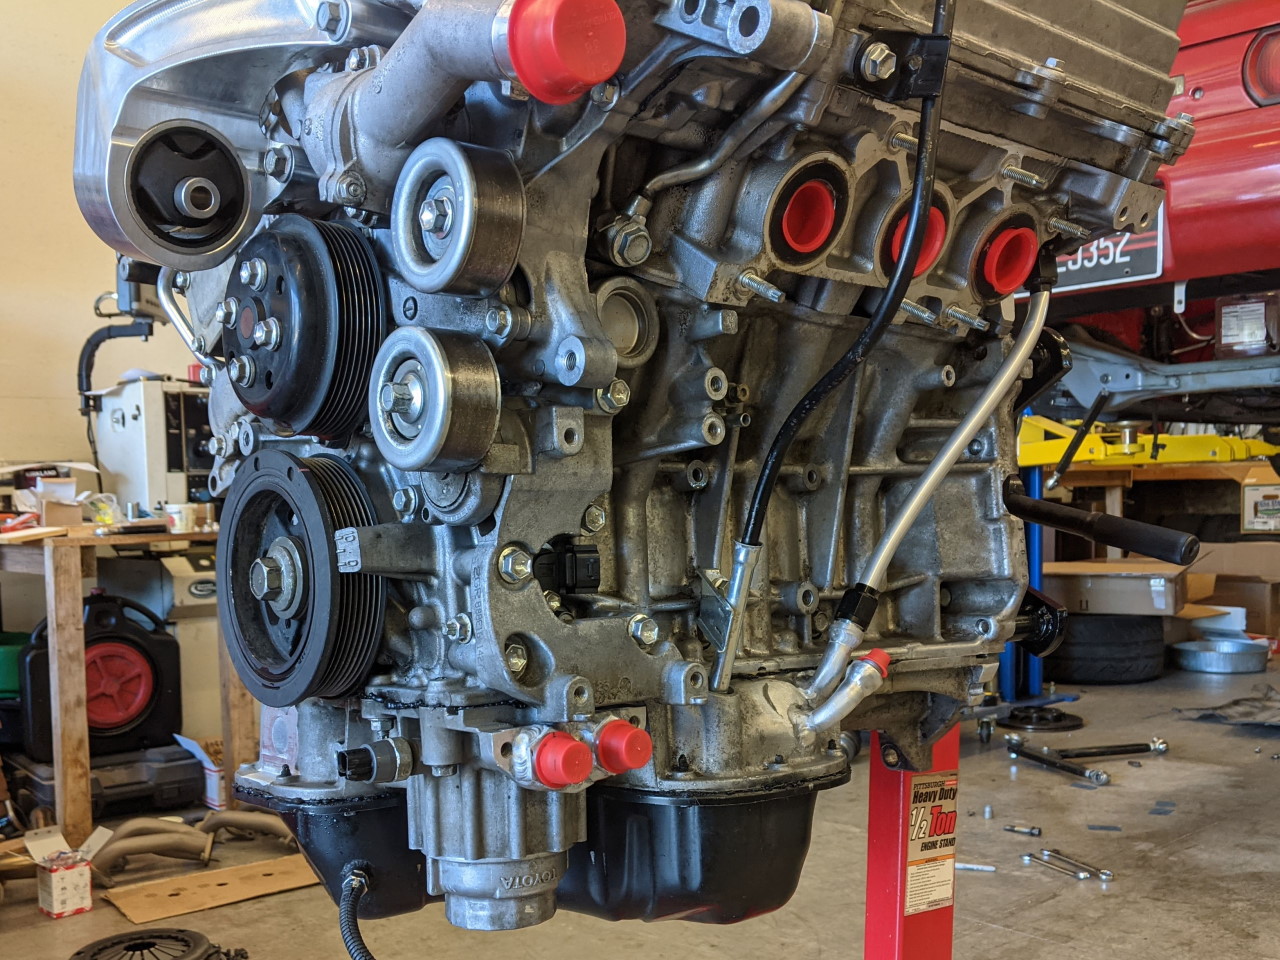
And finished off with the oil pans, and then rolled it out into the driveway for a pressure wash. Cleanest it's been in years! The extra external drain line from the head is a topic for a future post...
 |
 |
First Drive
As of this writing I have only driven it a few miles, but so far it feels great. It's a little hard to compare having not driven it in a few months, but it does feel quicker. Eventually I will get it on a dyno, but it may be a while.
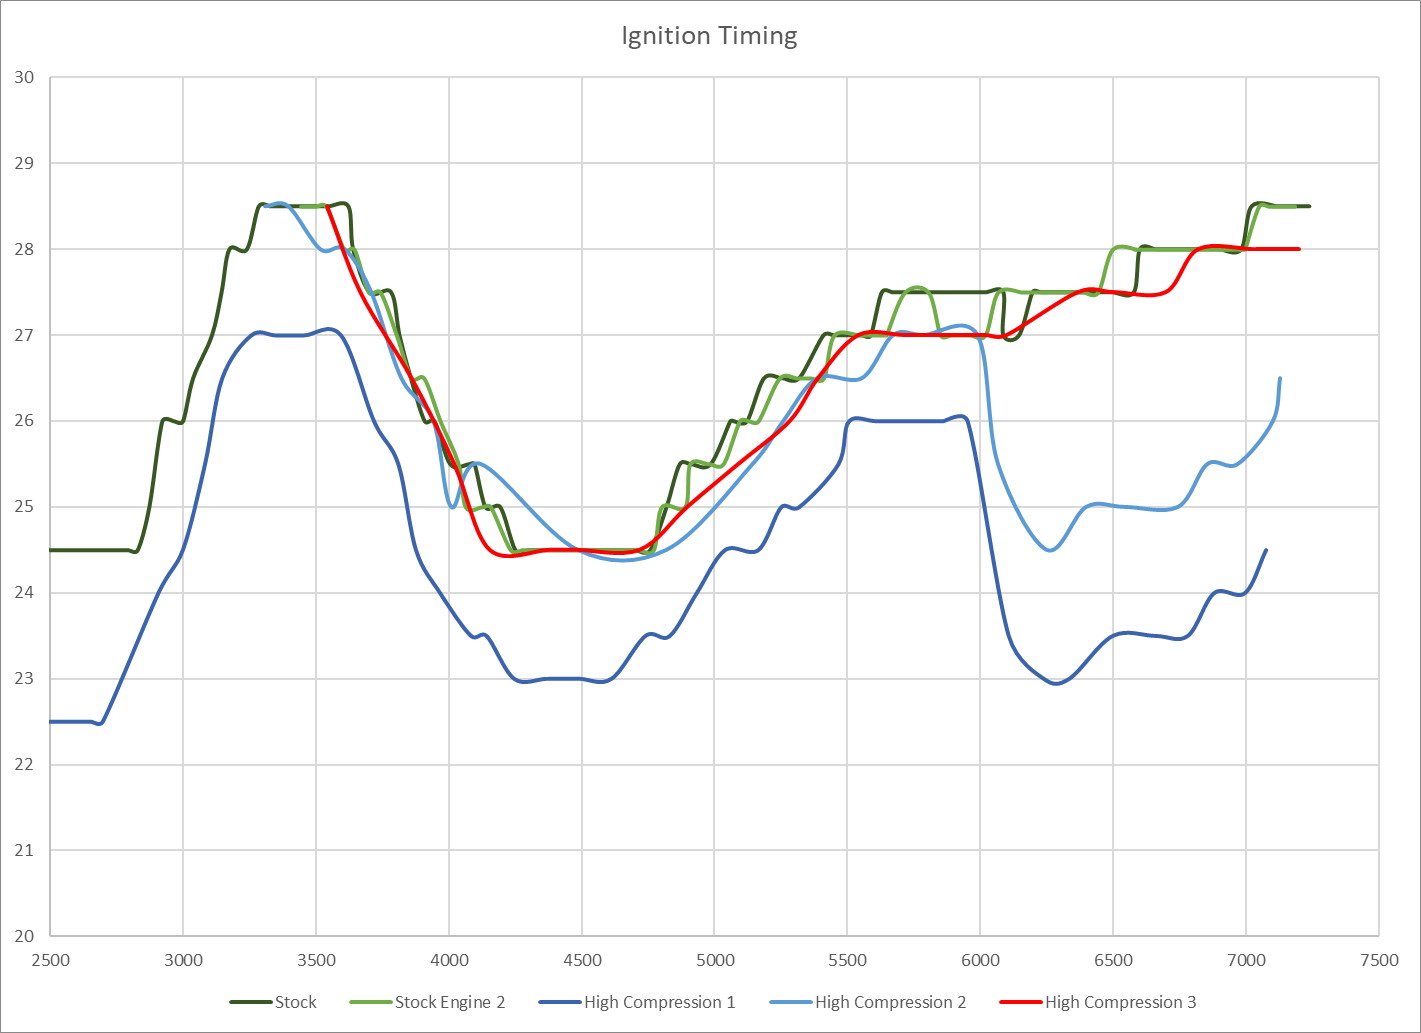
As expected, the stock ECU pulls a little timing in response to the higher compression. About 1.5 degrees everywhere, except above 6k RPM where it pulled more on this pull. Keep in mind this is the very first complete 2nd gear pull this motor has seen, so it may be that the ECU just has to do a little learning. Or it may be that it is switching to the low octane timing map, in which case I will need to get a reflash from Frankenstein Motorworks to properly run the new motor.
Here's a graph of timing vs RPM for that very first 2nd gear pull plus another pull the next day after a few miles driving, compared to a similar pull from a couple of years ago. After a few pulls the stock ECU had learned a little, and was running nearly the same ignition advance through most of the midrange, and while it still dips at about 6k, it has added about 1.5° there as well. With maybe 100 miles on the rebuild I logged another pull, and found that it was running basically the same timing as it did the with stock motor (within about 1/2°)!