The E153 transmission from the MR2 Turbo is strong, but that strength is also it's greatest weakness. Large, heavy gears that generate a lot of heat, waste power, tear up synchros, and don't shift very nicely (especially the early boxes like mine). Plus they have become difficult to find on the used market, and rebuild parts are no longer available for the early years. There has to be another option!
The "Narrow E-Series"
Found in a number of cars from 2002 through 2014 in the US market, the narrow E-series (E350 / E351 / E352) has a number of advantages. One, it is significantly newer and was found it more cars, meaning rebuild parts are still available and the transmissions themselves are available and inexpensive in junk yards. The Camry E351 version also has gearing that I think will be about perfect for the average MR2 street car. 1-4 are very similar to the stock E153 (slightly taller), while 5th gear is 9% taller giving lower highway cruising RPM. See the Brayden's E Series Gear Ratios page for details on the cars they came in and the gear ratios available. I also built this excel calculator to compare the gear ratios and resulting speeds / RPMs. For the Camry E351 that I am installing, the resulting speeds at 3000 and 7200 RPM with my 275/40-17 rear tires:
| Cruise Speed | Redline Speed | % Diff from E153 | ||
| 1st | 3.538 | 16 | 39 | -0.8% |
|
2nd |
2.045 | 28 | 68 | 1.7% |
| 3rd | 1.333 | 44 | 105 | 2.6% |
| 4th | 0.972 | 60 | 144 | 2.6% |
| 5th | 0.731 | 80 | 191 | 8.7% |
| Final | 3.944 | |||
The narrow E-series is also about 24lb lighter than the E153, and the axles I will use will save about 13lb more, leading to a pretty substantial 37lb weight savings on the swap. And while from what I have read the transmission is not AS strong as the E153, the E153 is overkill for most applications. Data from the Scion community suggests that these transmissions are good for somewhere around 400whp, and that the differential is the first weak point. Quaife makes a limited slip differential for this transmission, so that can be overcome. I will likely install one eventually for performance reasons even if it's not needed for strength.
Shift Conversion
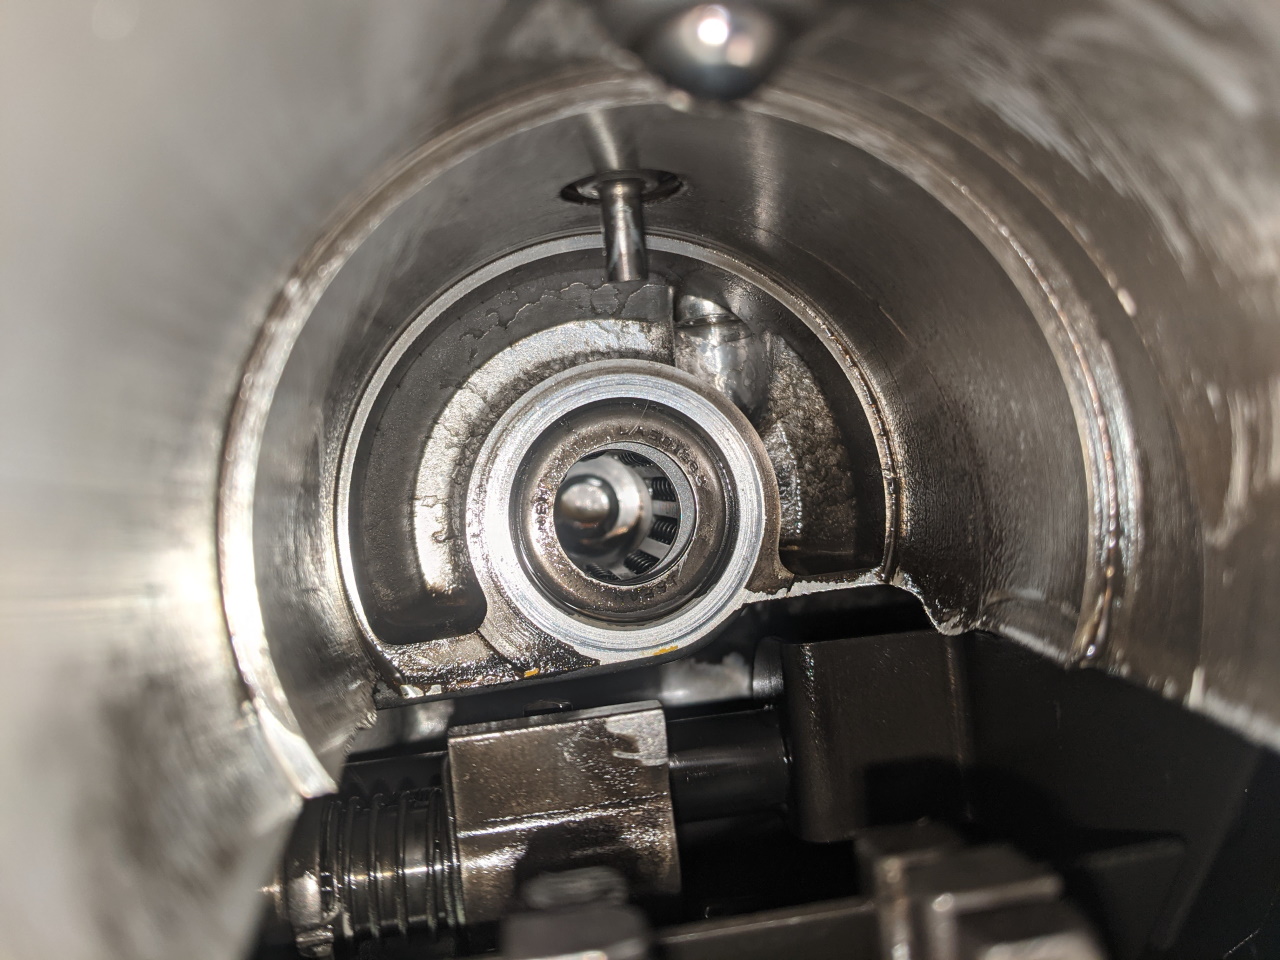
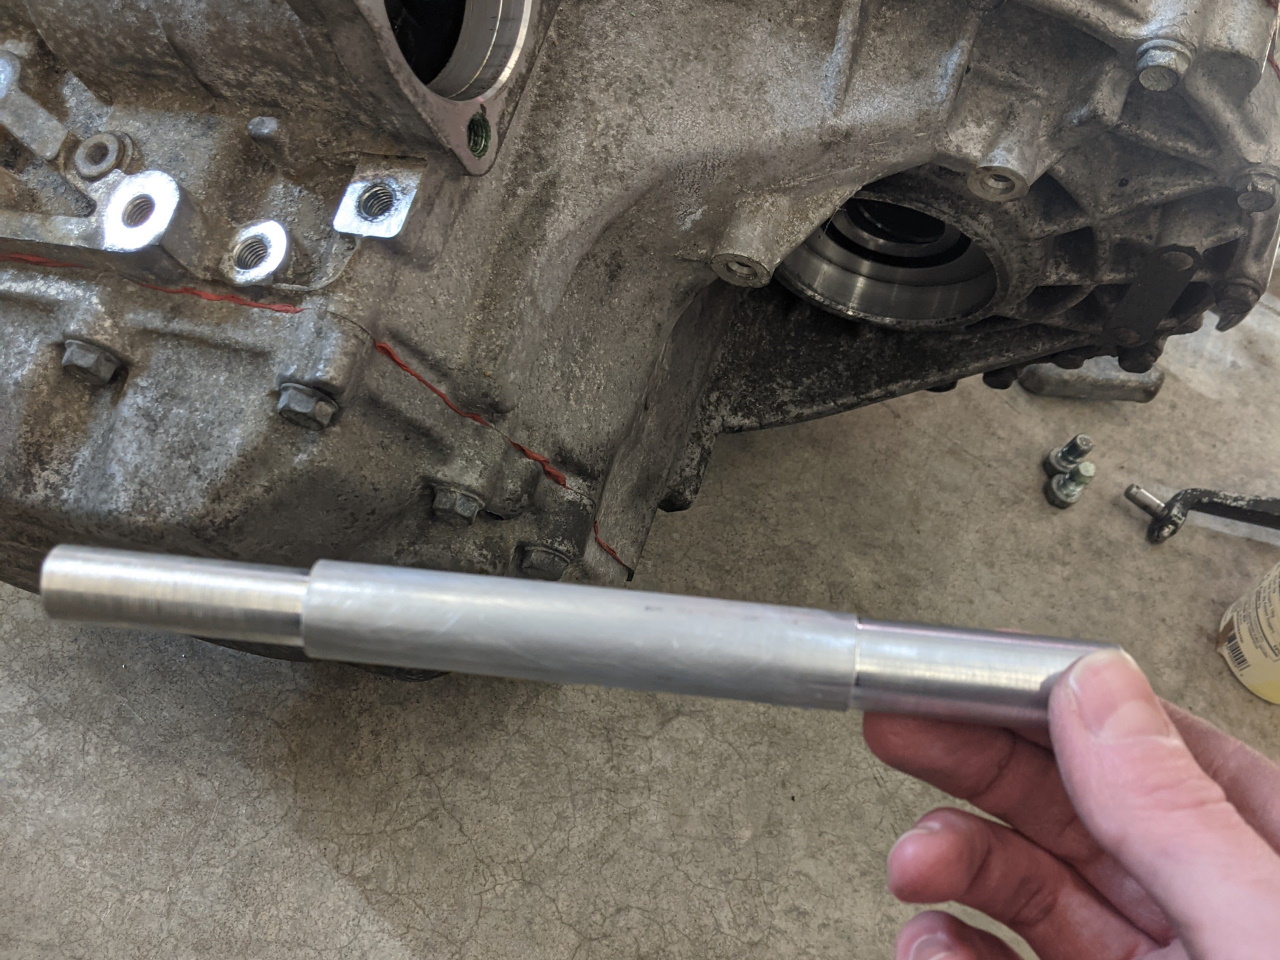
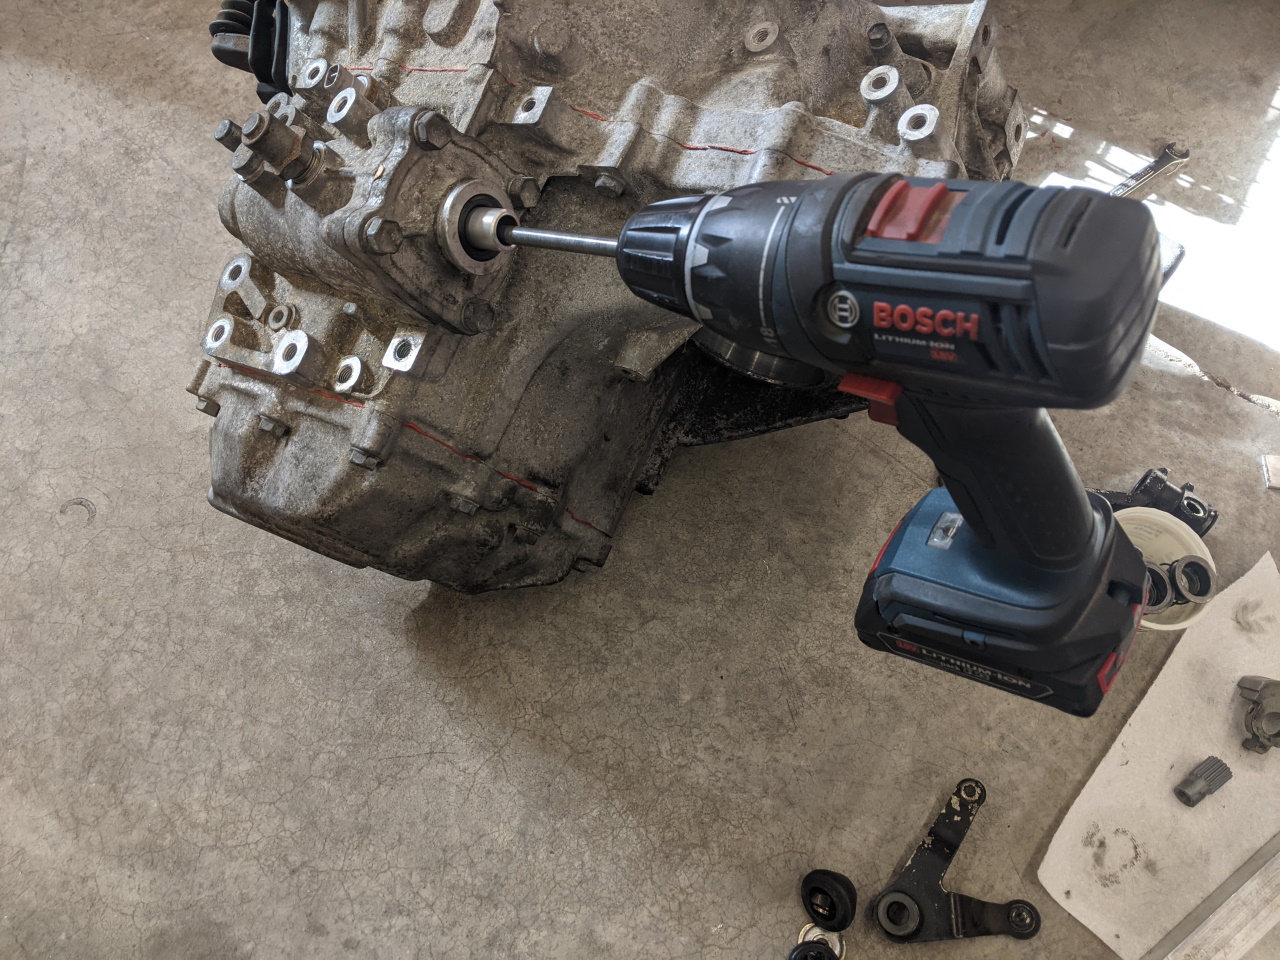
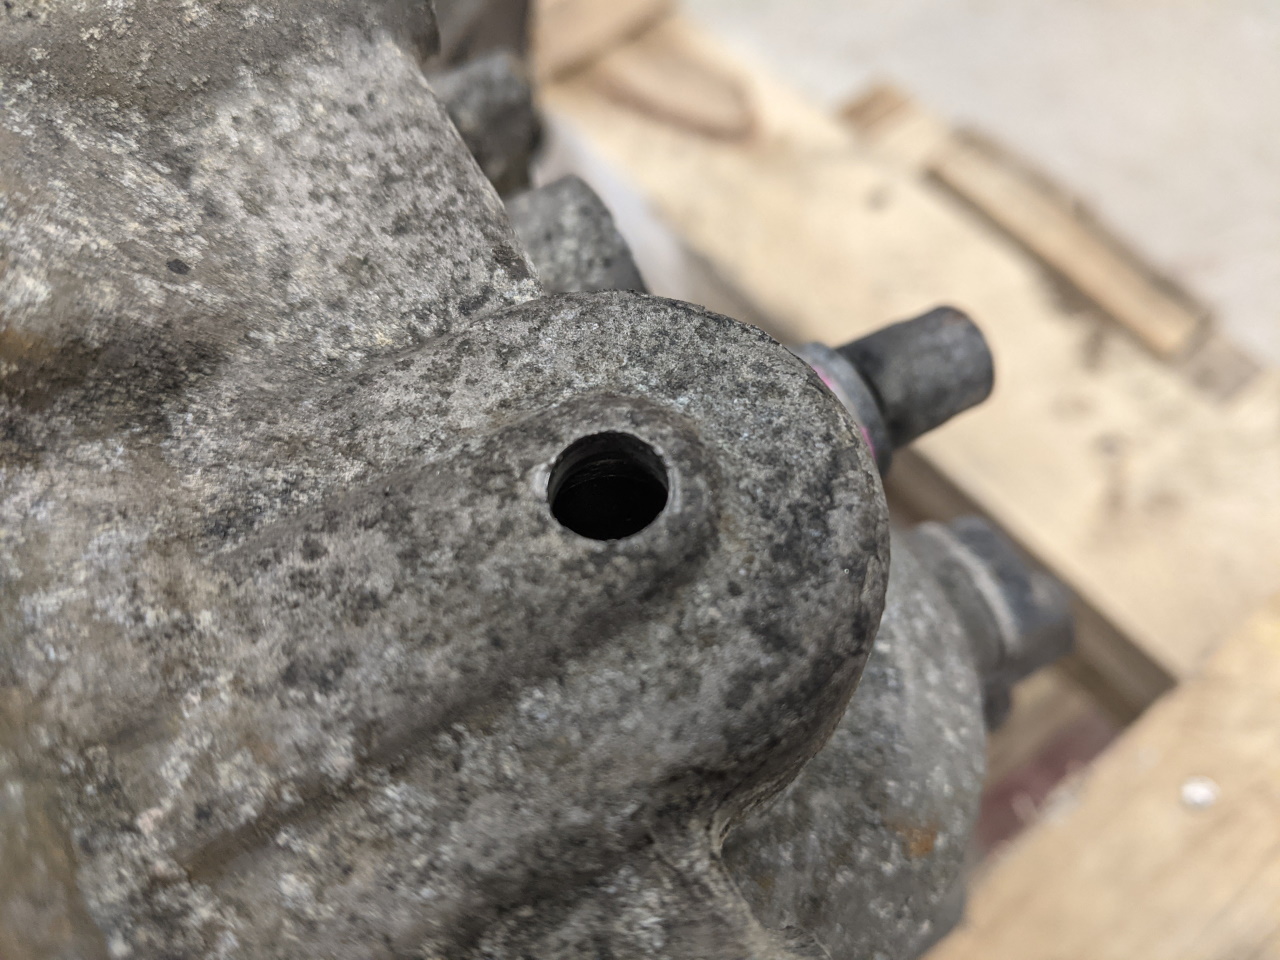
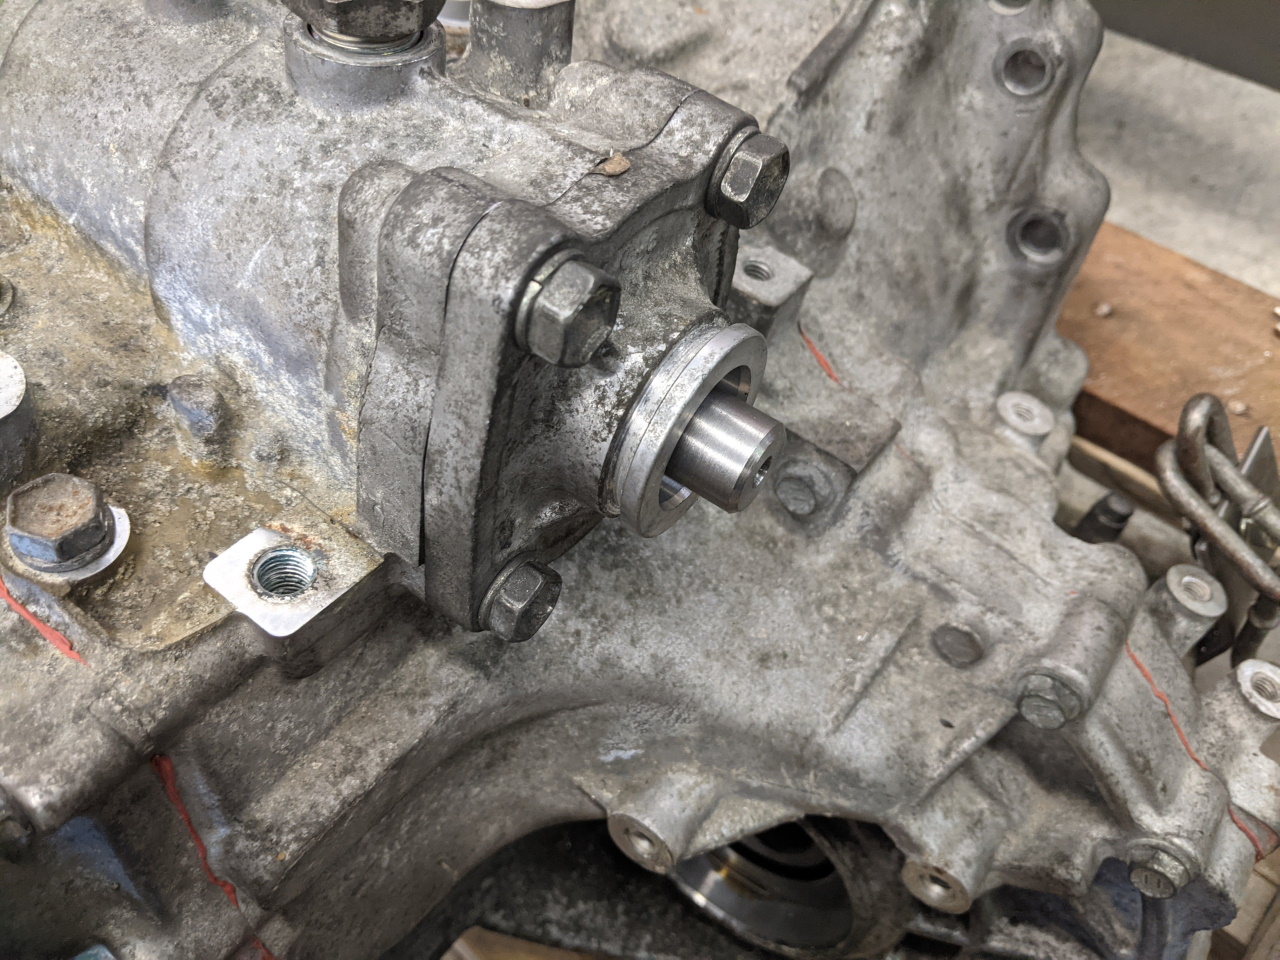
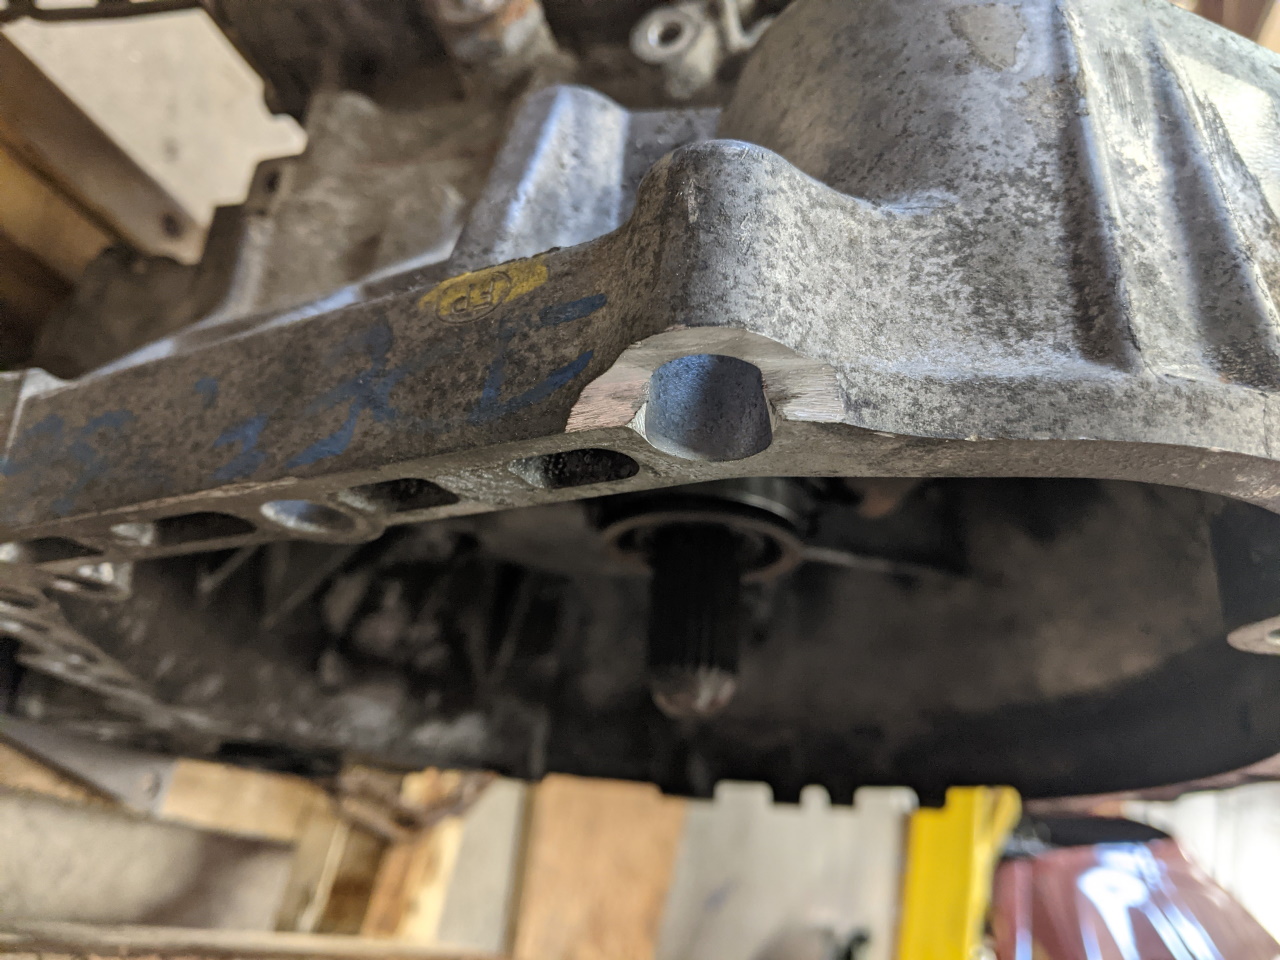
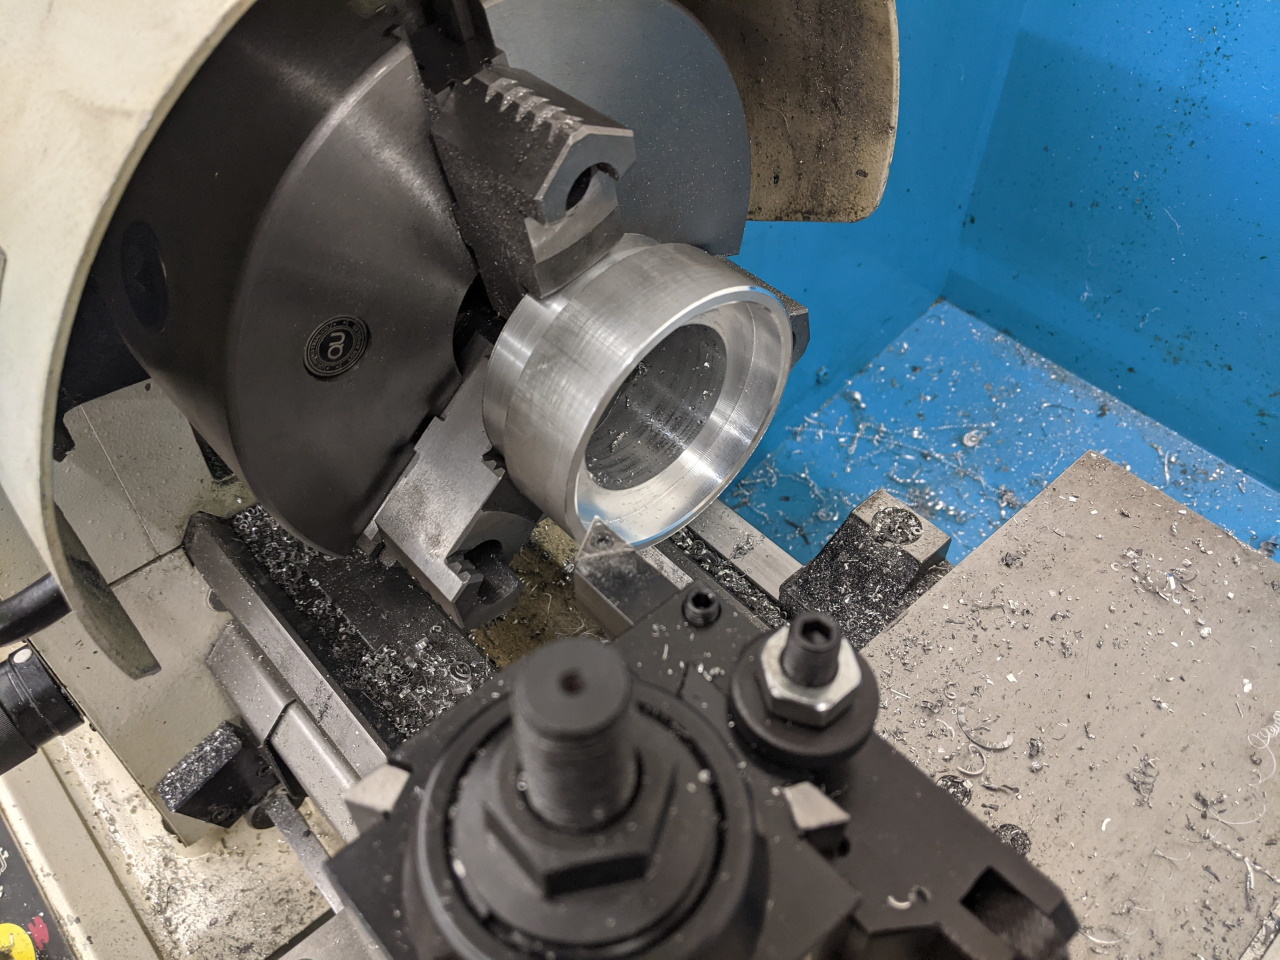
The first and most obvious hurdle to overcome is that the shift mechanism on (most) of these transmissions exits out the back of the transmission. The exception is one Euro only version, but part of the goal here is to avoid hunting down a rare transmission. The solution is to modify the existing transmission case. With the shift mechanism removed we can see a pilot hole at the far end that we will use to center our new hole. There is also a roller bearing for the shift shaft that will need to be protected. I intended to drill mine without taking it apart, so keeping shavings out of the rest of the box is also important. I made the tube shown below on the lathe, designed to fit in place of the shift shaft to keep shavings contained.
 |
 |
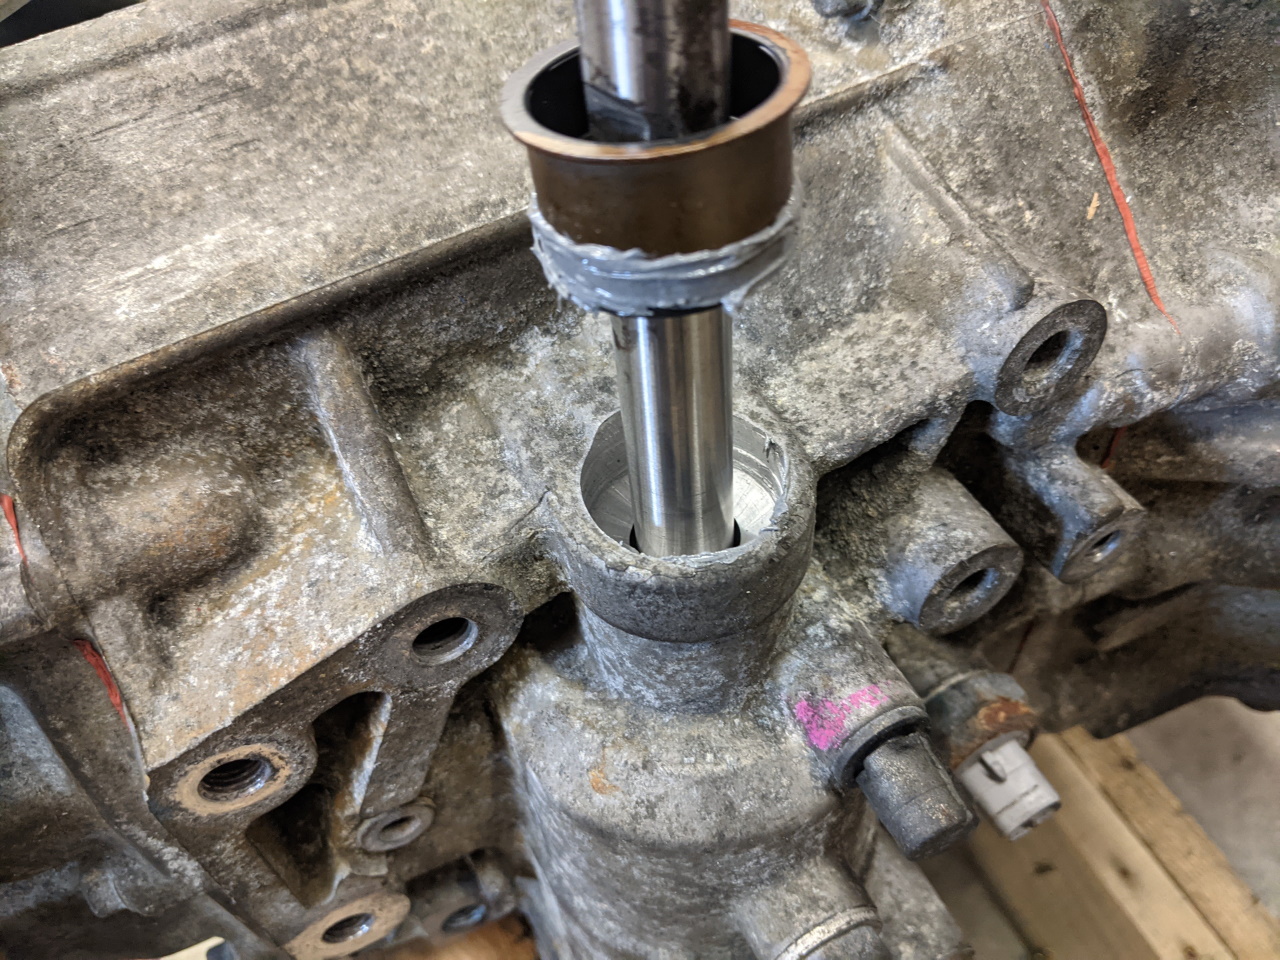
I drilled my initial pilot hole with a long 5/16" drill bit. Old school 3SGTE guys will know why I have have a 12" long 5/16" drill bit in my tool box ;)
 |
 |
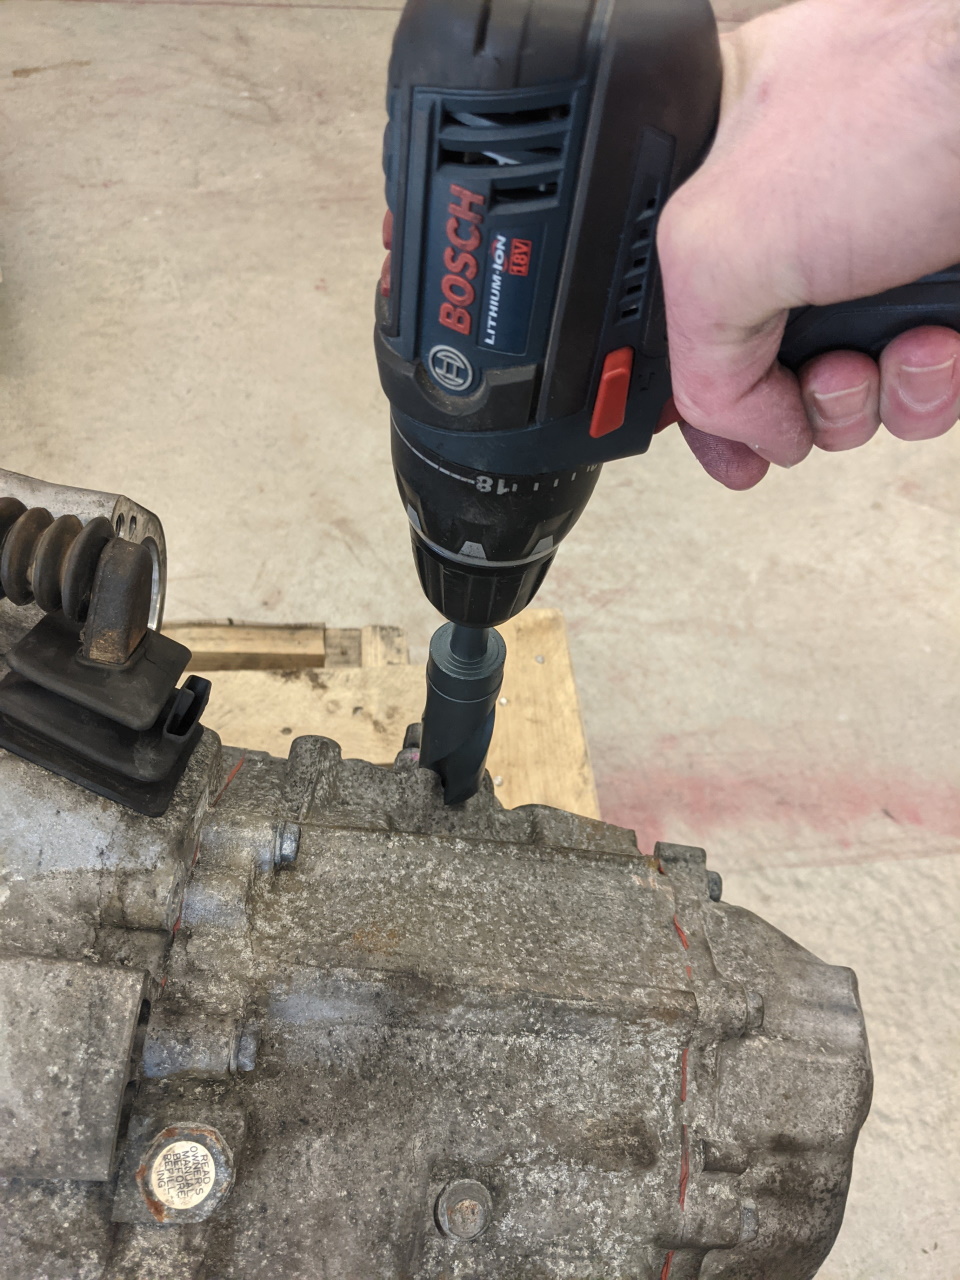
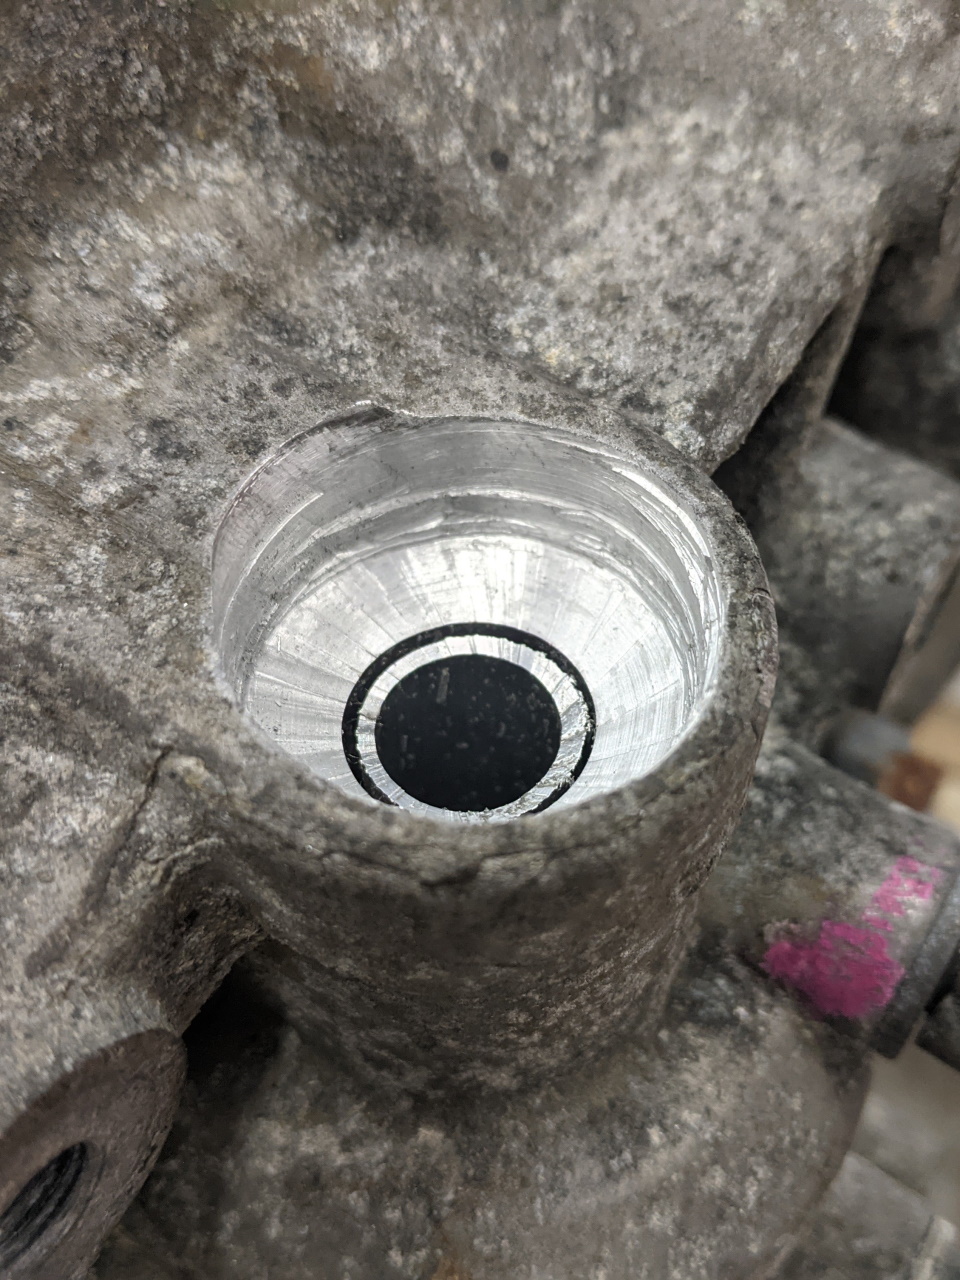
I then went back with a 28mm drill bit and drilled from the outside to form the pocket for the shaft seal. This hole didn't end up as perfect as I would have liked, but it will work. I almost certainly could have done a better job if I had taken it apart and used the drill press or the mill, but part of the point here was to see if / prove that it can be done more easily than that. It probably would have also helped to drill it in several steps instead of going straight to 28mm in one shot. One note if you follow my method exactly, be sure to put a pair of vice grips on the far end of the drill tube to keep it from spinning. Depending on the length of the tube you may be drilling the end of the tube some as shown below, so you don't want it to move.
 |
 |
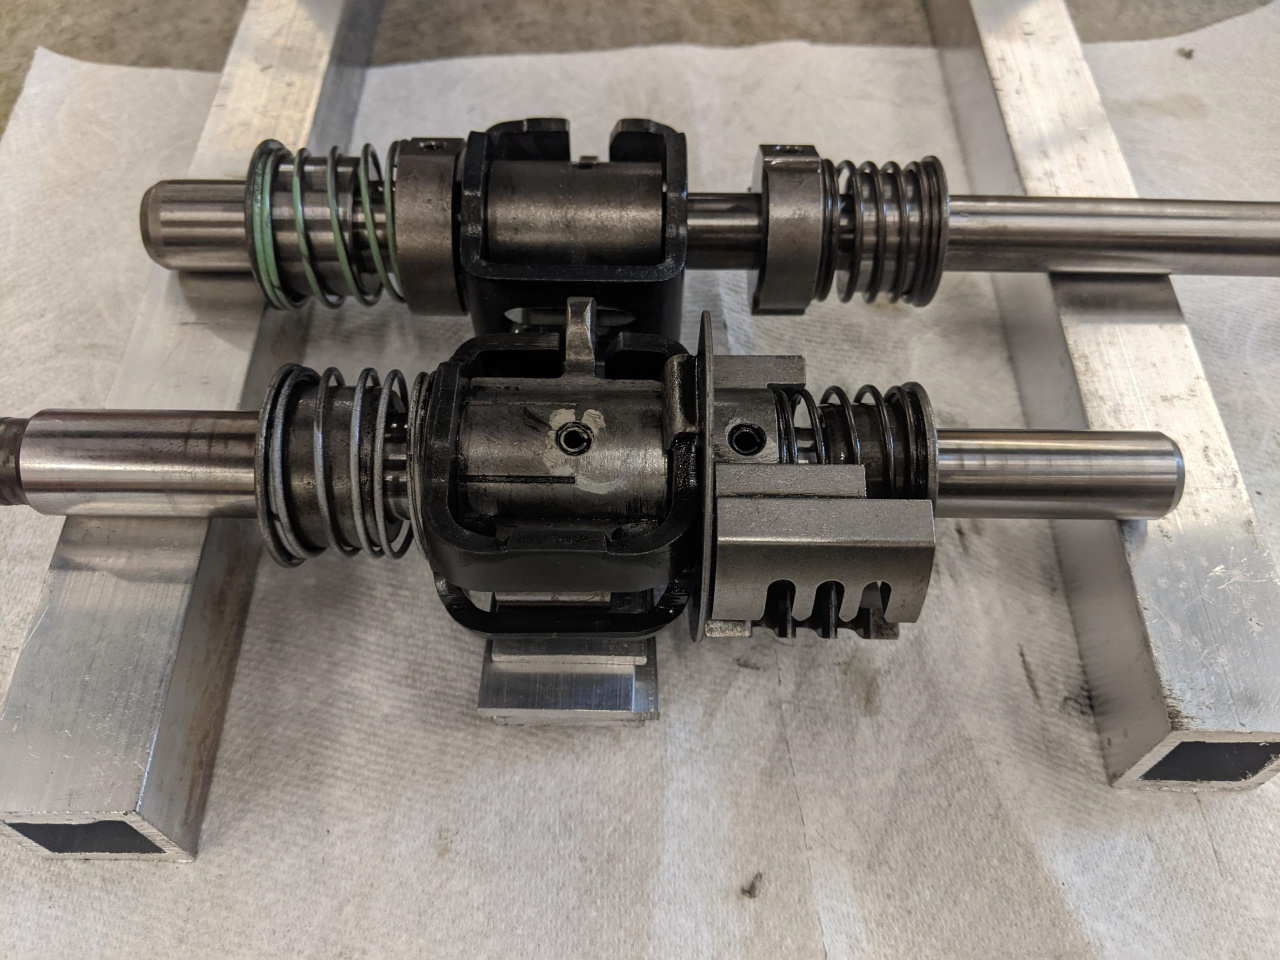
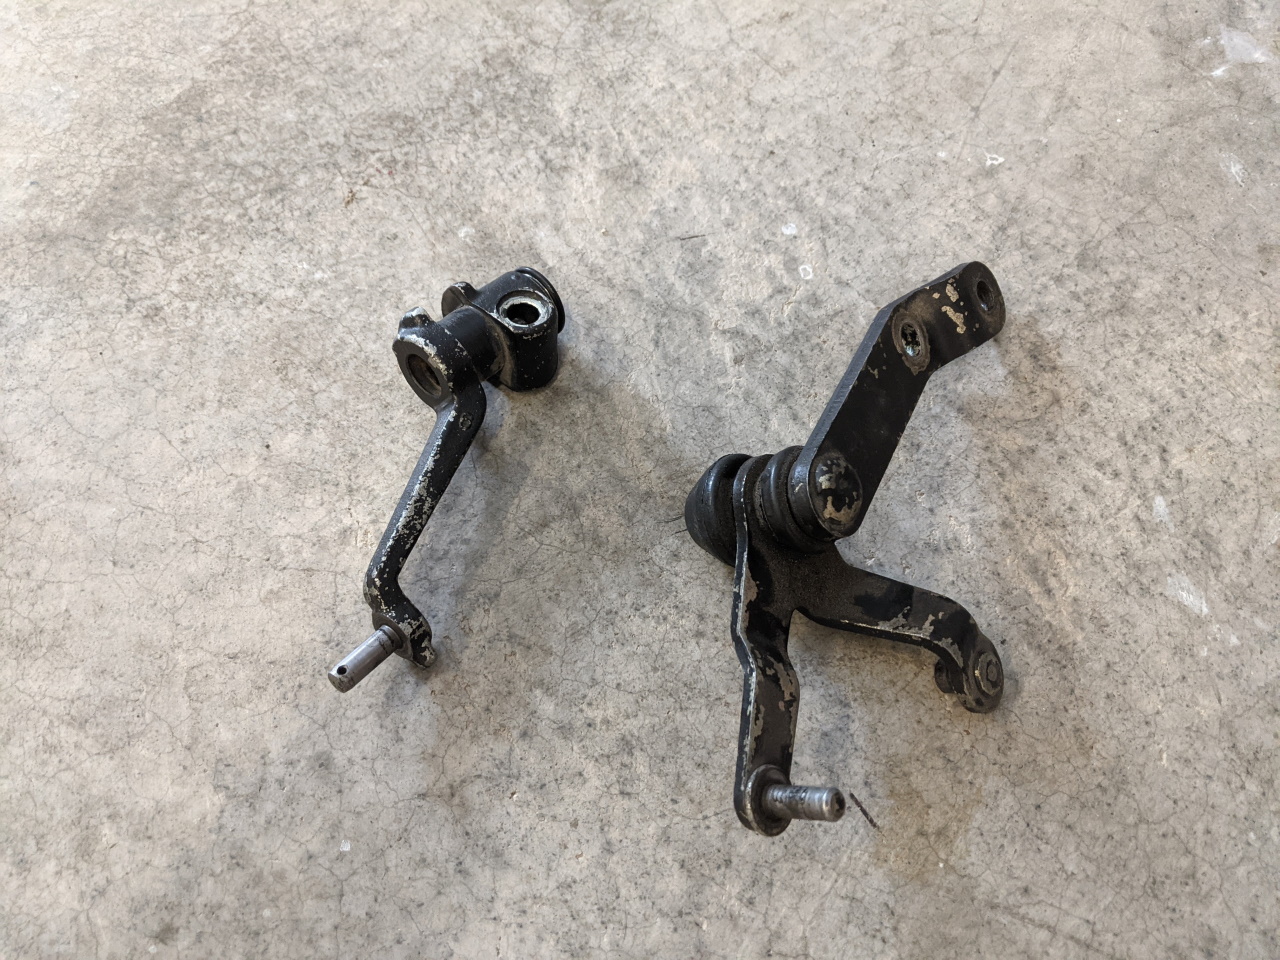
With the modification to the case complete, we need a shift mechanism to install. The E351 mechanism is similar to the mechanism from my E153, but not similar enough. And the grooves and pin holes in the shaft are in different places, so we can't just swap the E351 pieces over to the E153 shaft. Fortunately the E153 shifter bellcrank bracket bolts right onto the E351. One can also use the lever and bellcrank from an S54, although the bellcrank bracket for the S54 will not work.
 |
 |
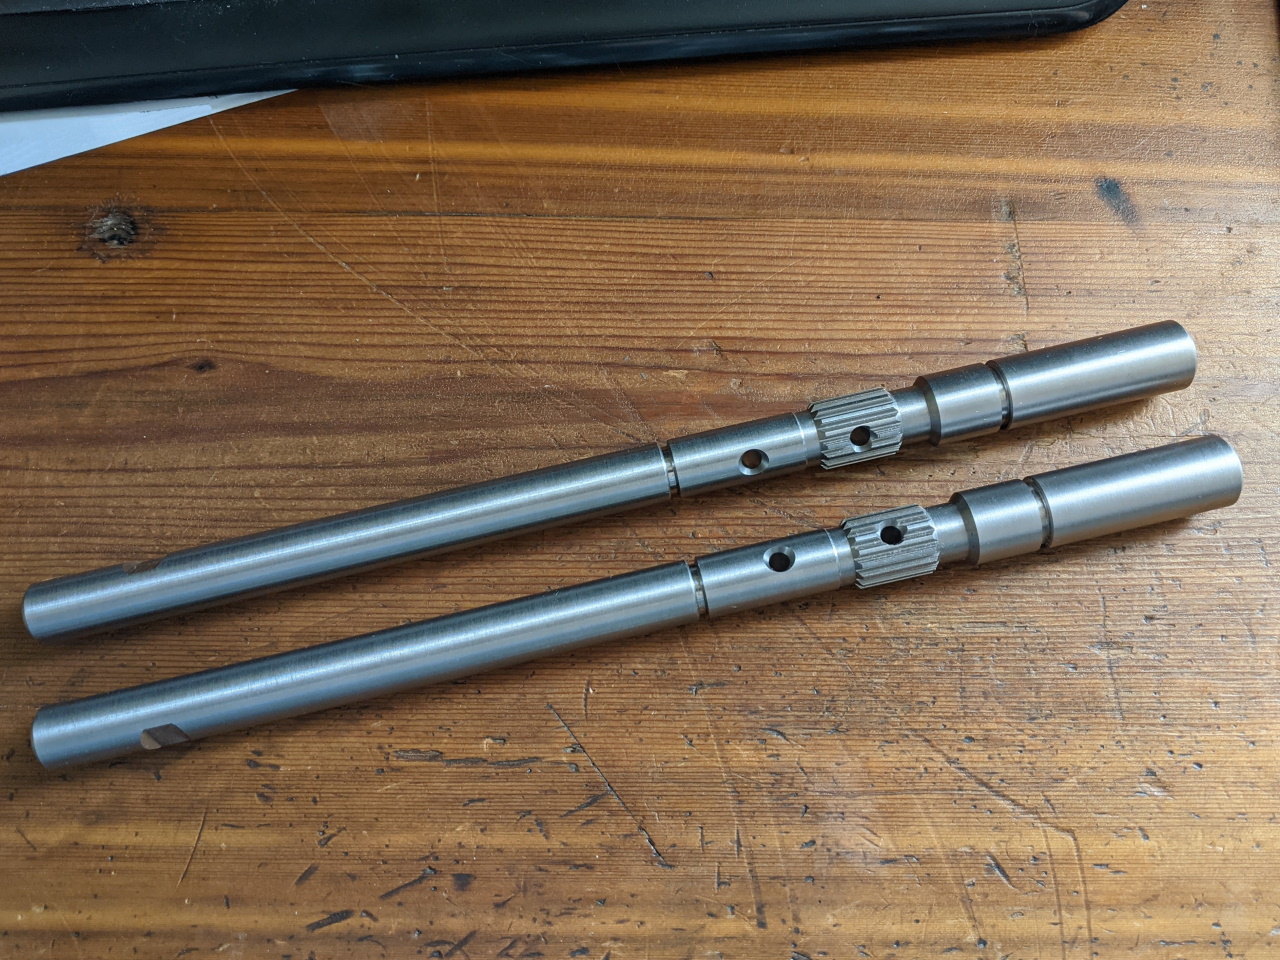
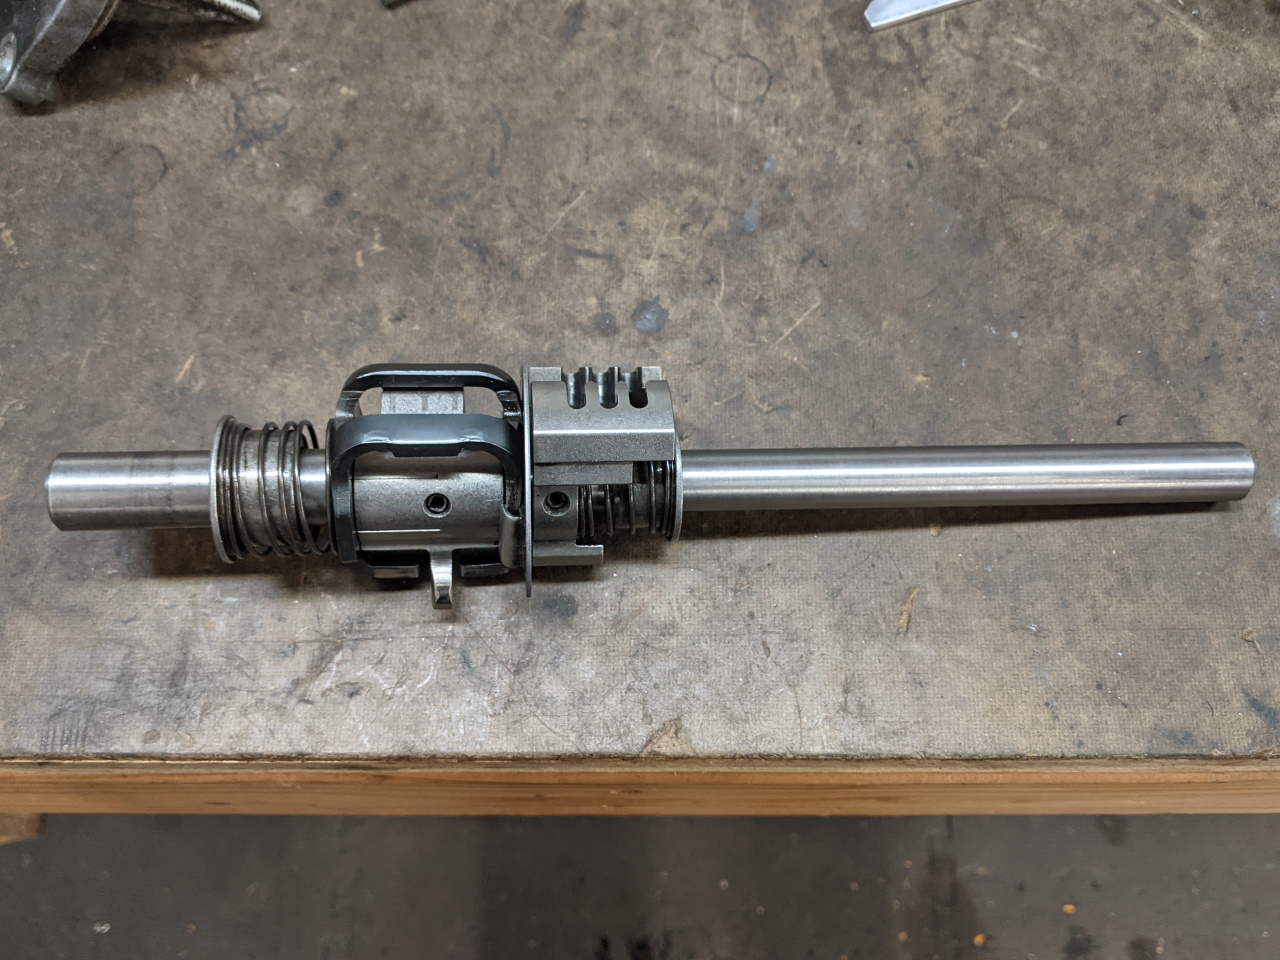
A custom shift shaft will be needed, combining the length of the E153 shaft with the groove / pin spacing of the E351 shaft. The first prototype shafts are shown below, plus the assembled shift shift with all of the E351 parts installed on the custom shaft. Future production versions of the shaft have additional pin holes and snap ring grooves to allow them to be used to convert a Camry E153 box to front shift, or to repair an old MR2 E153 box, in addition to being usable in the E351. That shaft plus a reproduction of the shifter bellcrank bracket can be found in my store.
 |
 |
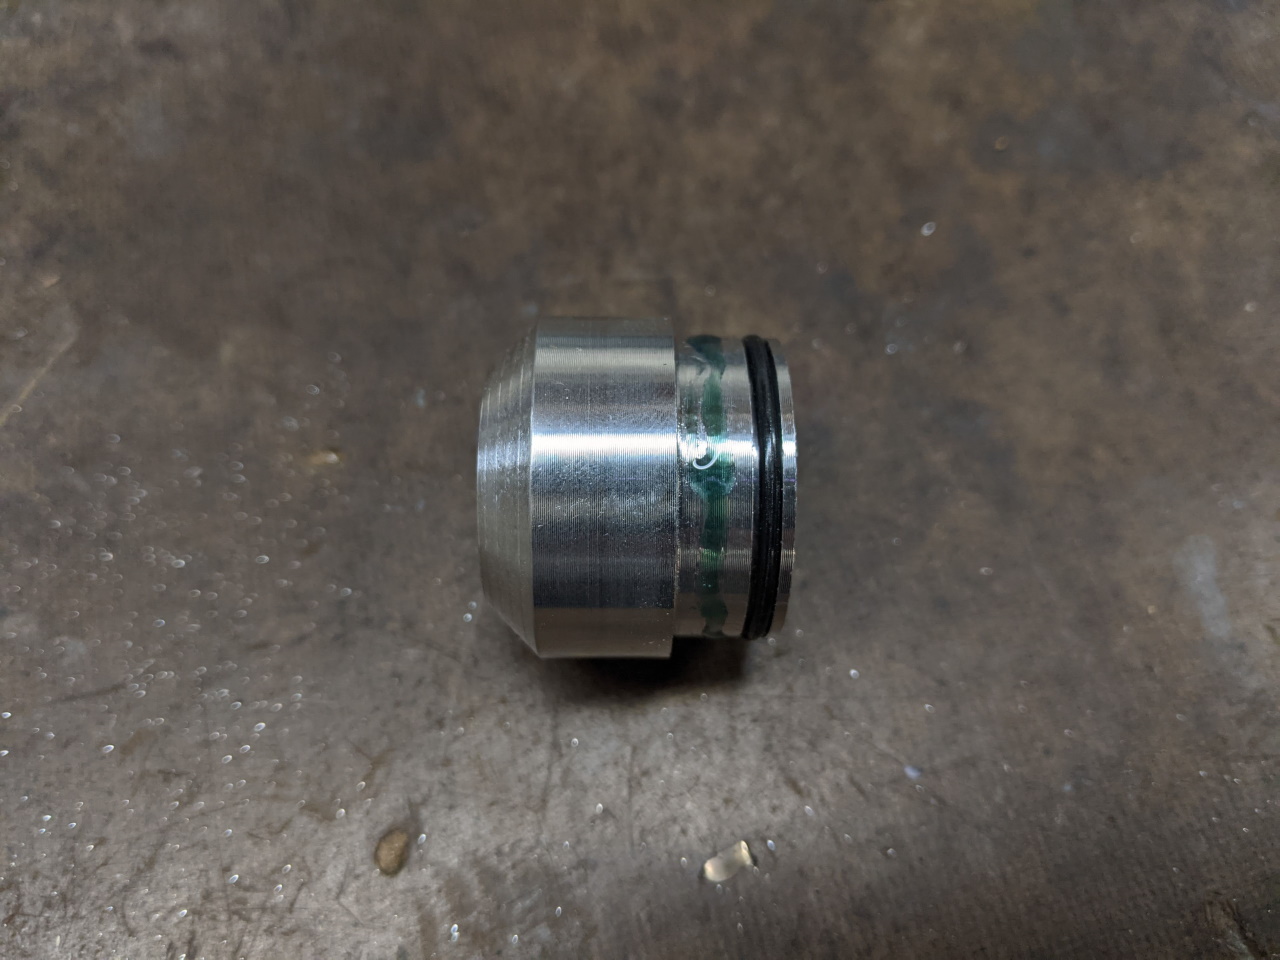
With the shift shaft assembled it can be installed back into the transmission, using the original E351 back cap. The seal has been removed, and a new cap will be installed in it's place. On the front, the new shift shaft seal (Toyota PN 90311-15005) can now be installed. As mentioned previously, my 28mm hole didn't end up quite perfect, and so the seal was a loose fit. I simply coated the outside in JB weld and installed it using the shaft to keep it centered.
 |
 |
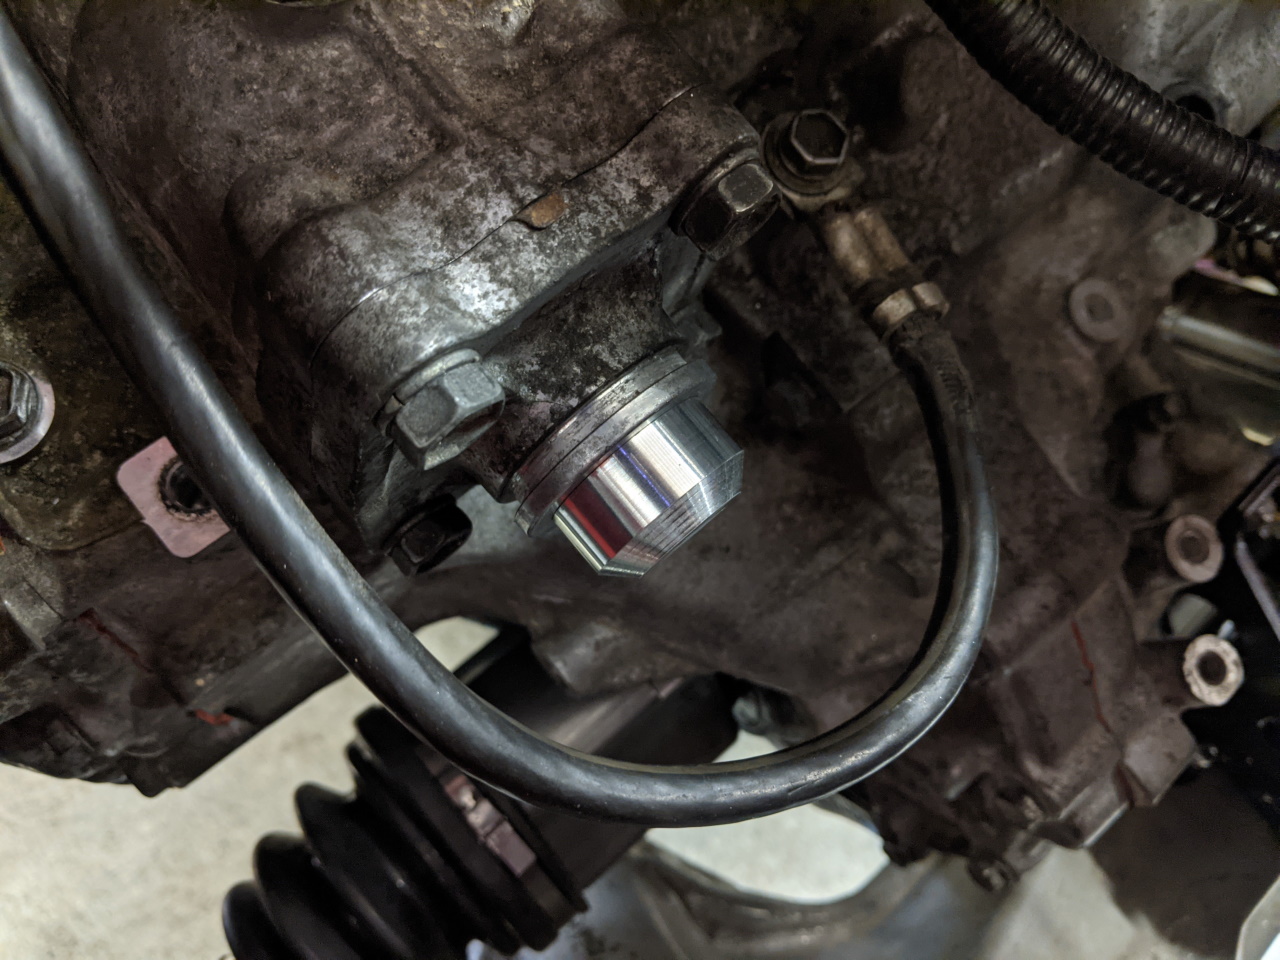
Finally, the back cap for the shift housing is installed using green locktite to secure it in place.
 |
 |
Mounting the Transmission
The stock E153 left side mount bolts right up to the E351. The front mount bracket also bolts on, and is the same between the E153 and S54. The rear mount bracket is different, due to the smaller differential housing on the narrow transmission. I used the rear mount bracket from Frankenstein Motorworks to which I added a few lightening holes (hey, another 0.4 lb saved!).
 |
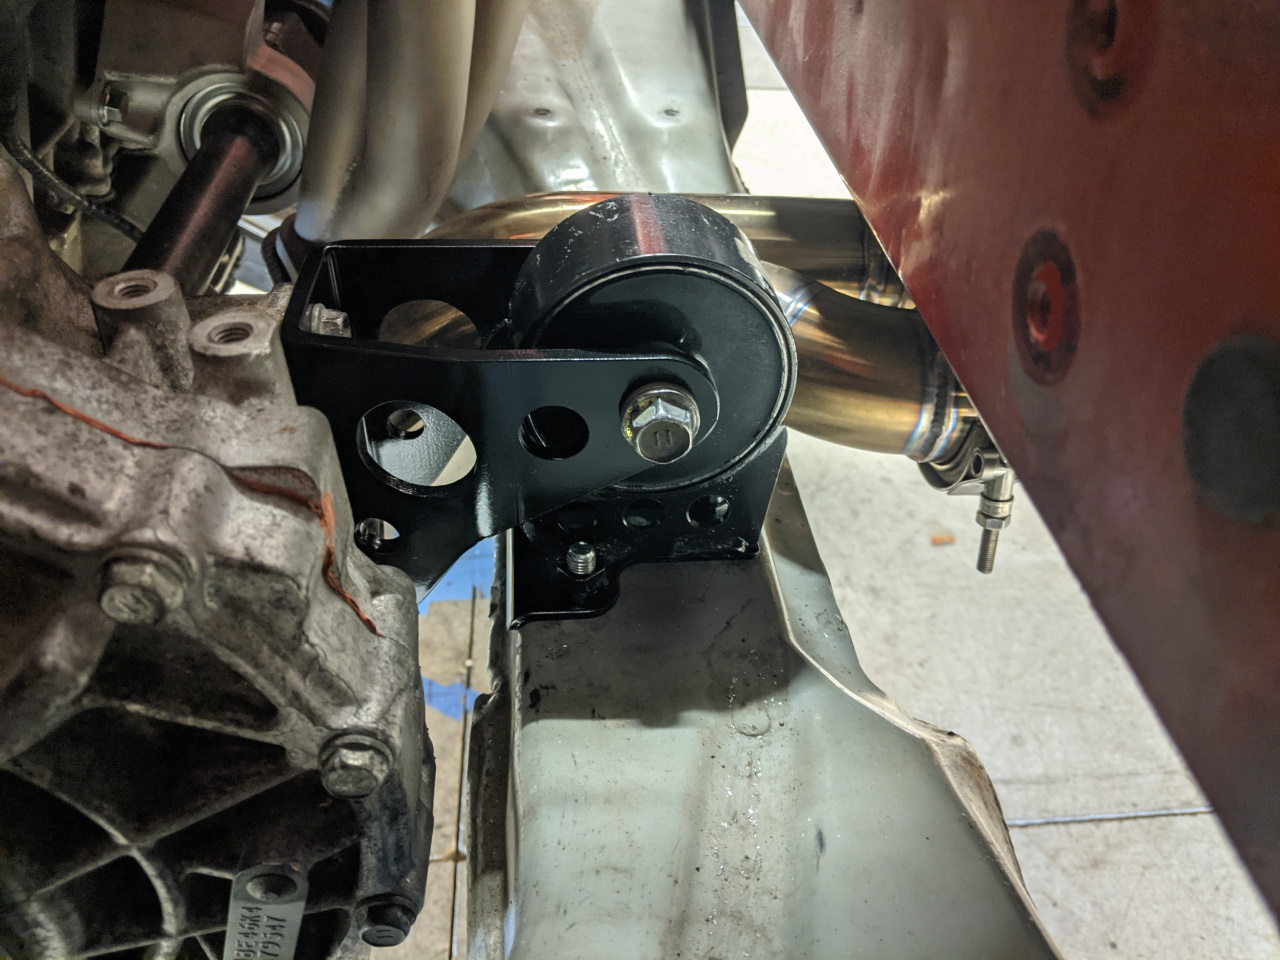 |
In order to mate the transmission to the 2GR-FE, one upper corner of the transmission must be trimmed to clear the forward cylinder head. Also if you wish to use the M10 bolt that installs next to the axle from the engine into the transmission, the hole must be drilled out to the proper size and tapped. There is a pilot hole in the correct location. If installing on a 3S / 5S motor, this is doubly important as there are only three bolts otherwise.
 |
 |
Clutch, release bearing, and flywheel are the same as the E153. Clutch slave cylinder can be either the original E153 unit, or the E351 version. I ended up using the E351 version as I felt it had a slightly more convenient bleeder position than the "single port slave cylinder" that is commonly used from the E153 Camry application. The E351 slave cylinder also has a heat shield provision, which isn't a bad thing to have.
Axles
At first I considered using the stock E153 axles. The stubs are longer than needed, but I even went so far as to machine a spacer to move the LH axle seal out to the correct location. However, I had some concerns that because the seal was now further from the supported part of the axle there would be too much radial play in the axle and the seal would leak. I ended up not using this part.
 |
 |
I decided instead to take a page out of the Frankenstein Motorworks playbook and mix-and-match TrakMotive axle pieces from Rock Auto to form the right lengths and combinations of splines. These axles will also save me about 6.5lb each. Marc describes the process here, although I will be using some different part numbers. This took a little trial and error to find a RH intermediate shaft that would work and in the end it's not a perfect solution as you will see below, but it's close enough for me. I ended up using the following part numbers:
| TrakMotive Part Number | Useage | Original Source |
| TO8156 (two required) | Outer CV and half shafts | 2001-2005 AWD Rav4 |
| TO8154 | LH inner stub | 2001-2005 FWD Rav4 |
| TO8246 | RH inner stub / intermediate shaft | 2010-2011 Camry (automatic) |
I had to buy four axles in order to build 2, but they are only $45-60 each, so the total cost is still reasonable. These part numbers will require the use of the 26 spline NA hubs. Note that some of these axles have a small lip on the edge of the inner cup that prevents the tripod from coming out. Once you find the lip, it's easy to flatten it with a couple of hits with a hammer and punch, allowing the axle to slide out.
|
|
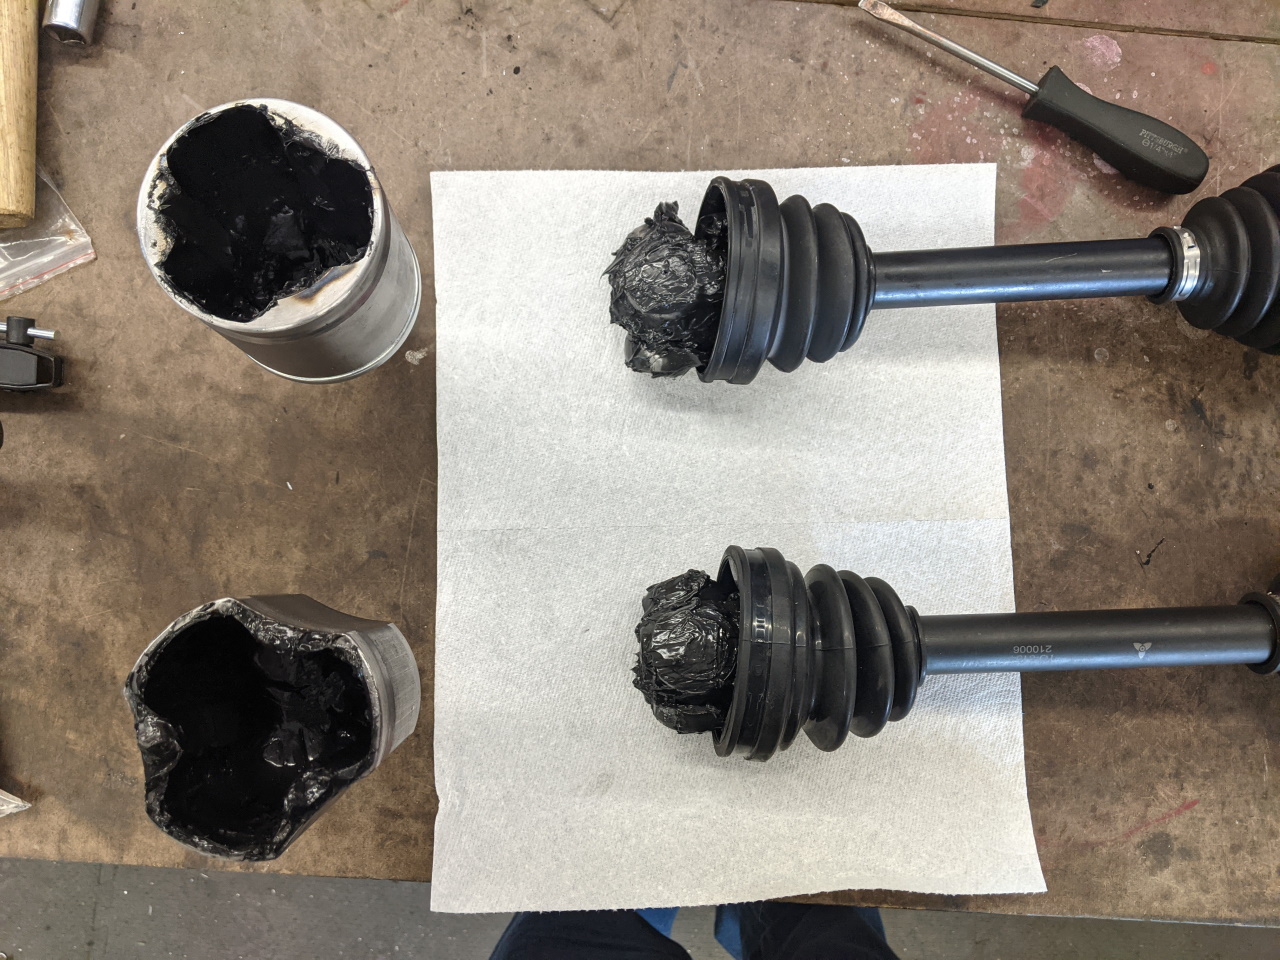 Step 2: Separate at inner joint |
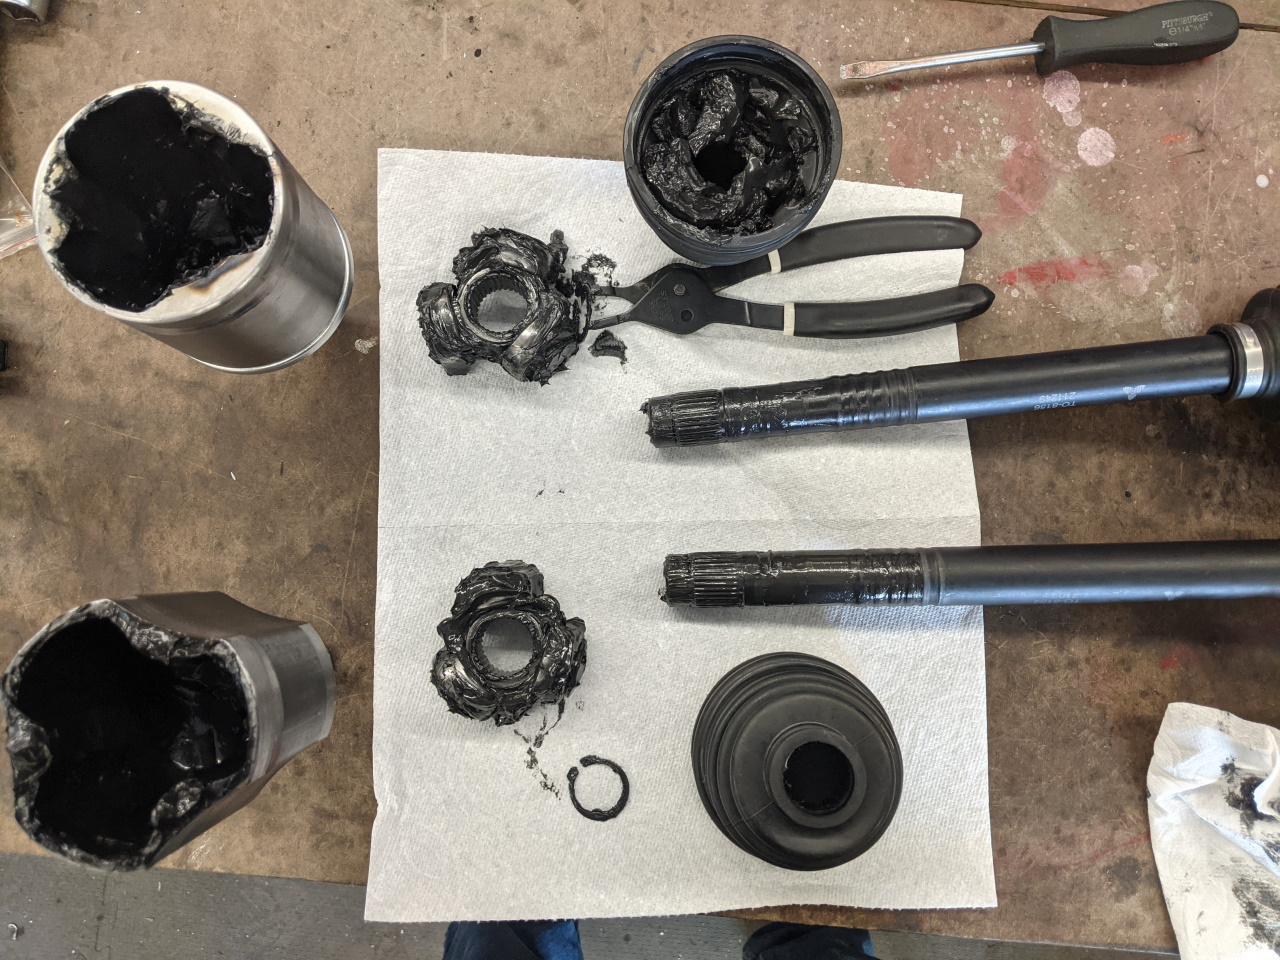 Step 3: Remove inner tripod and boot |
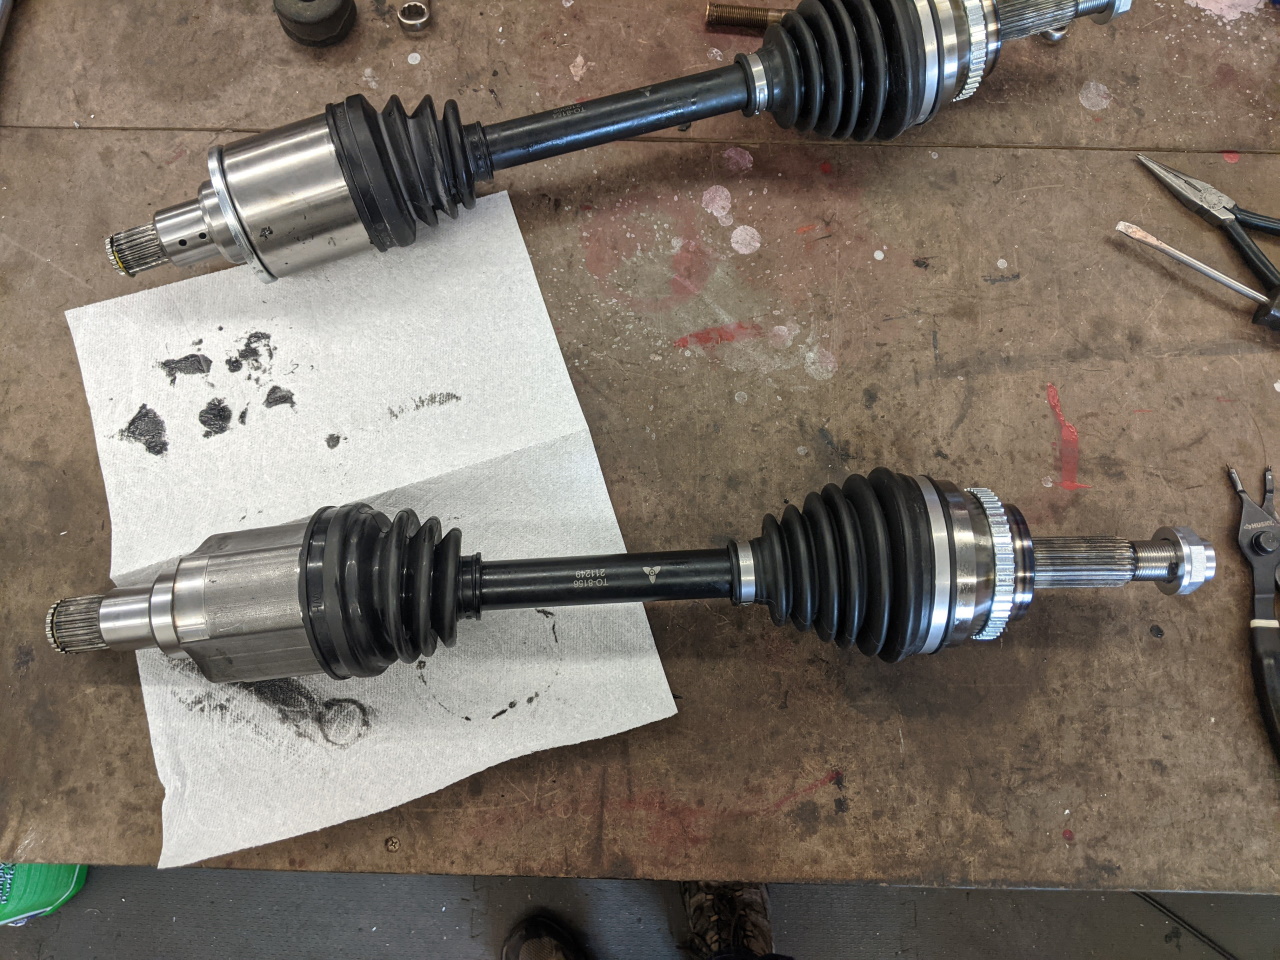 Step 4: Swap boots and inner stubs, reassemble |
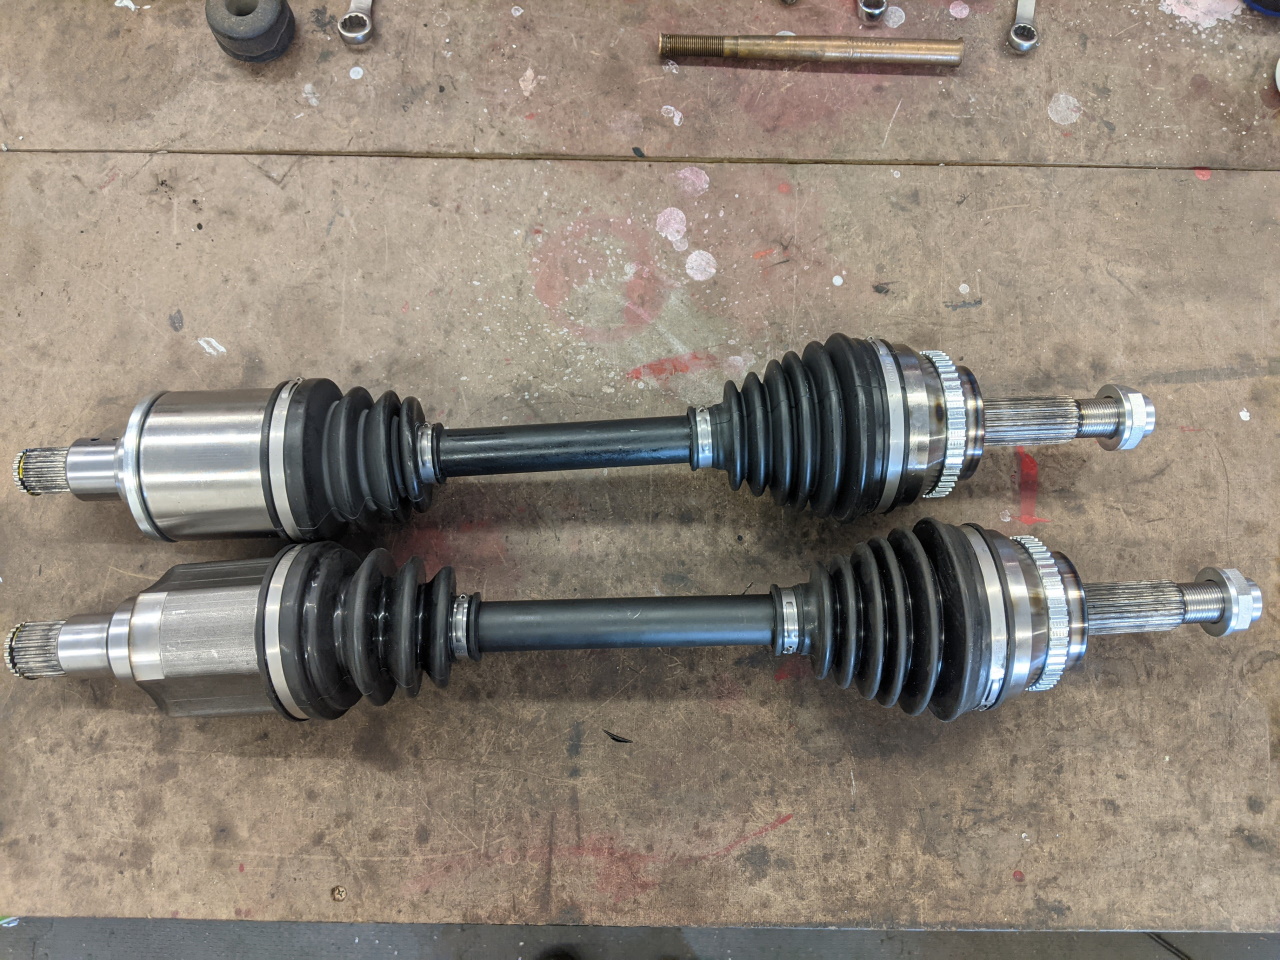
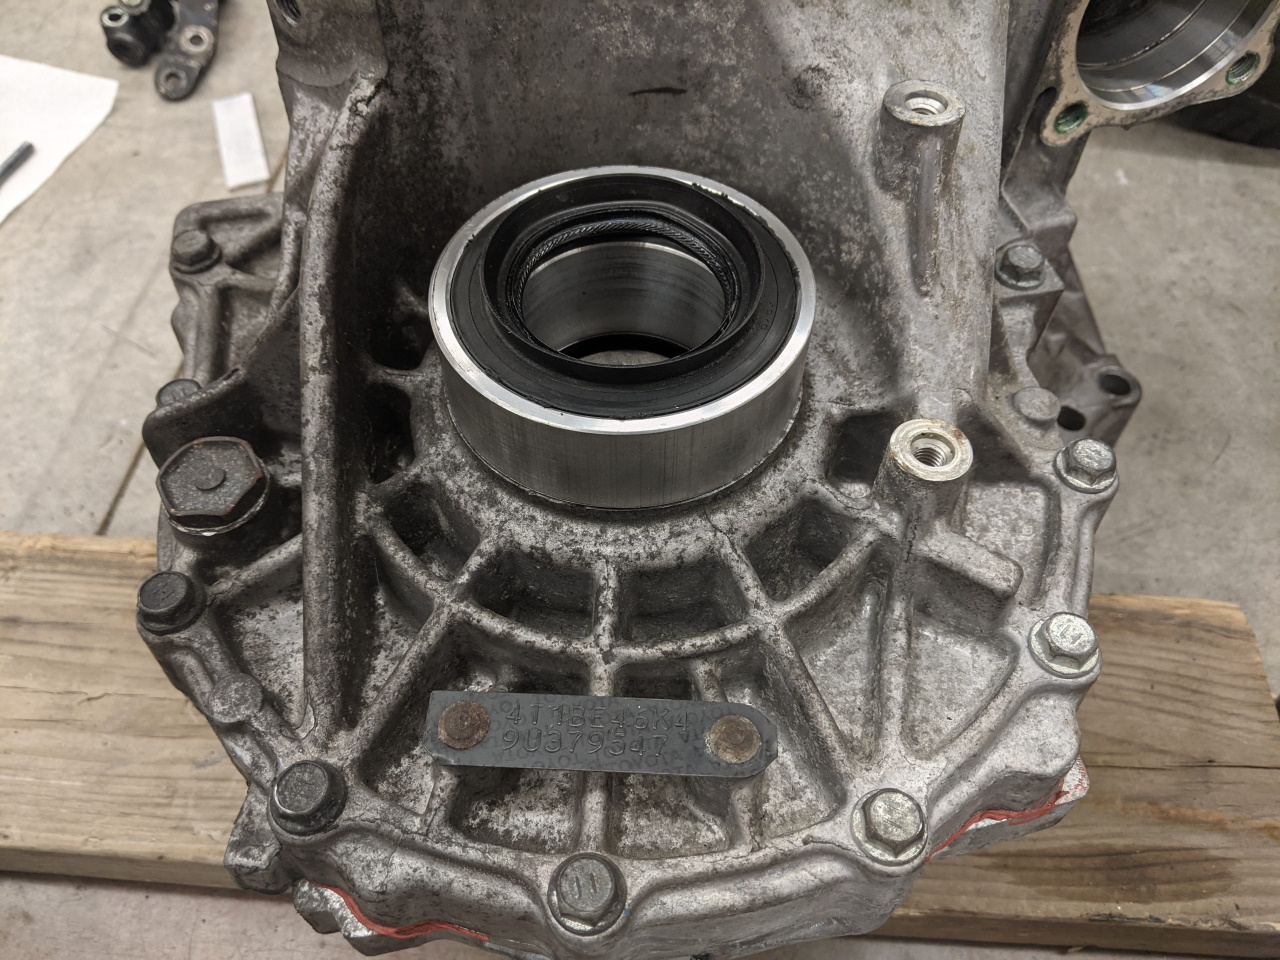
The not quite perfect aspect of this is that the RH axle seal is in a different location than the axle was designed for, leaving a gap between the seal and the seal cover as shown below. I ended up just removing the seal cover. The engagement to the differential is perfect, and it fits the Frankenstein Motoworks axle bracket for the 2GR, which means it will also work with the stock 3SGTE axle bracket as well.
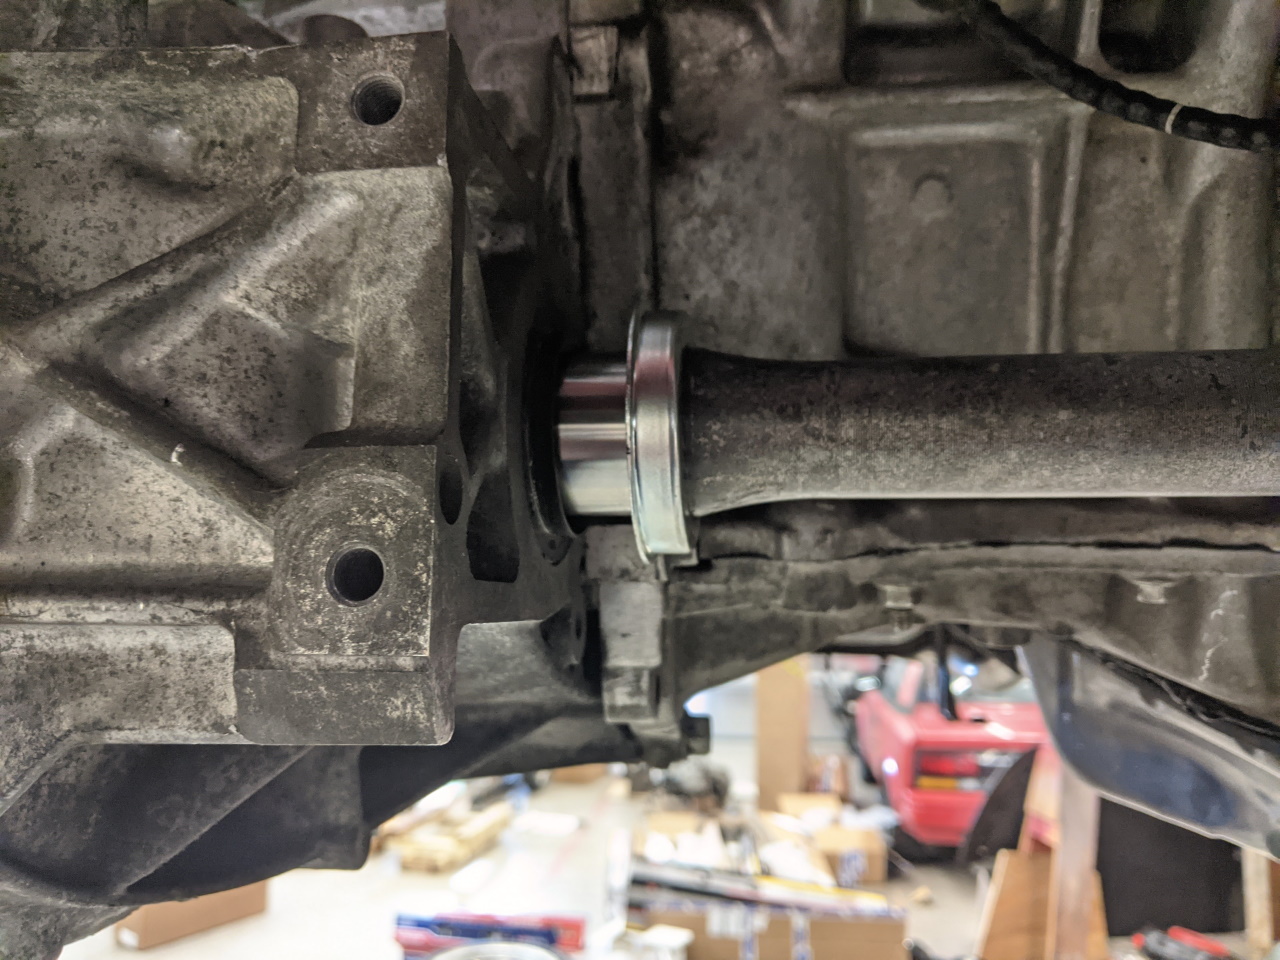
IMPORTANT!: I recently discovered that this does not leave very much engagement for the axle seal, and more importantly that there is a difference in the sealing position of OEM vs some / all aftermarket seals. The OEM seal actually sits deeper in the transmission by just enough that it won't seal with these axles. The two aftermarket seals I have tried so far (SKF and BCA) seal a little further up the axle shaft and work with this axle solution.
The one other catch with these axles is that the ABS Tone Ring is too small to work with the stock SW20 sensor position. The stock tone ring can be removed from the MR2 axles if you are careful (or new ones purchased from Rock Auto, they say they are for the front but they are actually rears). The only issue is the depth of the press fit area does not quite allow the 3-piece MR2 tone ring to fully tighten on the axle, leaving the inner two pieces loose. I solved this with a laser cut ring which installs between the inner sleeve and the tone ring. These are also available.
|
|
|
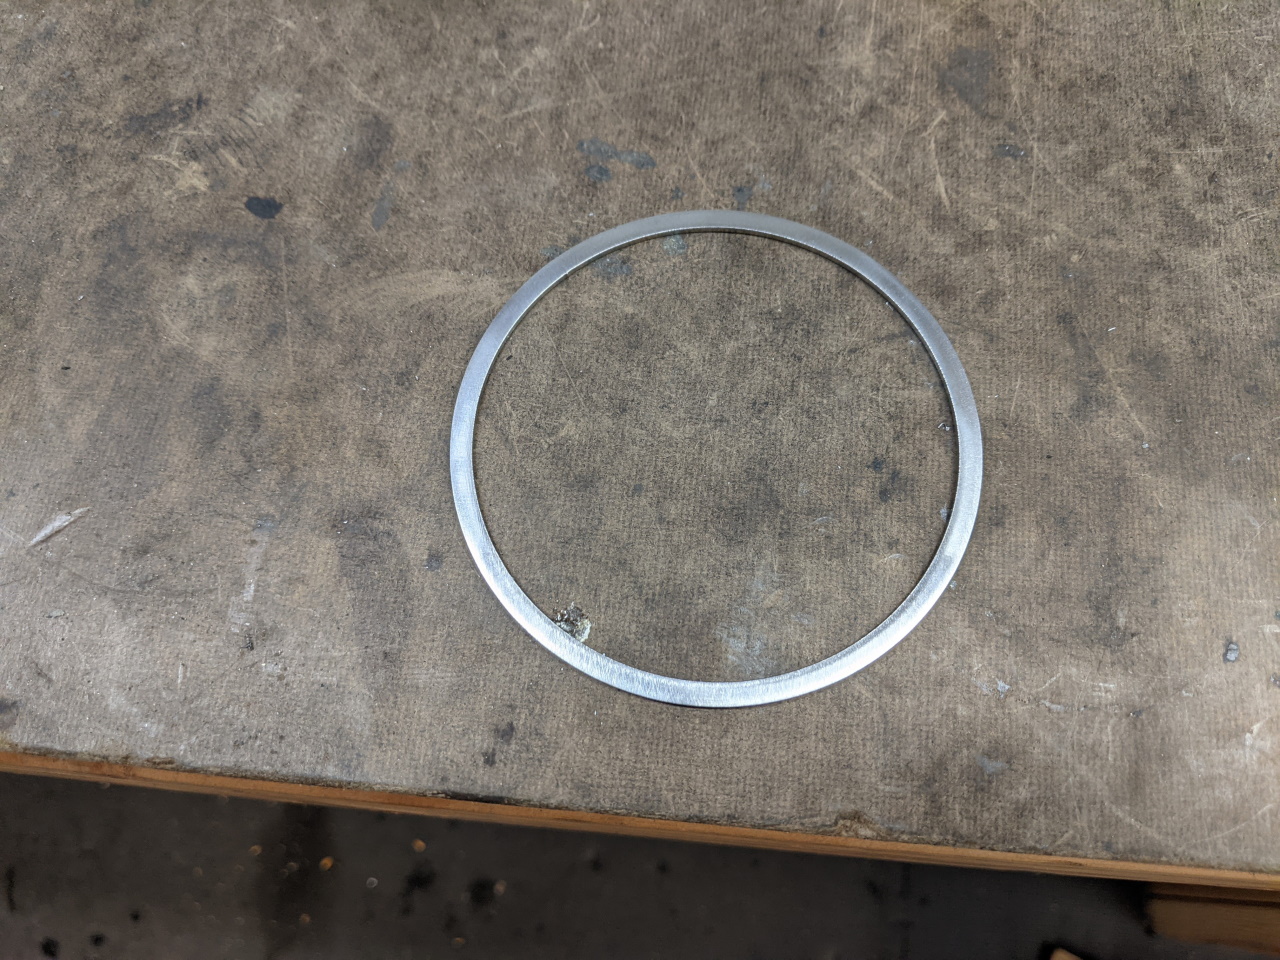 Laser cut tone ring spacer |
|
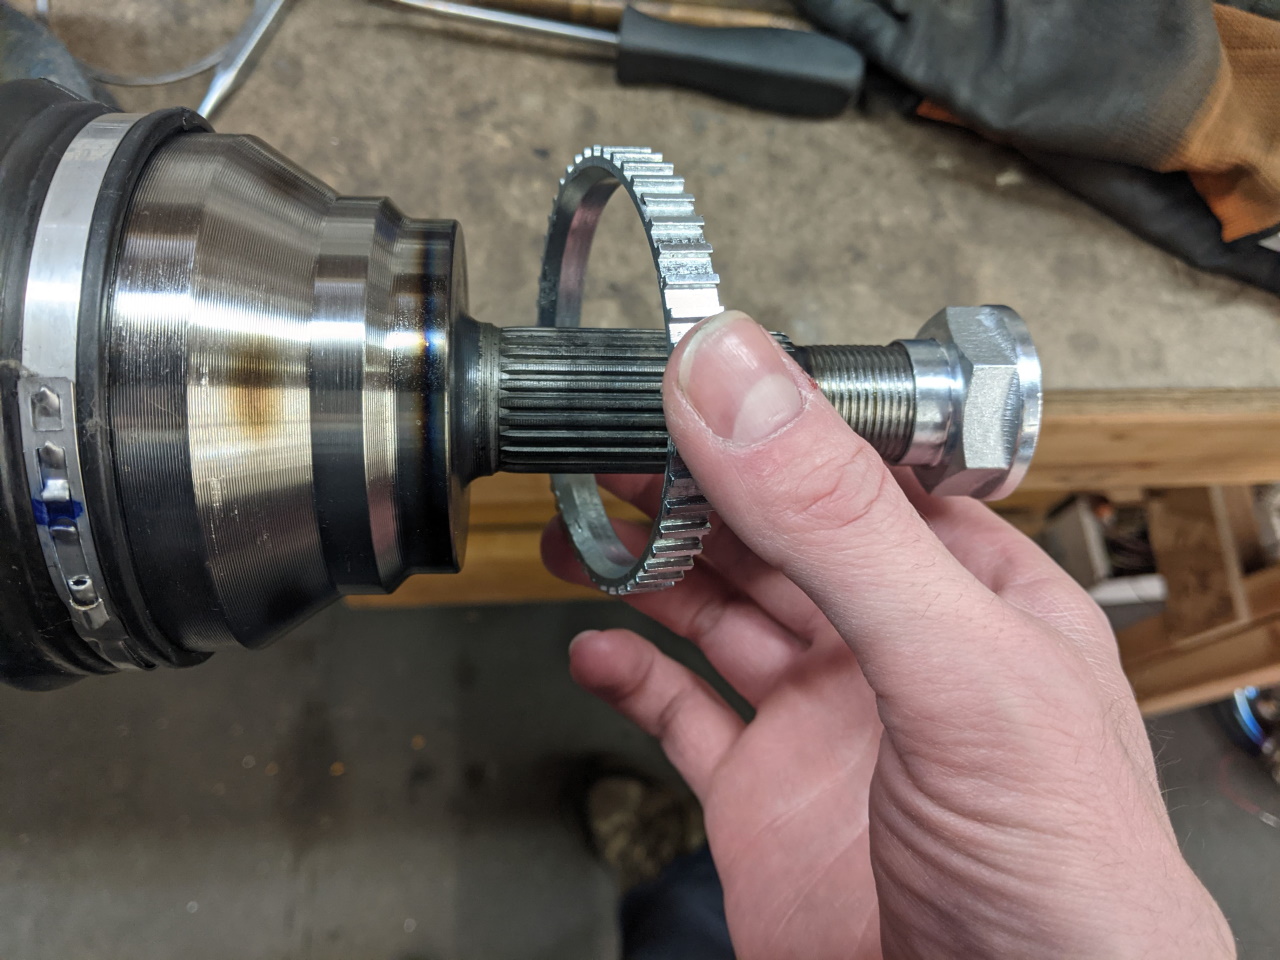
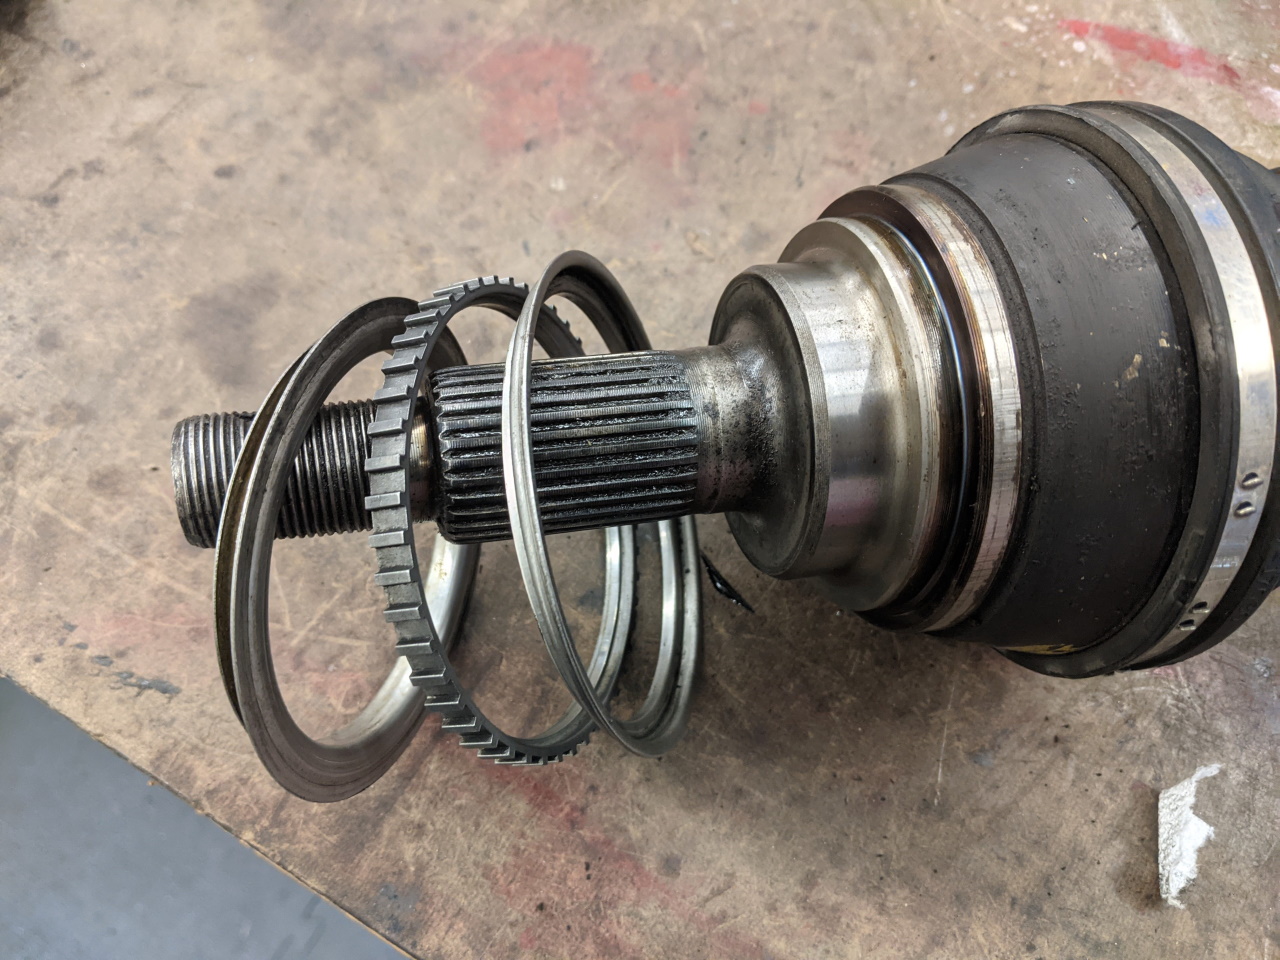
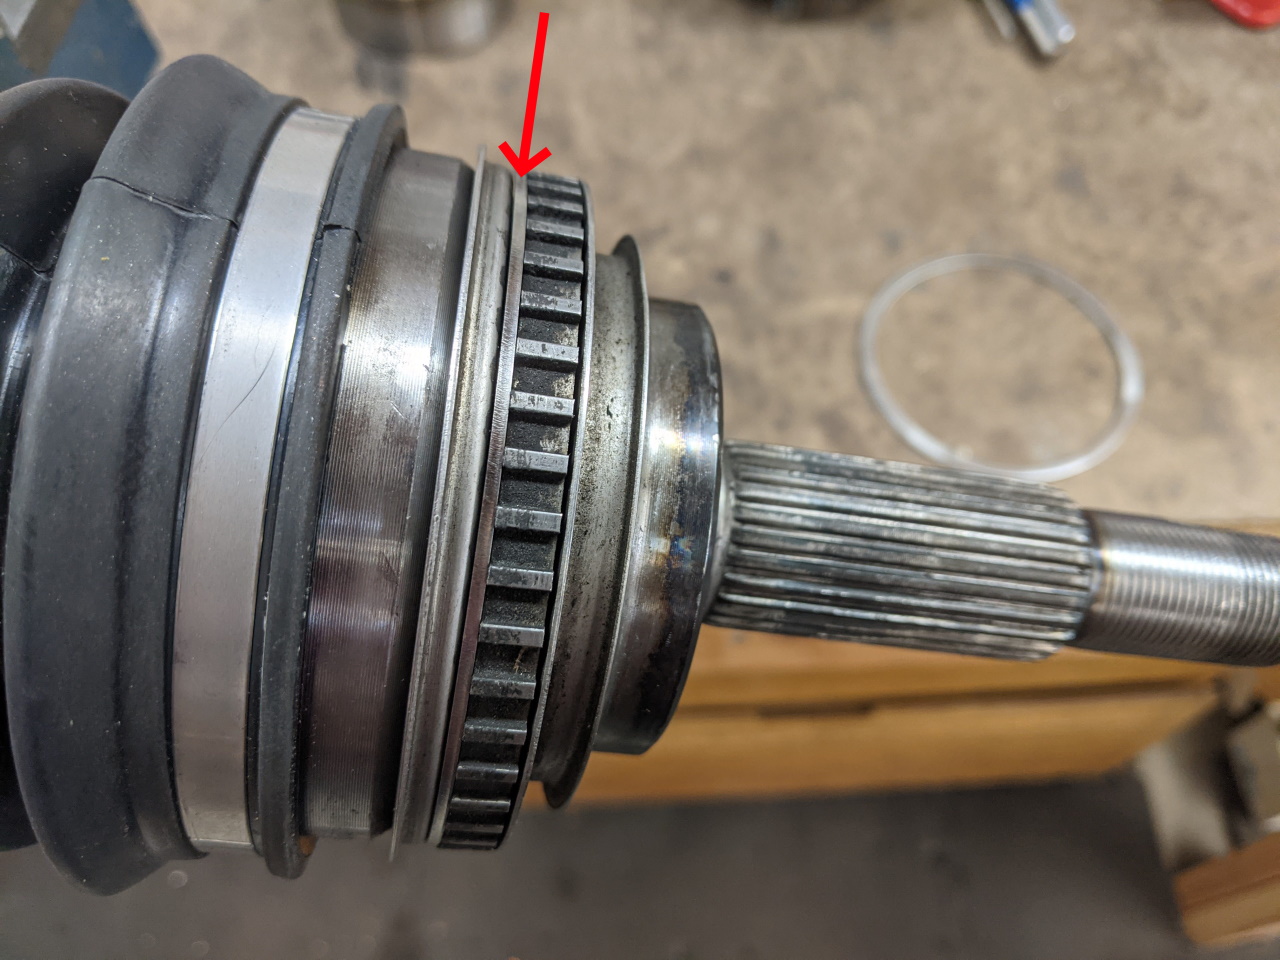
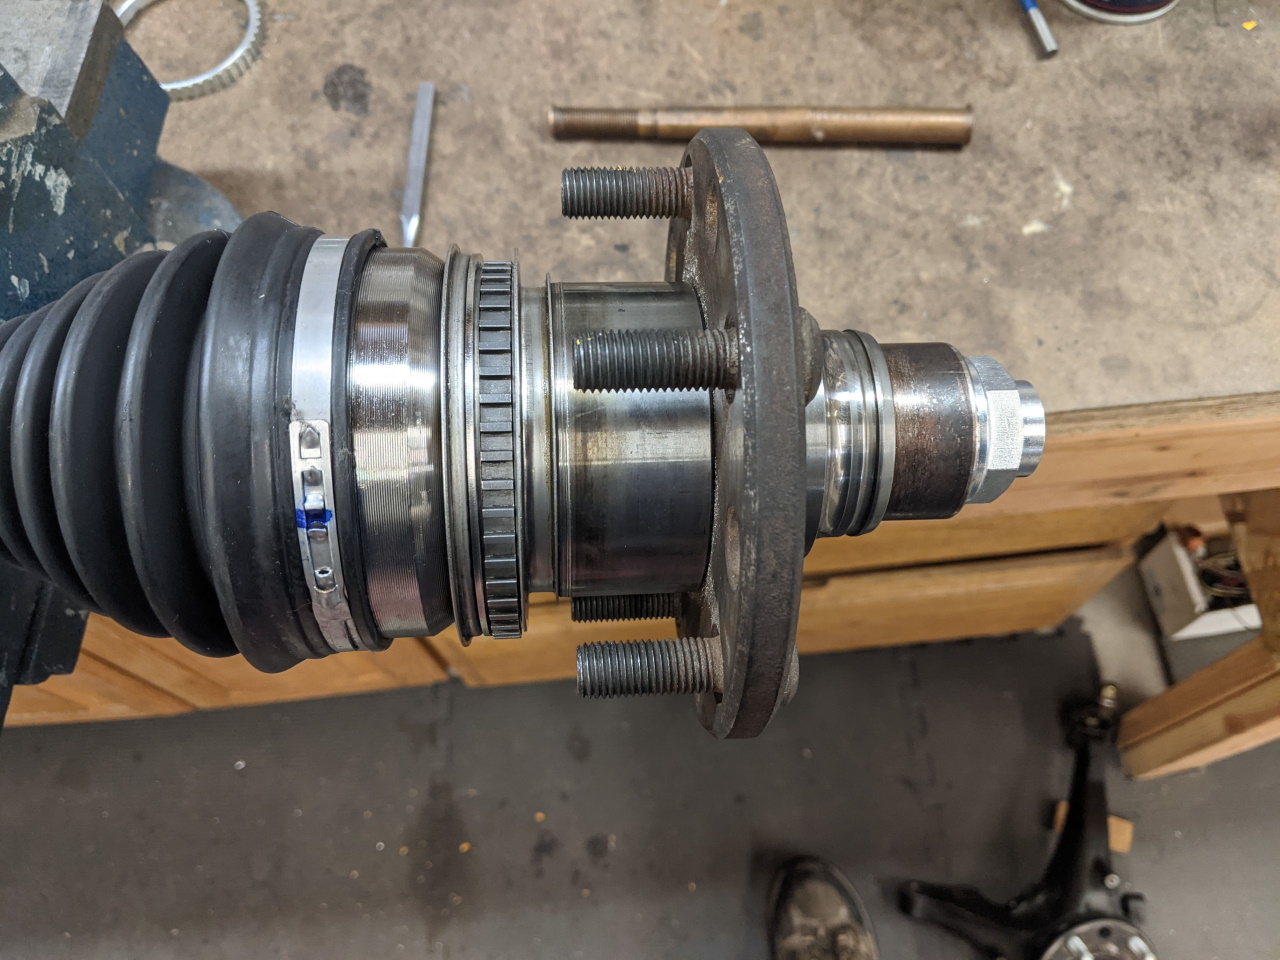
I installed the ring using an old wheel bearing race and hub, plus an axle nut, to press it into place. I attempted tapping it on with a hammer and had no success with that method. Steady pressure is the way to go for a task like this.
Speed Sensor
In my car, I am pulling a speed signal from my Spyder ABS system, so I don't need to worry about this. However, for reference I will include some data on the topic that I have collected.
Later years of cars with this transmission also pulled their speed signal from the ABS, however the transmission still has the port for the sensor (with a plug in it) and the speedo drive gear installed on the differential. At least my 2008 Camry transmission does. According to the part numbers, the speed sensor housing is the same as the S54 sensor housing. HOWEVER, the number of teeth on the drive and driven gears vary over the years and models, so simply installing an S54 speed sensor may result in a speedometer that reads significantly high. If you have an electronic speedo (93+ MR2), this should be easily fixed by simply installing the Camry speed sensor as well. The result will be a few % higher than the stock MR2 speedo, which should compensate nicely for the typical larger than stock tires on modified MR2s. I don't at the moment have an easy solution for the early mechanical speedo, although the mechanical speedometers do have some build in calibration mechanism that you may be able to compensate with.
| 91 MR2 S54 | 05 Camry E351 | 03 Camry E351 | S54 / E351 Hybrid | |
| Drive Gear | 25 | 32 | 32 | 32 |
| Driven Gear | 21 | 25 | 26 | 21 |
| Drive Ratio | 1.19 | 1.28 | 1.23 | 1.52 |
| Percent Error | 108% | 103% | 128% |
Note that this is only two of the MANY years / applications that these transmissions can be sourced from, and there may well be a combination of drive and driven gears available from a Corolla or Scion that better matches the MR2. There may also be a mechanical drive from an early 90's Camry or Corolla or something that would work better with the new driven gear, but I have not investigated that. Finding an early 90's mechanical drive from ANY car may also be an issue.
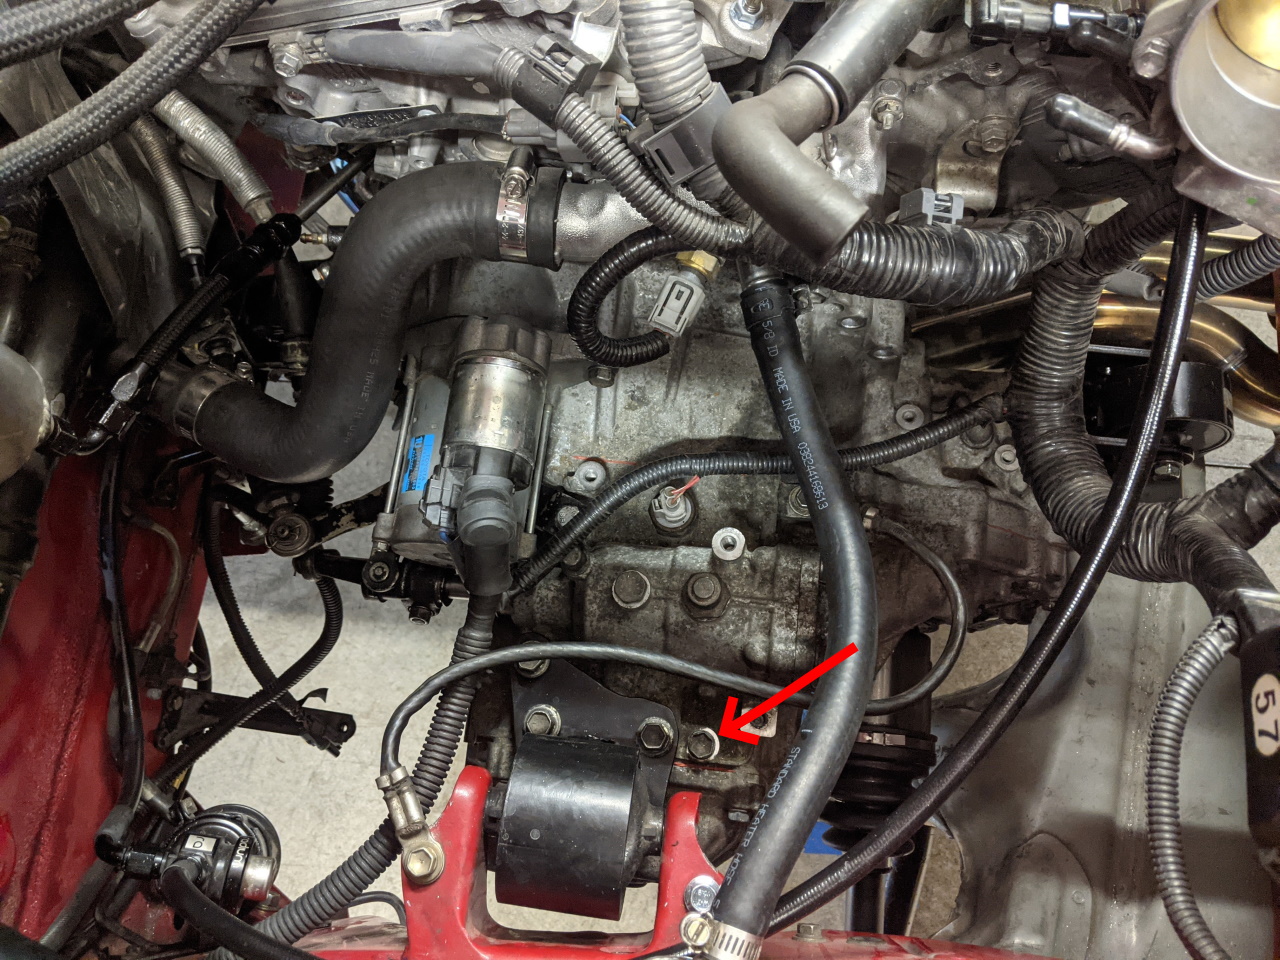
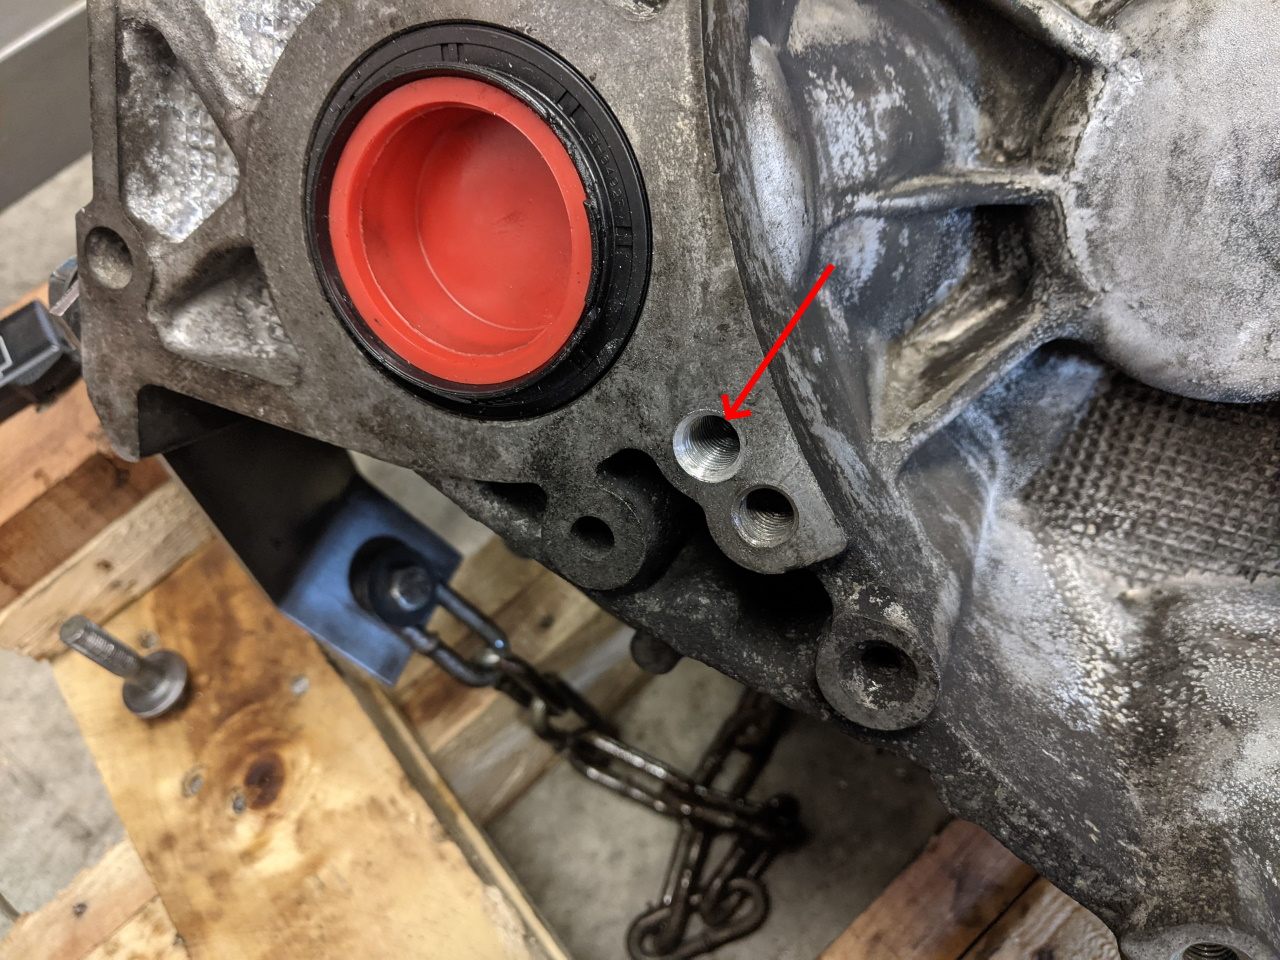
And that's it, a more modern transmission with some nice gearing options, available in junk yards, and with rebuild parts still available. Oh, and one last thing... Make sure you put a bolt with some locktite into this hole, as it goes all the way through into the transmission case: