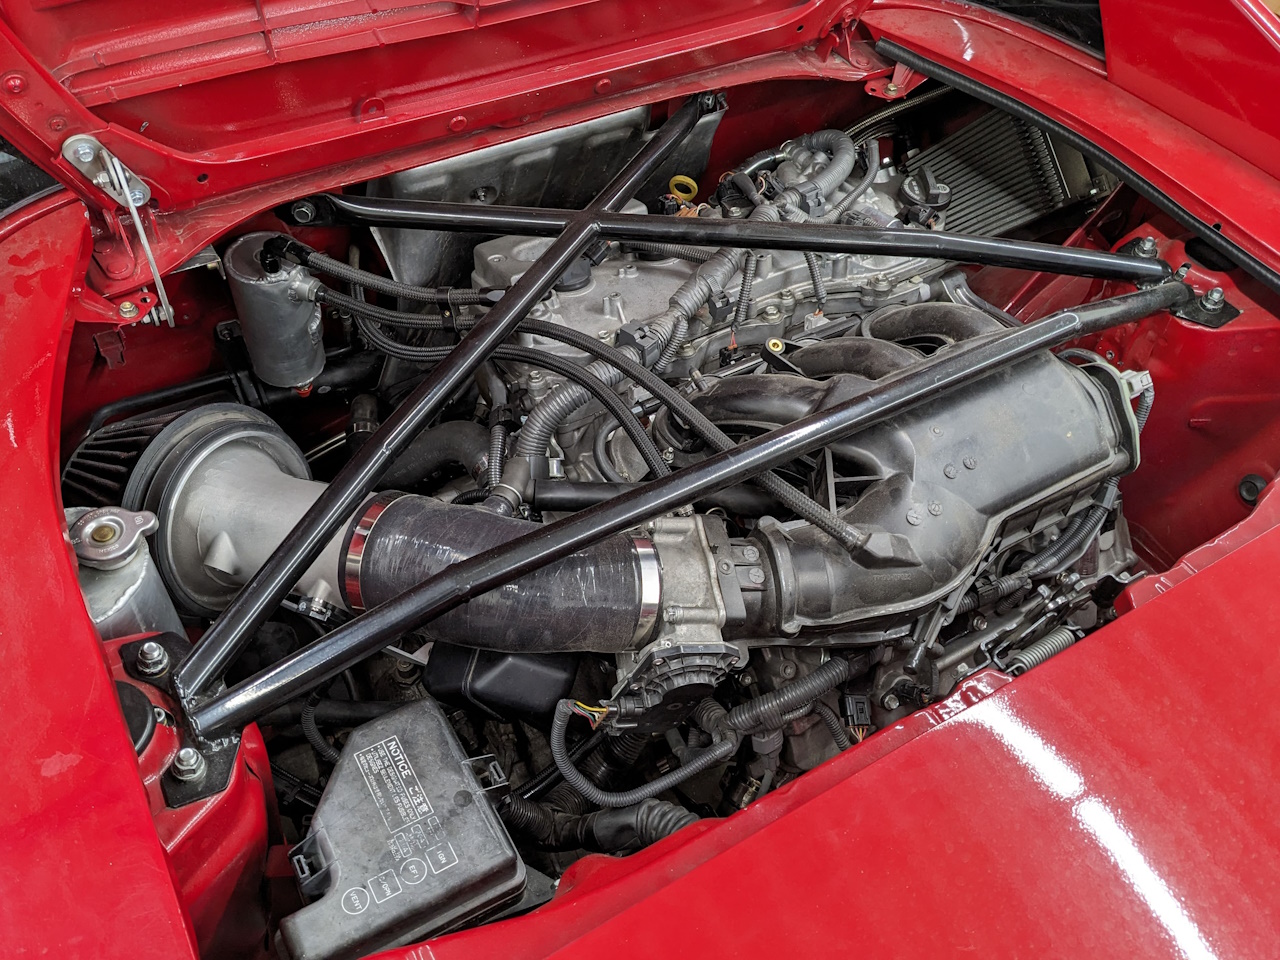
Ever wonder just how stiff (or not stiff?) the MR2 chassis is? Or how much difference various braces make to chassis stiffness? Me too!
The Test Rig
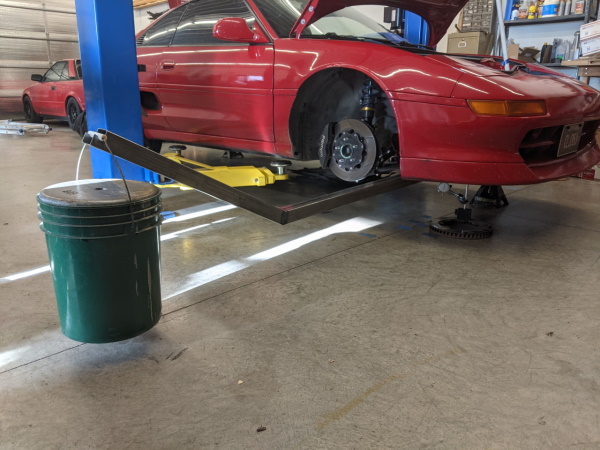
Measuring torsional chassis stiffness is actually easier than one might think. Support the chassis on 3 points, apply a torque to the end with the single support, and measure the deflection. I will admit, I copied the basic method from a YouTube video. I supported the rear of the car with two jack stands under the rear mounting bolts of the rear cross member.
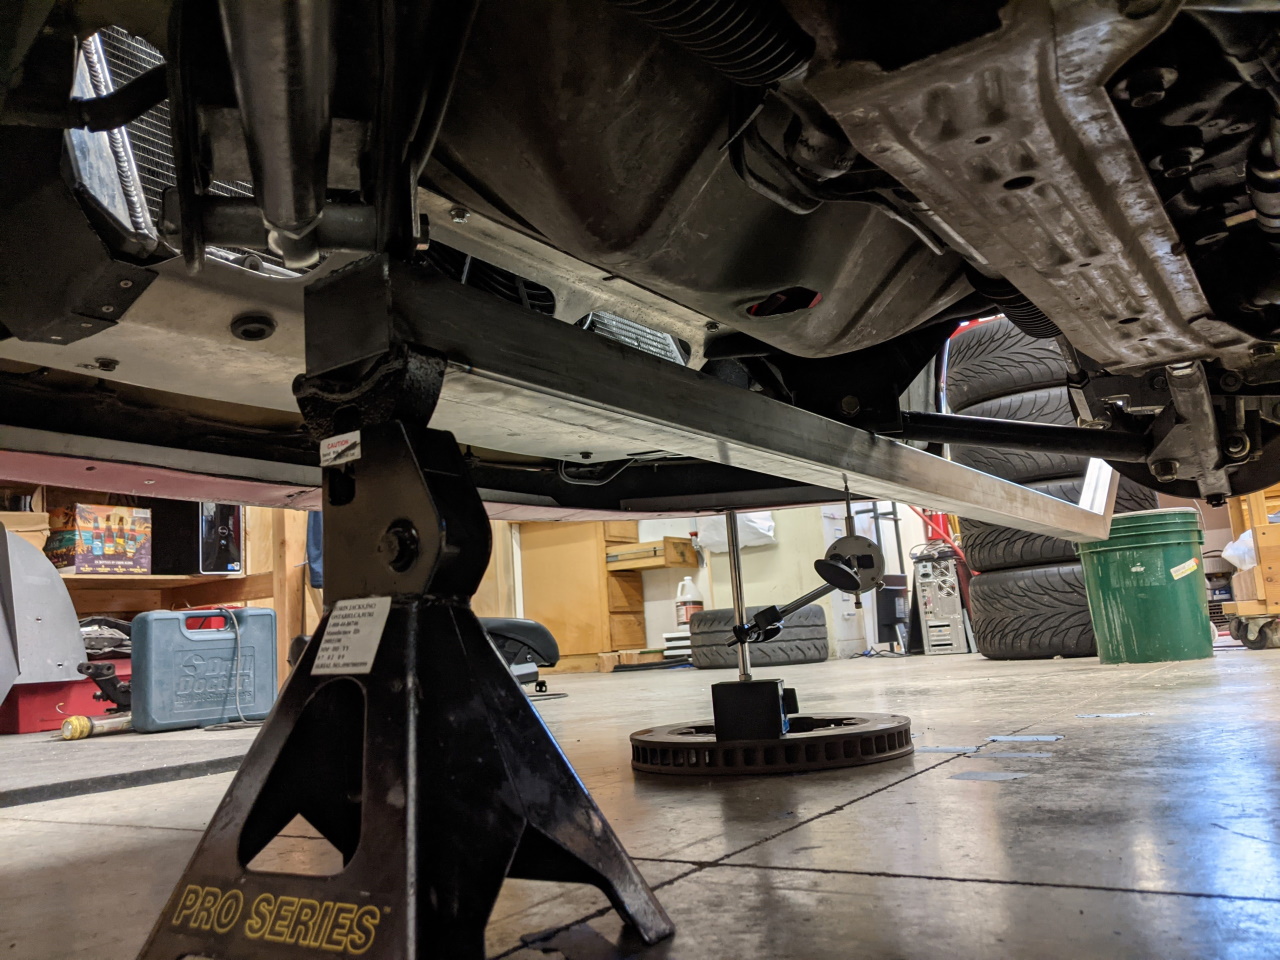
For the front, I built a bar that attaches to the front strut rod pivot bolts. The single front support goes under one end of this bar, and a dial indicator is positioned under the other attachment point (24" from the pivot). Because the support and dial indicator are directly below the attachment points to the chassis, flex in the bar can be ignored and we can measure only the deflection of the chassis itself. At the end of the bar (8ft from the single jack stand), a bucket of sand with a 25lb weight on top gives me a 90 lb weight that can easily be hung from the end of the bar in a repeatable manner. This gives me 720ft-lb of torque on the chassis.
The Test
For each change that I made to the car, I tested three times. Apply the weight, record the dial indicator. Remove the weight, record the dial indicator. Repeat 3x. Usually there was not more than about .001" variation between these three tests. I then lifted the car straight up using the 2-post lift, set it back down, and recorded the dial indicator. I repeated that a second time. This reading does not factor into the final results, it was more of a check for consistency, and a bit of a curiosity (I eventually stopped taking these measurements to save time, as they weren't really providing any useful data that I could see).
Each change to the car was made with the car on the lift. It was then set back on the three jack stands, and an initial reading of the dial indicator taken. As with the post test lift & reset readings, this does not factor into the final results. It can be an interesting gauge of changing stiffness however, as it gives an idea of how much the chassis flexes under it's own weight. Changes in this reading from one test to another are at least interesting in this regard. However since I am not applying a known torque when these readings are taken I cannot include this flex in any calculation of actual stiffness.
The Results
The results here are broken down into two sections. First the individual contributions of a few of the bigger items such as strut bars and testing of my prototype tunnel braces (for sale soon!). Each line on the table below represents a unique test configuration, with only the listed part added, removed, or changed. That part was then reinstalled before the next change. The tunnel braces and baseline configurations were tested at least a half dozen times each with the results averaged below.
| Average Deflection (in) | Stiffness (ft-lb / deg) |
Stiffness (nm / deg) |
% Change vs Baseline | |
| Baseline | 0.0480 | 6283 | 8520 | |
| Remove Custom Rear Strut Bar | 0.0488 | 6185 | 8387 | -1.6% |
| Remove Custom Front Strut Bar | 0.0520 | 5796 | 7859 | -7.8% |
| Install STOCK Front Strut Bar | 0.0494 | 6103 | 8276 | -2.9% |
| Add Steel Tunnel Brace, 8 bolts | 0.0467 | 6459 | 8759 | 2.8% |
| Add Steel Tunnel Brace, 10 bolts | 0.0465 | 6486 | 8795 | 3.2% |
| Add Aluminum Tunnel Brace, 8 bolts | 0.0467 | 6453 | 8750 | 2.7% |
| Add Aluminum Tunnel Brace, 10 bolts | 0.0462 | 6523 | 8845 | 3.8% |
One thing to note here is that the stock front strut bar is actually quite effective, providing about a 5% improvement in chassis stiffness on it's own. Adding a cross bar to the front strut bar as my custom bar does gives you another couple percent improvement. The rear bar alone only provides about a 1.6% improvement, although I found the driving feel (on the track) to be significantly improved by this particular rear brace (compared to a different, less effective rear brace).
The custom front and rear strut bars used in this testing were ones I made a few years ago. Pictures from other blog posts for reference:
The 8 bolt tunnel brace attaches at the 6 OEM locations, plus the two new ones at the front. The 10 bolt adds two additional points rearward of the 6 stock points. Interestingly the aluminum brace proved to be slightly more effective than the steel one (assuming all 10 bolts), probably as a result of it's increased thickness (3/16" vs 1/8"). It's also about half the weight.
3.8% improvement may not sound like a lot, but it's more than 2x the benefit that I measured from the rear strut bar, and 1.3x the benefit of an aftermarket front strut bar (vs stock) so it should be quite significant.

In the following tests, each change builds on the previous. I started with all braces installed, then removed things one at a time, starting with the strut bars and followed by the under body "cancer bars", the bracket under the fuel tank that supports the parking brake bell crank, then removed the T-tops, and even opened the doors. I then reversed the process, installing each piece in the reverse order (I did skip a couple of steps here, installing all of the under body braces in a single step). Where applicable, the results are averaged to create the table below (the raw data can be found at the end of this article).
| Average Deflection (in) | Stiffness (ft-lb / deg) |
Stiffness (nm / deg) |
% Change vs Previous | % Change vs Baseline | |
| Baseline | 0.0480 | 6283 | 8520 | ||
| Remove Front and Rear Strut Bars | 0.0522 | 5781 | 7840 | -8.0% | -8.0% |
| Remove Front "Cancer Bars" | 0.0530 | 5690 | 7716 | -1.6% | -9.4% |
| Remove Parking Brake Bracket | 0.0530 | 5690 | 7716 | 0.0% | -9.4% |
| Remove Rear "Cancer Bars" | 0.0533 | 5655 | 7668 | -0.6% | -10.0% |
| Remove T-Tops | 0.0538 | 5602 | 7597 | -0.9% | -10.8% |
| Open Doors | 0.0557 | 5418 | 7347 | -3.3% | -13.8% |
The "cancer bars" (so called because they are so often rusted out!), seem to make more of a difference than you might expect. Not much of an effect, but some.
I tested the removal of the parking brake bracket for a couple of reasons. One, I had removed it along with the parking brake system earlier this year for weight reduction reasons. Two, the center tunnel of the car is where a lot of the cars strength comes from, and tying the bottom of the tunnel together can have a significant effect (a square tube being much stronger than a C section). In this case it didn't seem to change much, but I'm not ruling out a brace there as an area for future improvement.
Interestingly the T-tops, even being held in place only by sliding pins, have a small effect on stiffness. Not much, but something. I was inspired to test this after noticing how much movement there was in the t-top joint when picking the car up and setting it back down on the jack stands. I would be interesting to do this same test with a hardtop, but T-tops are what I have. I have been considering replacing the T-top latch with some sort of bolt in bar that would tie the front A and B pillars together, but I haven't figured out yet how I want to implement that. Ideally, in a not-irreversible manner.
Testing with the doors open was also inspired by watching the door gap change as I lifted the car. It's almost as dramatic as the T-tops. Not that I think people are driving around with their doors open! But, the amount of difference due to opening the doors makes me wonder if those TRD "Door Stabilizers" that everyone seems so skeptical of might actually make a worth while difference. I might just have to get a set. If I do, I will of course test them in this manner!
SORRY, I tested the TRD door stabilizers and saw no measurable improvement. Clever design... but not very effective.
Overall, ~8500 nm/deg isn't fantastic, but it could be worse. Compared to other cars, we have a long ways to go to get to Porsche Cayman levels of stiffness (31,000-41,000 nm/deg, depending on generation). But compared to other cars of the same era it's not too bad. It's 75% stiffer than a Miata of the same year (4880 nm/deg), and not too much lower than an E36 M3 (10,900 nm/deg) or a C5 Corvette (9,100 nm/deg).
The Raw Data
For those looking to really nerd out, here's the raw data for the incremental tests. Note the difference in average deflection between the first row and the last is only .0006". There is a bit more variation between some of the install / remove tests in the middle, but the consistency in returning to the fully braced configuration is, in my opinion, impressive. The stiffness columns are based 720ft-lb of torque and the average deflection with a 24" distance between the pivot and measure points. The average deflection column is the average of Test 1, Test 2, and Test 3 ("apply" measurement minus "remove" measurement for each test, giving only the elastic deflection due to the application of the torque).
| Start | Test 1 | Test 2 | Test 3 | Lift & Reset 1 | Lift & Reset 2 | Average Deflection | Stiffness ft-lb / deg | Stiffness nm / deg | |||||
| Apply | Remove | Apply | Remove | Apply | Remove | ||||||||
| All Braces Installed | 0.000 | 0.055 | 0.007 | 0.055 | 0.007 | 0.056 | 0.007 | 0.002 | 0.002 | 0.0483 | 6240 | 8461 | |
| Remove Front Strut Bar | 0.006 | 0.065 | 0.013 | 0.066 | 0.014 | 0.066 | 0.014 | 0.007 | 0.006 | 0.0520 | 5800 | 7865 | |
| Remove Rear Strut Bar | 0.006 | 0.067 | 0.014 | 0.067 | 0.014 | 0.068 | 0.015 | 0.008 | 0.007 | 0.0530 | 5690 | 7716 | |
| Remove Front "Cancer Bars" | 0.007 | 0.068 | 0.015 | 0.068 | 0.015 | 0.068 | 0.015 | 0.008 | 0.008 | 0.0530 | 5690 | 7716 | |
| Remove Parking Brake Bracket | 0.008 | 0.068 | 0.015 | 0.068 | 0.015 | 0.068 | 0.015 | 0.009 | 0.009 | 0.0530 | 5690 | 7716 | |
| Remove Rear "Cancer Bars" | 0.008 | 0.069 | 0.015 | 0.069 | 0.016 | 0.069 | 0.016 | 0.010 | 0.010 | 0.0533 | 5655 | 7668 | |
| Remove T-Tops | 0.010 | 0.071 | 0.017 | 0.071 | 0.018 | 0.072 | 0.018 | 0.014 | 0.014 | 0.0537 | 5620 | 7620 | |
| Open Doors | 0.015 | 0.071 | 0.015 | 0.071 | 0.015 | 0.071 | 0.016 | 0.012 | 0.012 | 0.0557 | 5418 | 7347 | |
| Close Doors | 0.014 | 0.070 | 0.016 | 0.071 | 0.017 | 0.071 | 0.017 | 0.014 | 0.014 | 0.0540 | 5585 | 7573 | |
| Install T-Tops | 0.013 | 0.072 | 0.021 | 0.073 | 0.021 | 0.073 | 0.021 | 0.014 | 0.014 | 0.0517 | 5837 | 7915 | |
| Install Underbody Braces | 0.017 | 0.076 | 0.024 | 0.076 | 0.025 | 0.076 | 0.025 | 0.018 | 0.018 | 0.0513 | 5875 | 7967 | |
| Install Rear Strut Bar | 0.010 | 0.070 | 0.018 | 0.070 | 0.018 | 0.070 | 0.018 | 0.012 | 0.012 | 0.0520 | 5800 | 7865 | |
| Install Front Strut Bar | 0.004 | 0.058 | 0.010 | 0.058 | 0.011 | 0.059 | 0.011 | 0.005 | 0.005 | 0.0477 | 6327 | 8580 | |