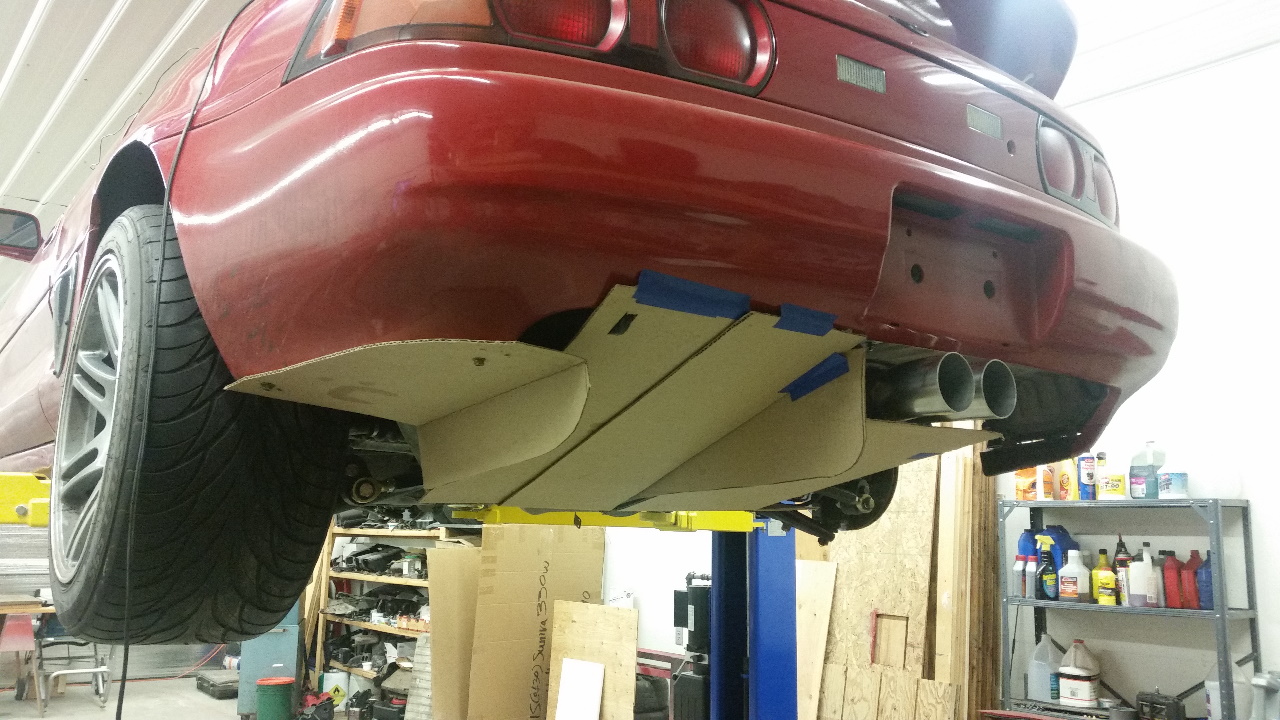
Building a (functional) rear diffuser has been on my list of things I wanted to do for a while, but getting it to fit nicely around the exhaust was always a problem. My new center exit exhaust solved that, so on to the diffuser build!
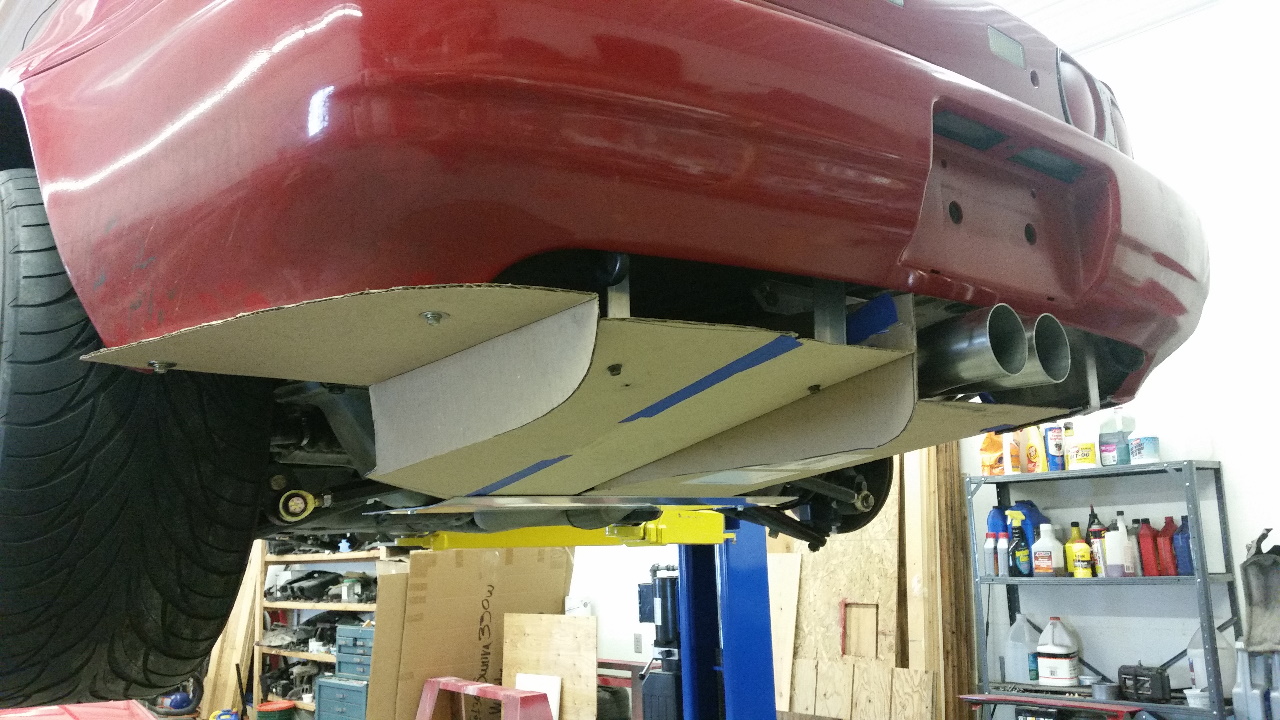
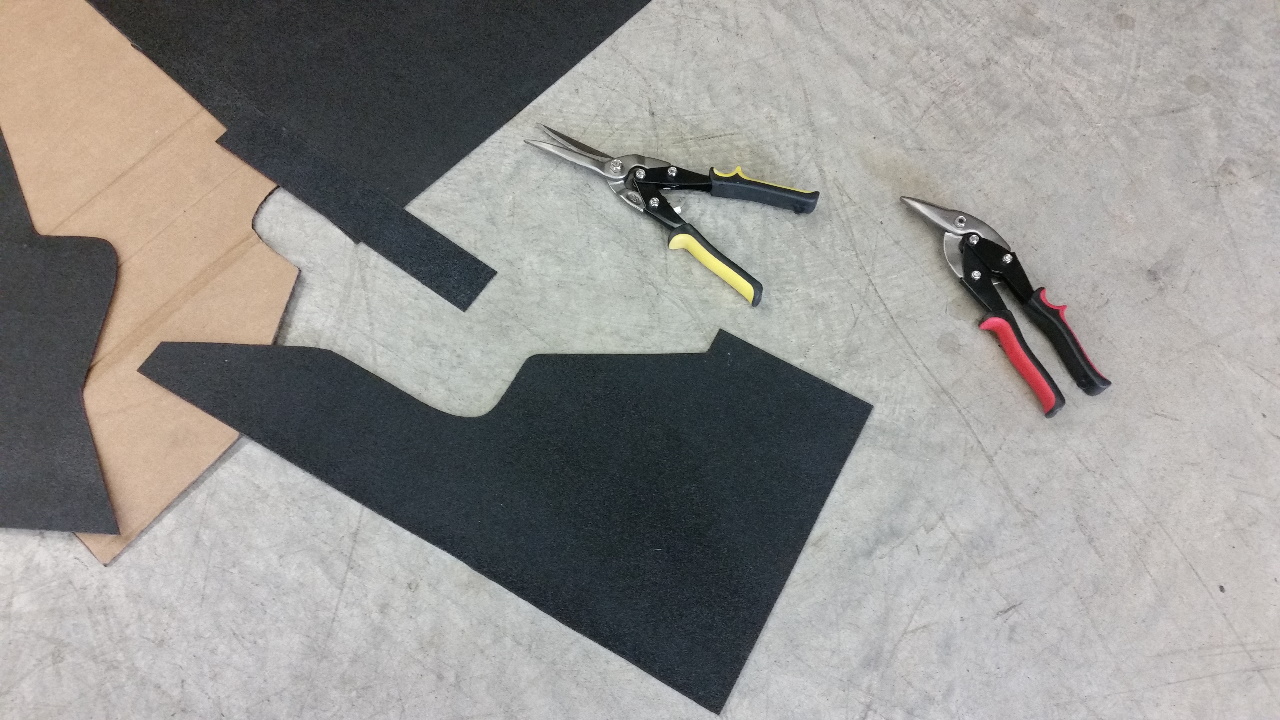
As with many things of this nature, it all started with a little CAD (cardboard aided design).
But before we go too much farther, let me introduce a tool that everyone who plans to modify a car to this extent should have. A rivnut puller: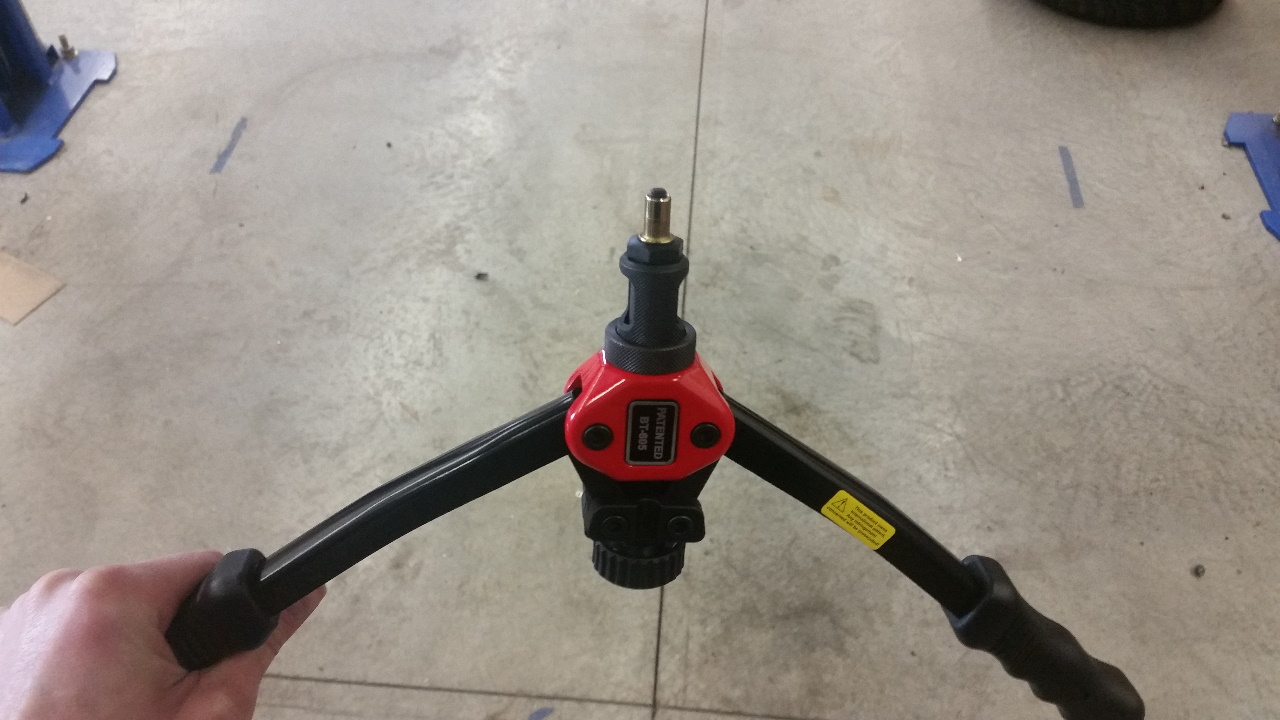
Basically, it lets you put a threaded insert almost anywhere, without needing access to the back side. This will be used extensively in this project. I had been meaning to buy one for years, and finally did before starting on the diffuser. It was only ~45 bucks on Amazon, I should have bought one years ago!
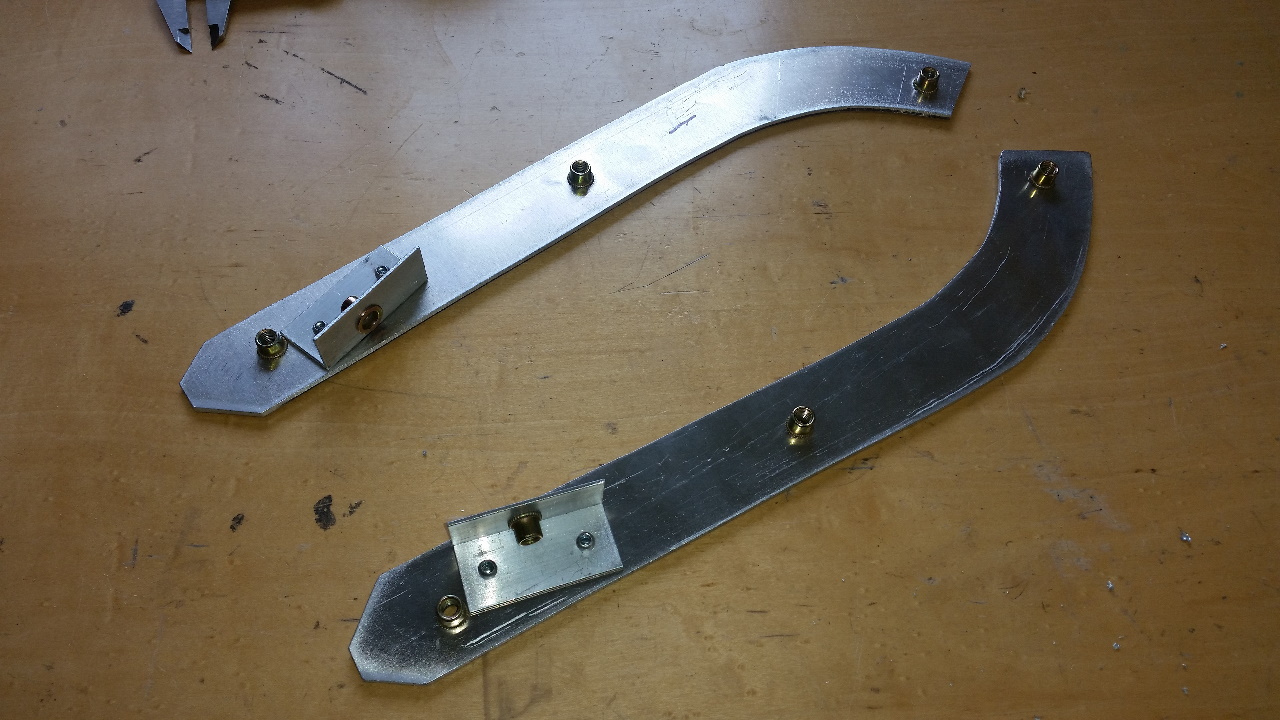
To attach the side plates of the diffuser I cut two support plates out of 1/8" aluminum sheet. Three rivnuts, plus a riveted bracket with a another rivnut to attach it to one of the mounting points on the chassis.
 |
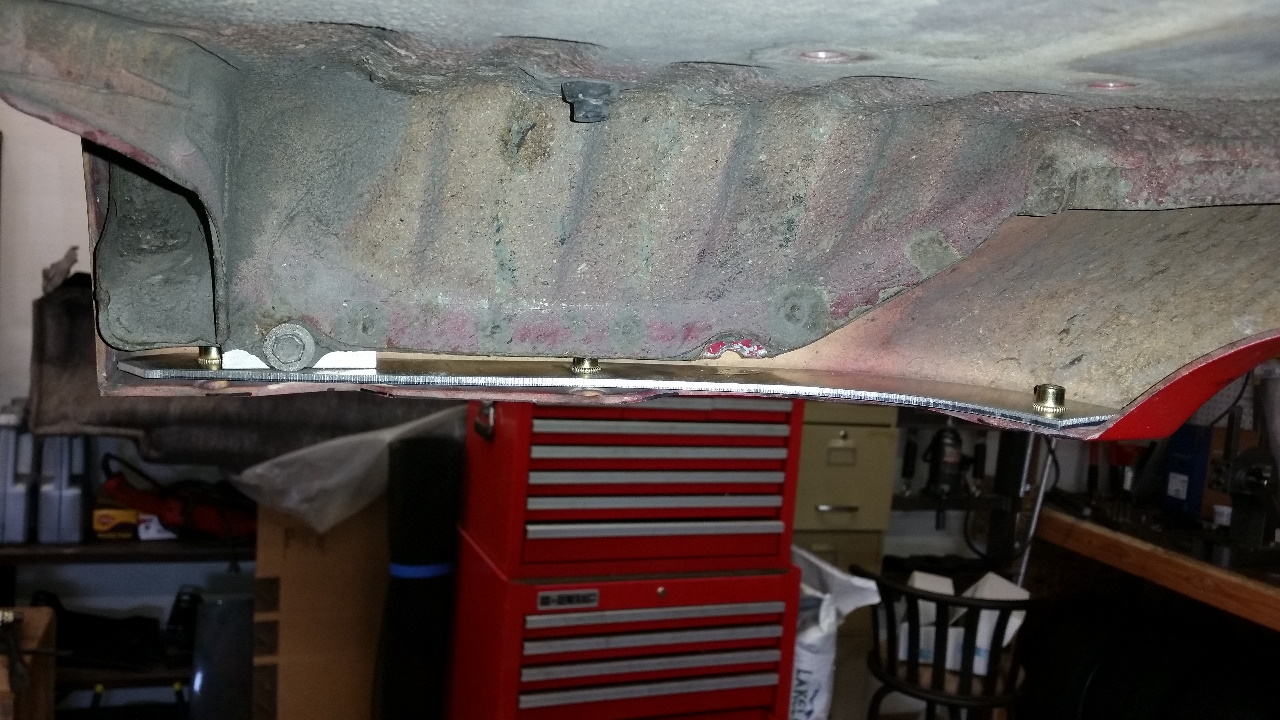 |
This allows for three fasteners to securely clamp the sides of the diffuser to the bottom of the bumper.
To support the middle, I made four brackets. Two out of aluminum flat bar, and two out of angle. They attach to the chassis behind the bumper with bolts from inside the trunk. These brackets actually ended up changing substantially before I was done, and the flat ones were eliminated entirely, but they were very helpful in the mockup process.

Here is mockup v2 hanging from the new brackets. Three rivnuts were installed in the bottom of the cross member to attach a (mostly) flat plate to support the front of the diffuser. As you can see I also reduced the angle of the side tunnels. I was afraid they were too steep to be functional in the original mockup, plus closing out the round corner of the bumper was going to be difficult.
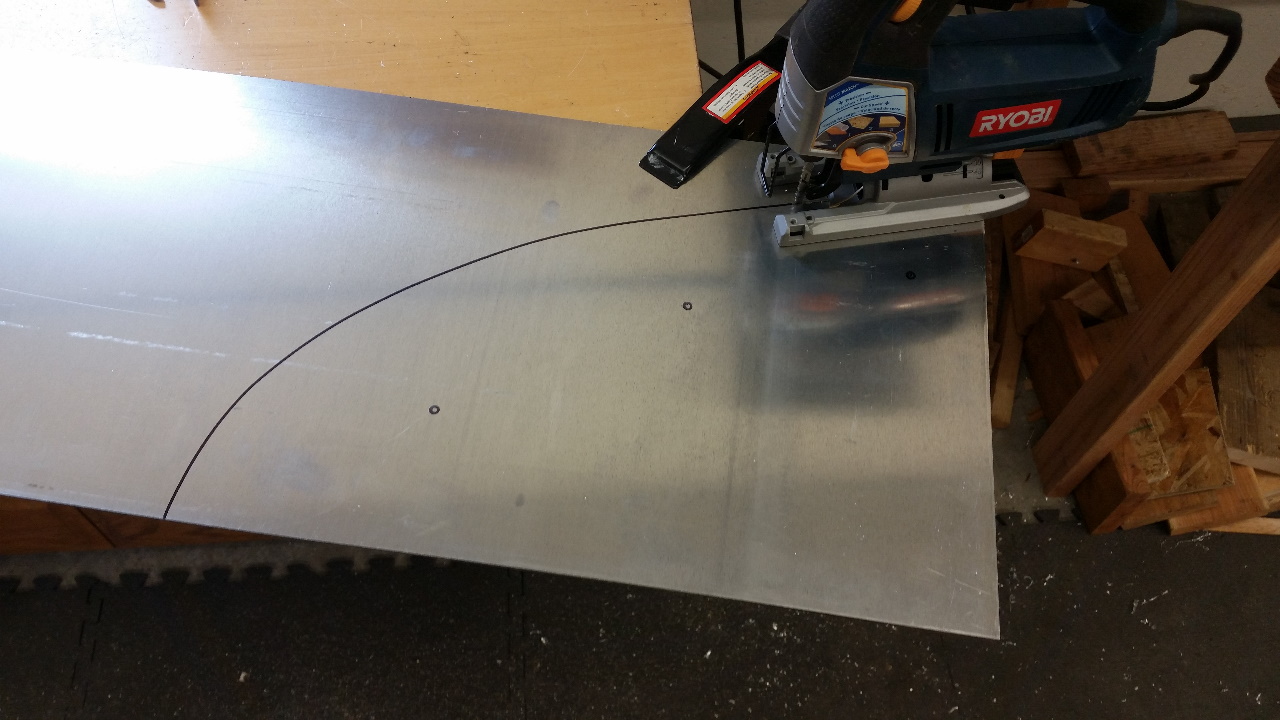
With the mockup done I started tracing my cardboard patterns onto sheet metal. 1/8" thick for the side plates, since these are likely to take a bit of abuse.
 |
 |
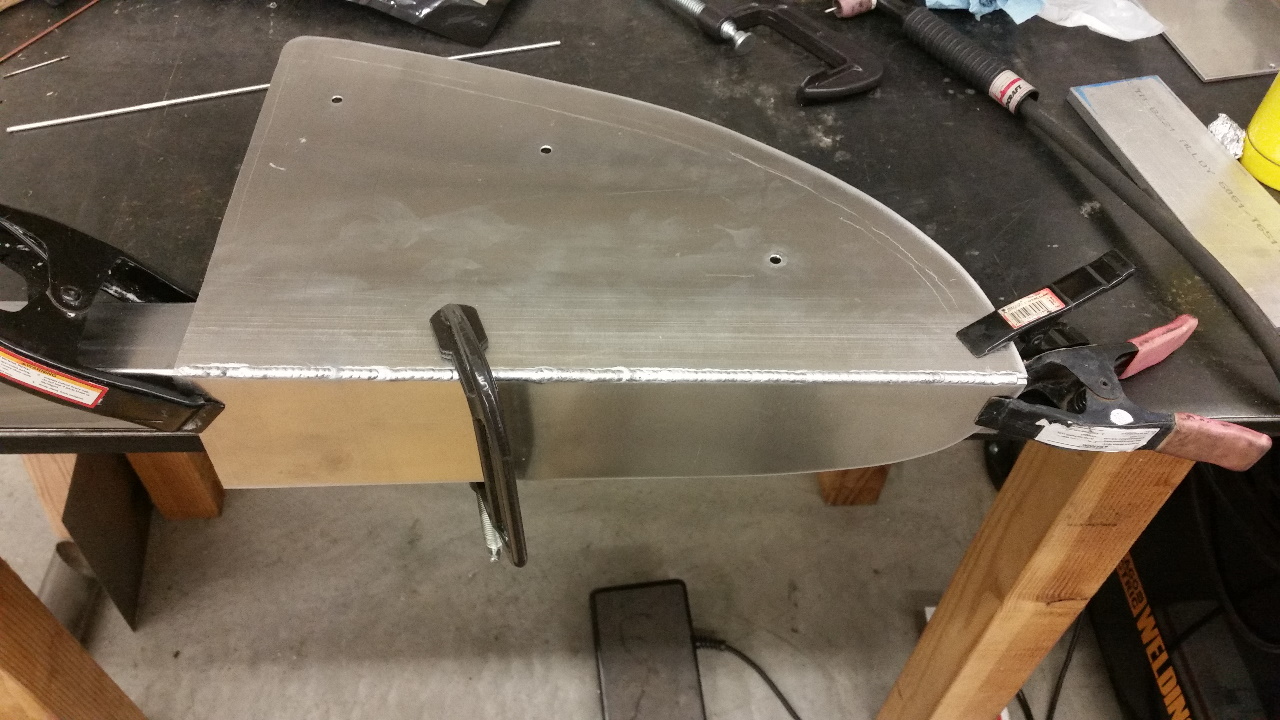
The vertical portions were also cut from 1/8" aluminum, and then the pair were clamped to a piece of square tube and welded together.
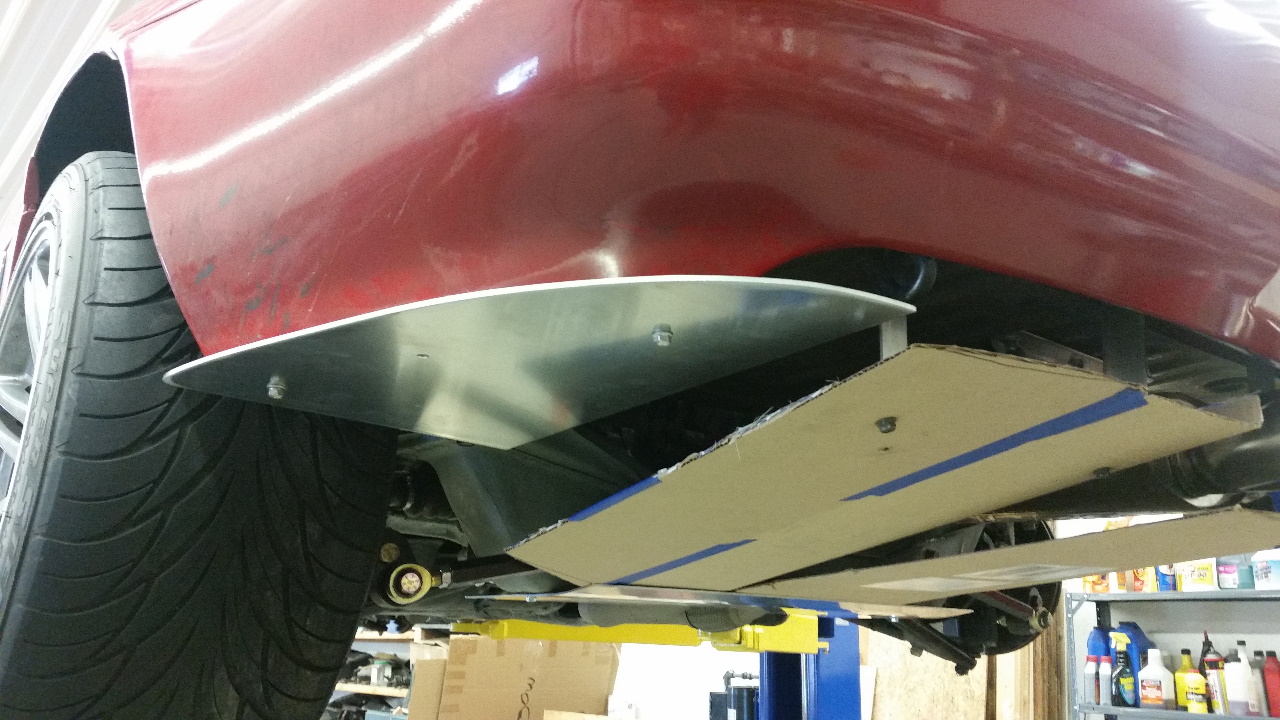
Finished side plates installed on the car.
 |
 |
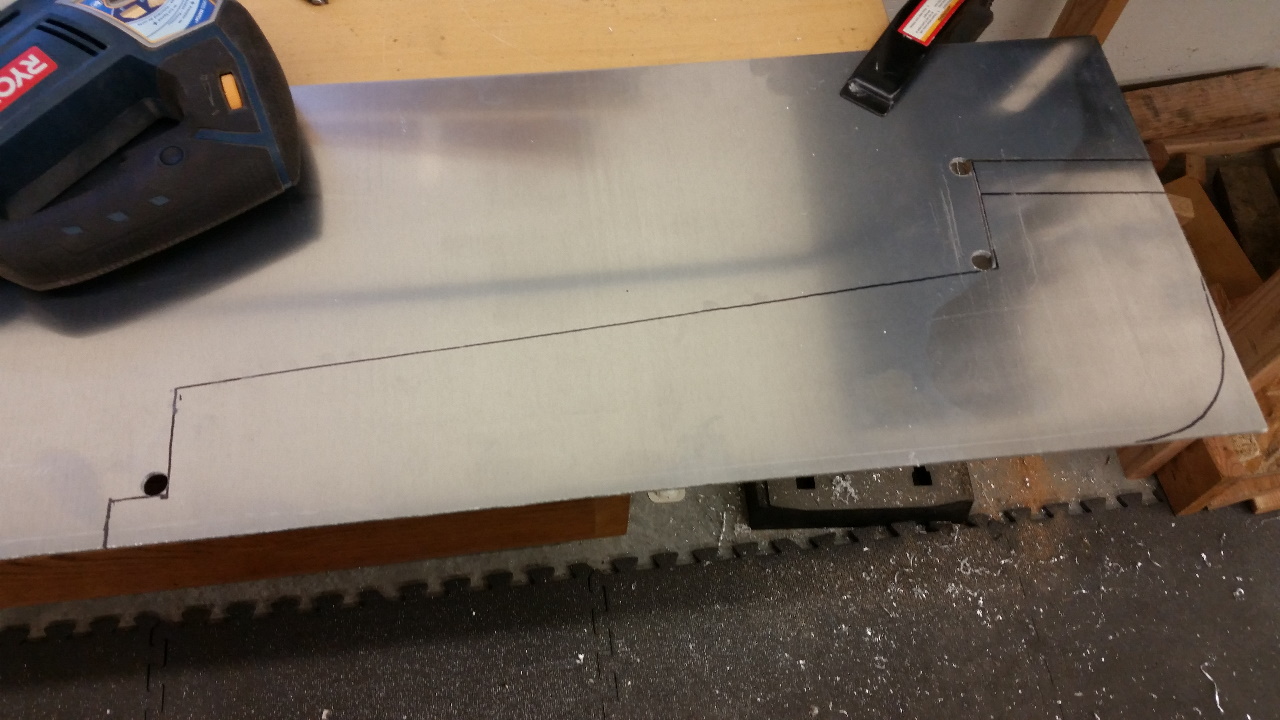
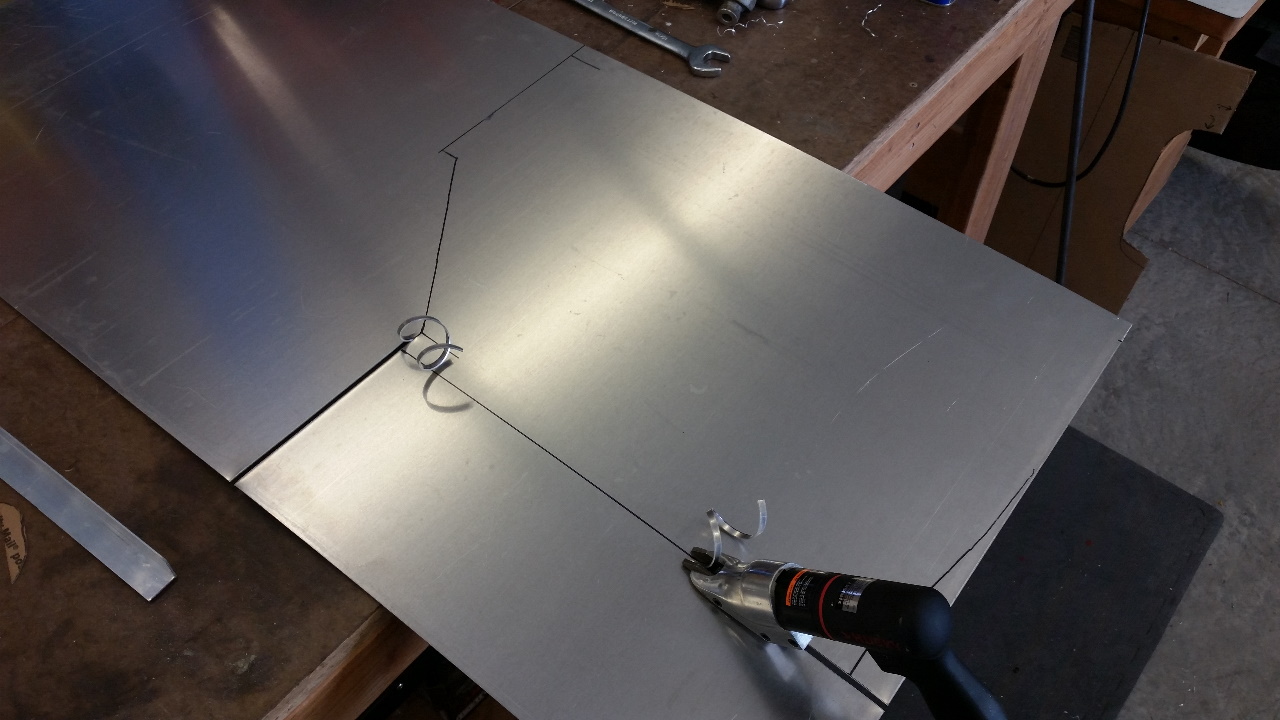
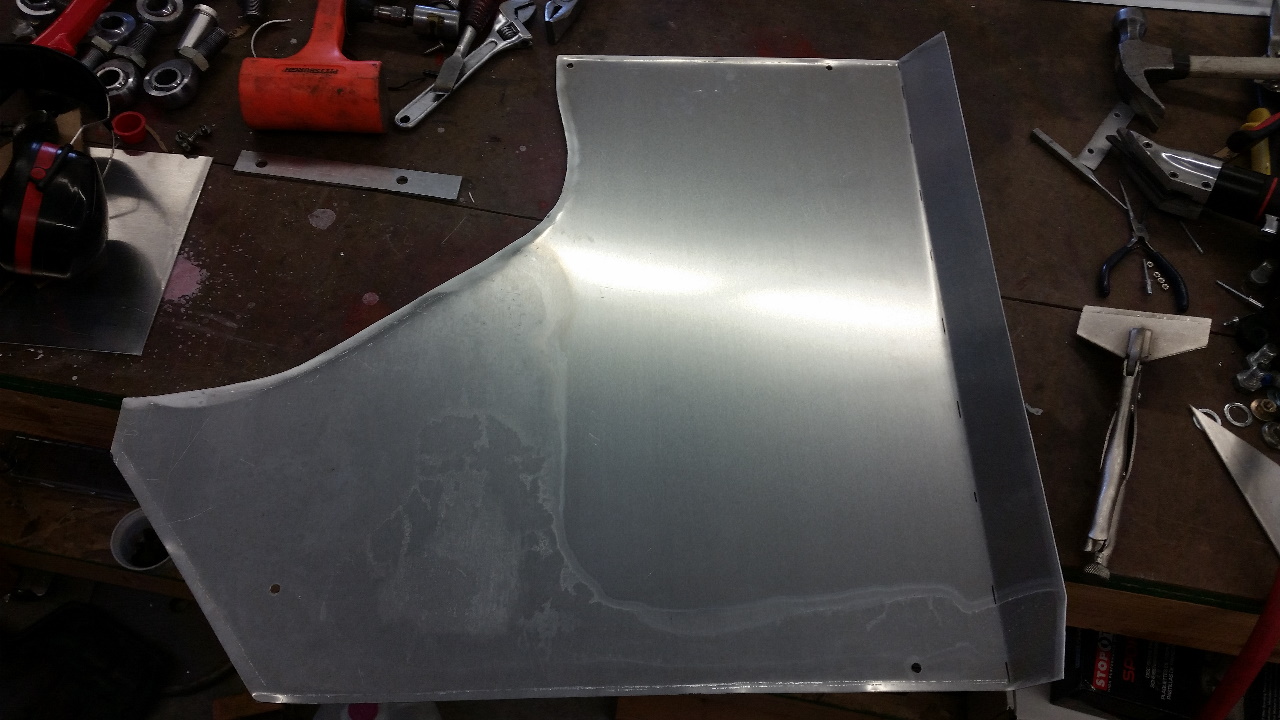
Continue the tracing and cutting. More 1/8" material for the center vertical pieces. All of the curved edges of these pieces were cleaned up with a belt sander for a nice smooth, even curve.
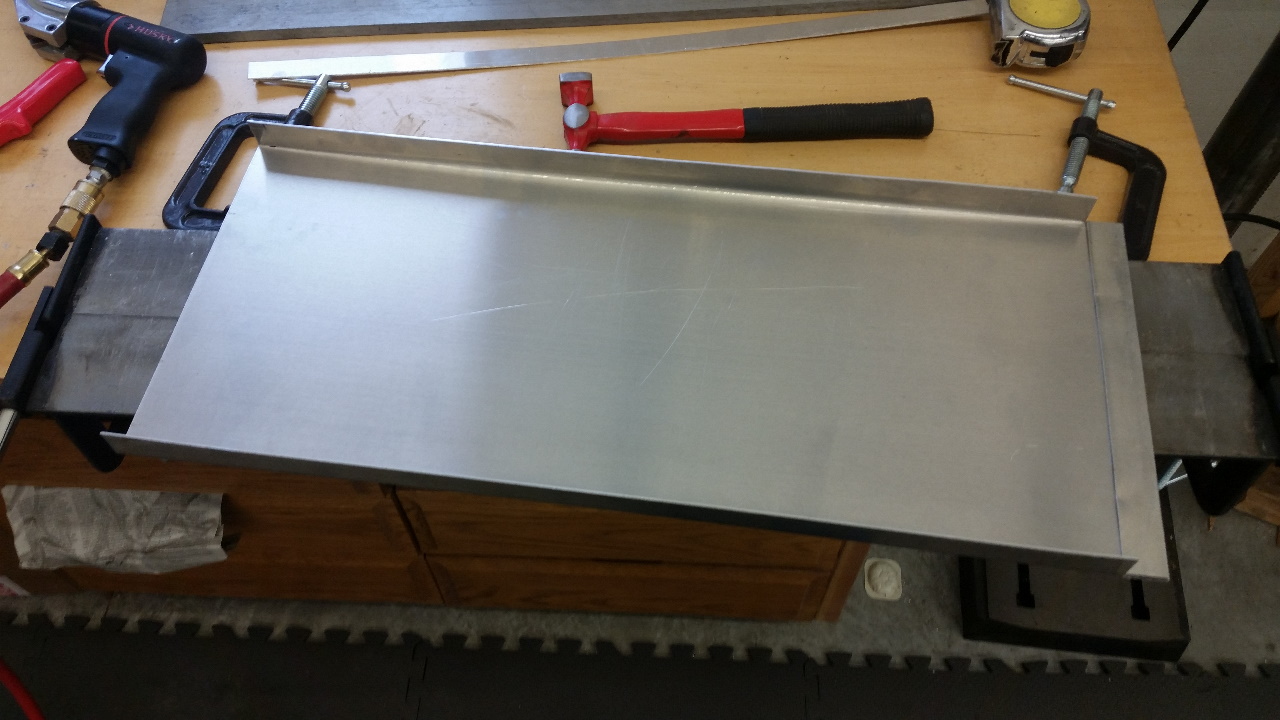
The horizontal pieces are cut from 1/16" sheet metal. For these I can use my shear rather than the jig saw. On the center piece I folded the back edge over for more stiffness. In hindsight, I think this was more trouble than it was worth! Also bent flanges on both sides for riveting to the side pieces. For anyone looking to tackle a project like this, I found that Allstar Performance sells sheet metal through Summit Racing at about the price price around, made even better because Summit ships free on orders over $99. Order from anywhere else and shipping will be a major portion of the cost.
 |
 |
Here's the center tunnel riveted together and hanging from the car.
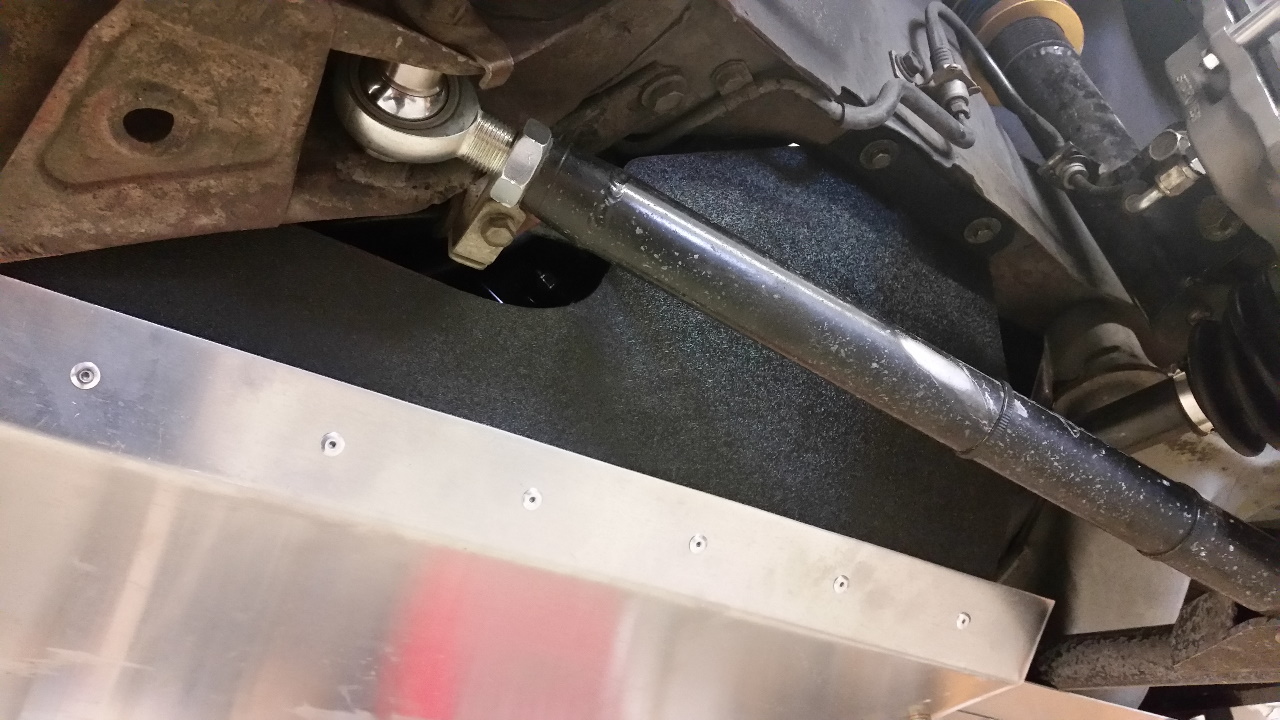
At this point I realized that a little more support was needed on the side plates, mostly to make sure they would hang level. The bumper tended to force them to angle slightly, causing the side tunnels to not be parallel. Two more rivnuts installed in the trunk floor, and two simple straps riveted to the side plate solved that issue. Once everything was done I realized this should have been moved forward to the edge so that the bolt would be easier to access with the diffuser installed.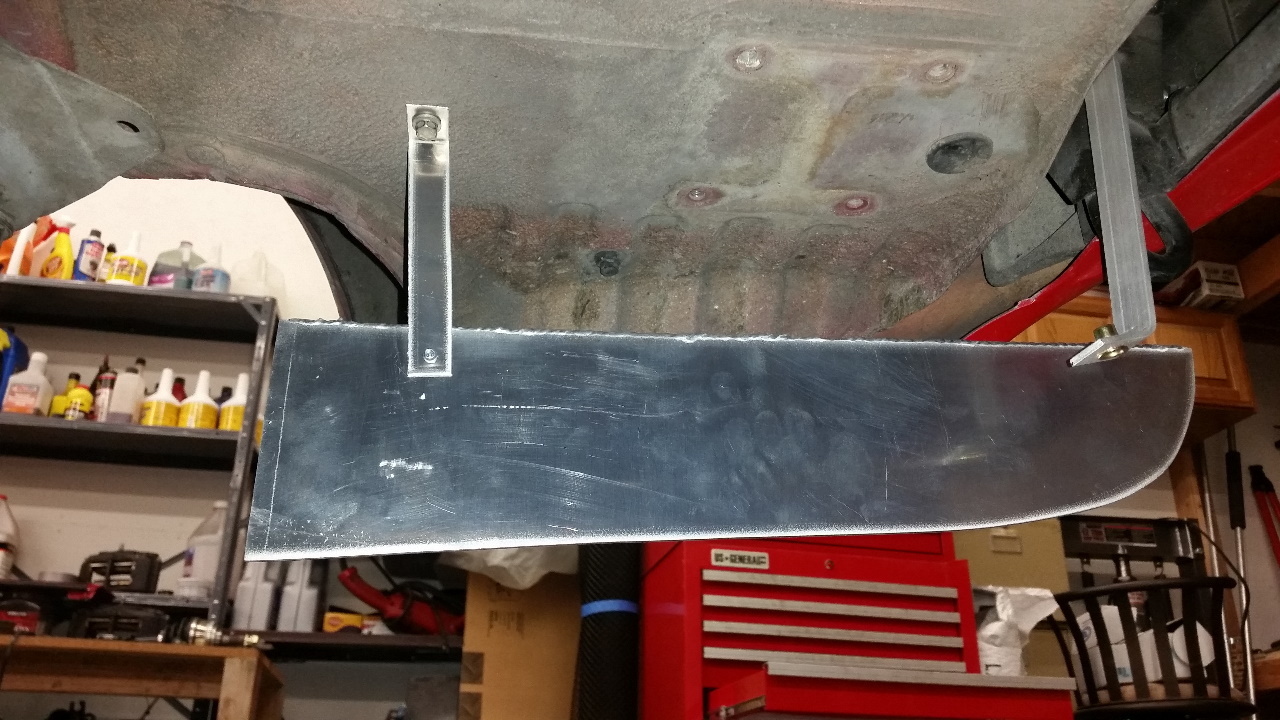
The top of the side tunnels traced out and partially cut.
And a shot of the flanges being bent on my cheap Harbor Freight bending brake. It does an OK job on thin material, provided you use enough clamps as shown.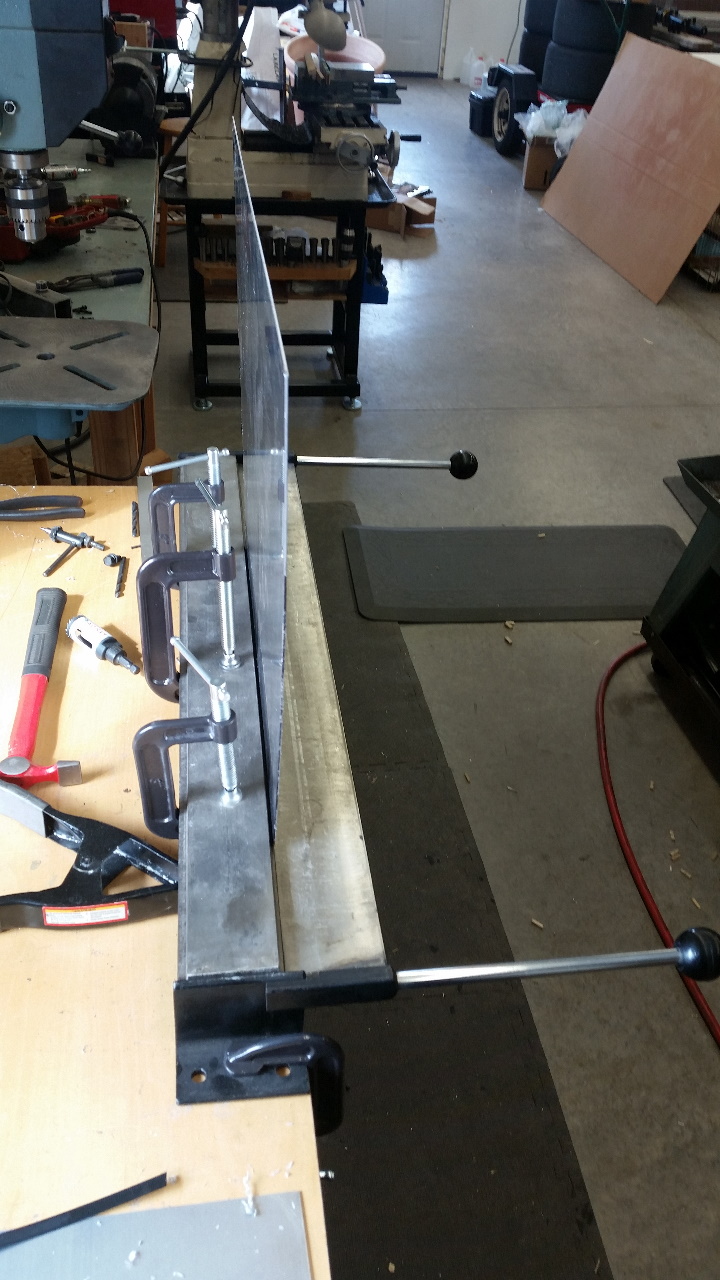
The side tunnels finished. At about this point I determined that my brackets were over kill, and eliminated the two on the outer corners, and shortened the two middle ones so that they only attached to the center tunnel. Pictures of that later.
So that's it for the diffuser, it's basically done. But it won't work very well with the big hole that is the engine bay in front of it...
Back to the cardboard, to mock up an under panel for the transmission / front of the engine bay.
 |
 |
Re-produced in aluminum. I bent a small flange around the entire perimeter to stiffen the panel, plus the larger flange on the left hand side. This attaches to the cross member panel at the back, and to two factory attach points at the front. The stock scoops are left open at the front edge feeding air to the engine bay and to my transmission cooler.
 |
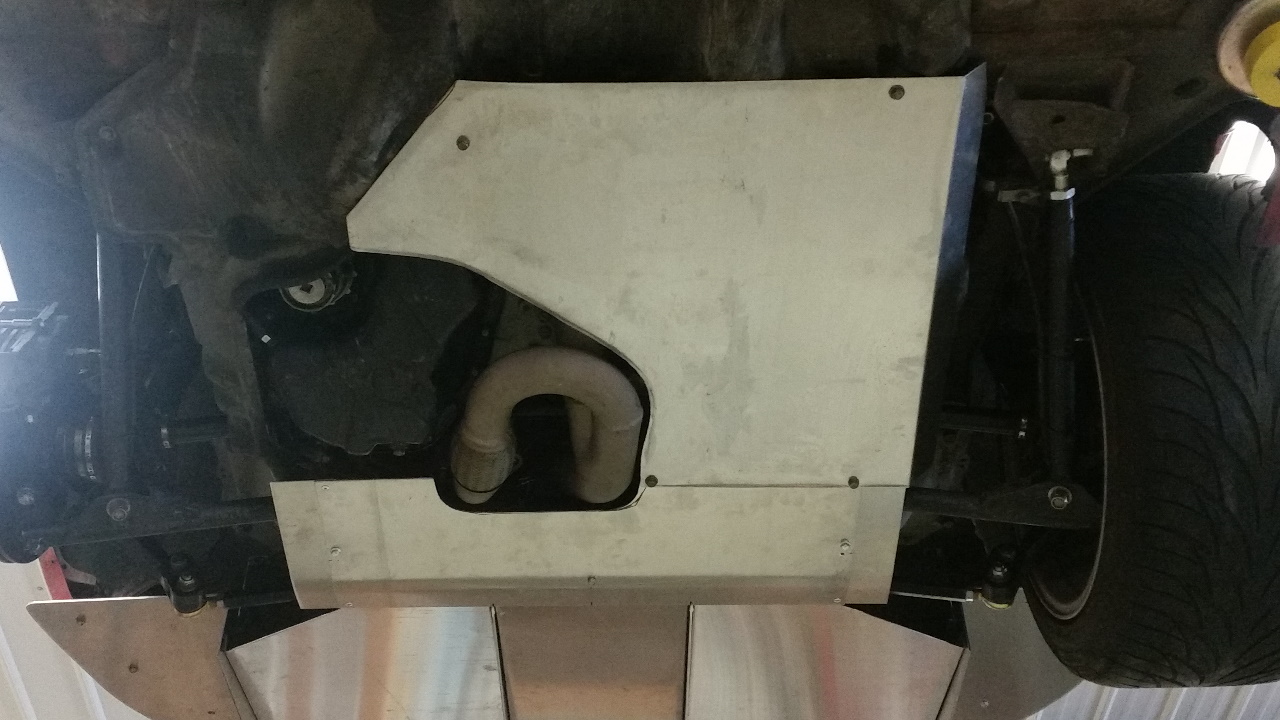 |
If you look close here you can see some design iterations that went on. My initial cross member panel was narrower than I liked, so you can see here the temporary extensions that I rivited on. This made it not line up with the angled edges on my side tunnels any more. I didn't take any pictures of the process, but I fixed this by welding some pieces back onto the side tunnels to finish it out.
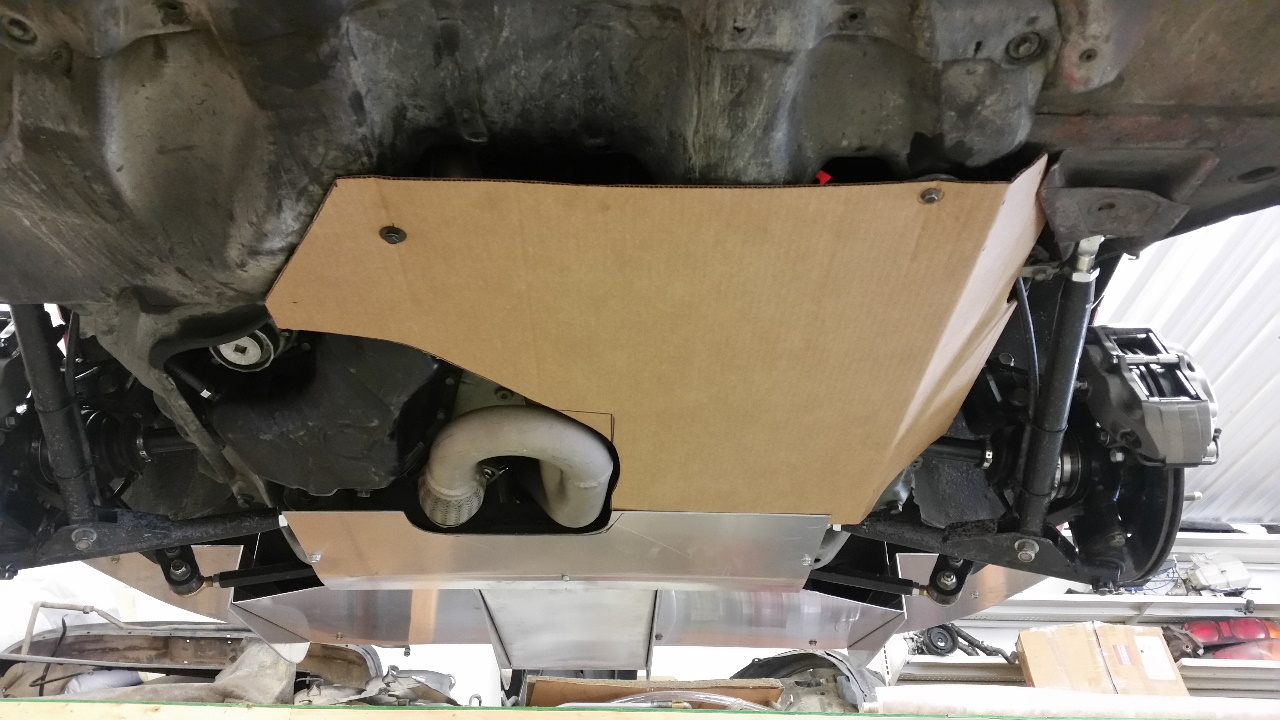
To close out the left hand wheel well area I turned to some .063 ABS sheet. Cheaper, lighter, and easier to work with than aluminum. It turns out that tin snips make great heavy duty scissors for cutting this stuff!
Bent in two places with a little heat and my bending brake, and rivited to the under panel along the flange. A second piece of sheet metal on the back side backs up the rivets, and two rivnuts in the frame rail attach the top edge. Just like the stock splash guard on the engine side.
As mentioned above, I decided I wasn't happy with the width of the panel under the cross member. Sometimes you don't figure these things out until you build them! So I cut a new piece out of some more 1/8" material, wider and with a flared shape toward the back. This was made as wide as possible while still allowing the control arms and tie rods to clear at full droop.
For both stiffness and to start the diffuser angle sooner and more gently I wanted to put a slight bend across this piece. But my cheap-o bender will NOT handle 1/8" material. Luckily my hydraulic press and a couple pieces of tubing will.

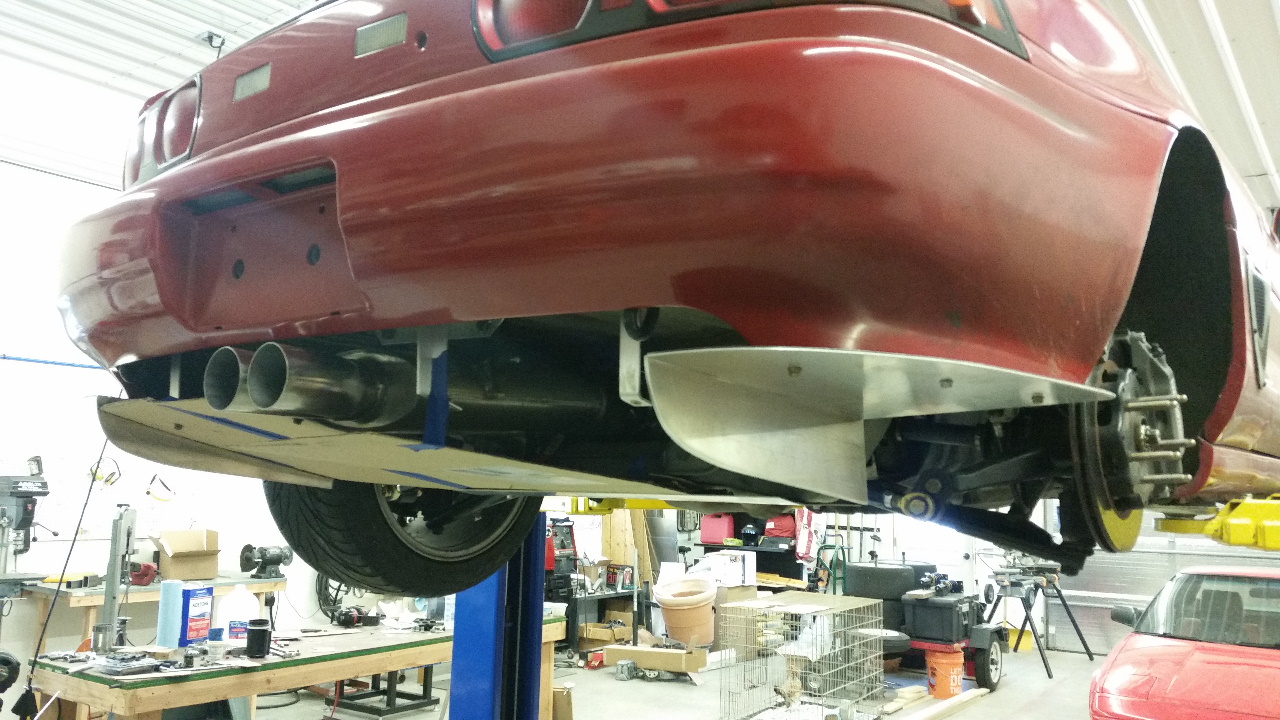
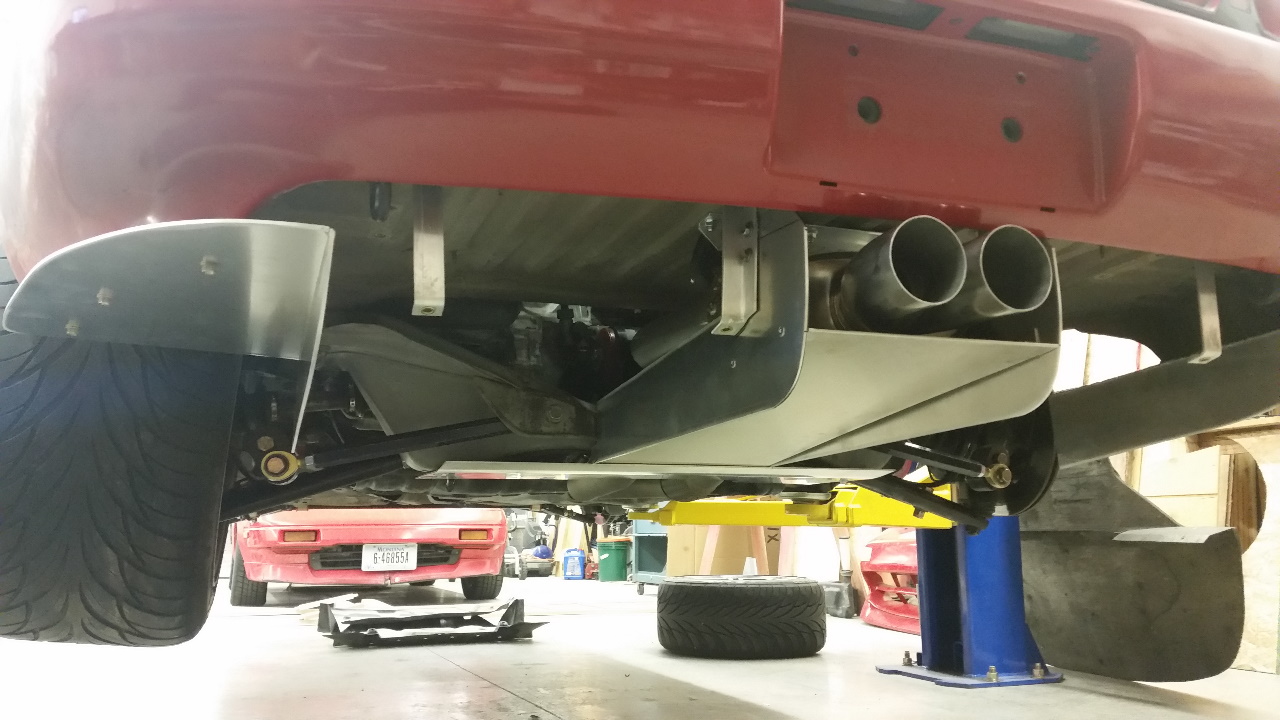
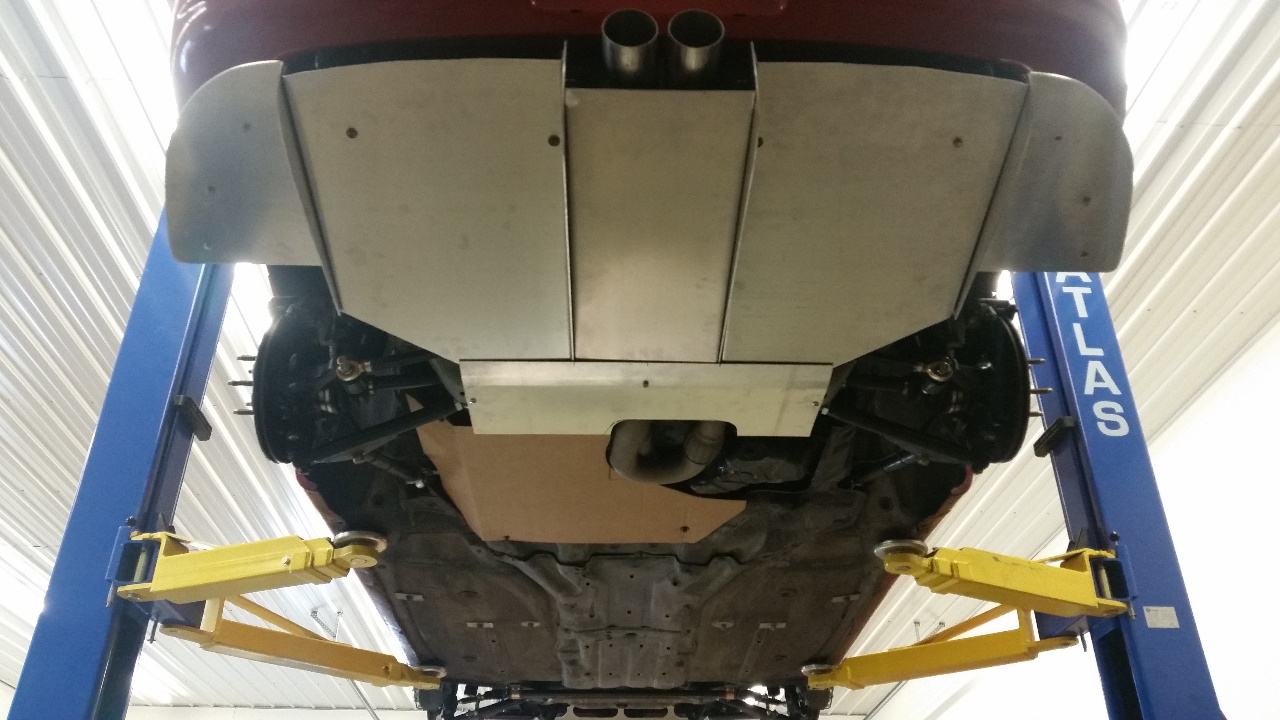
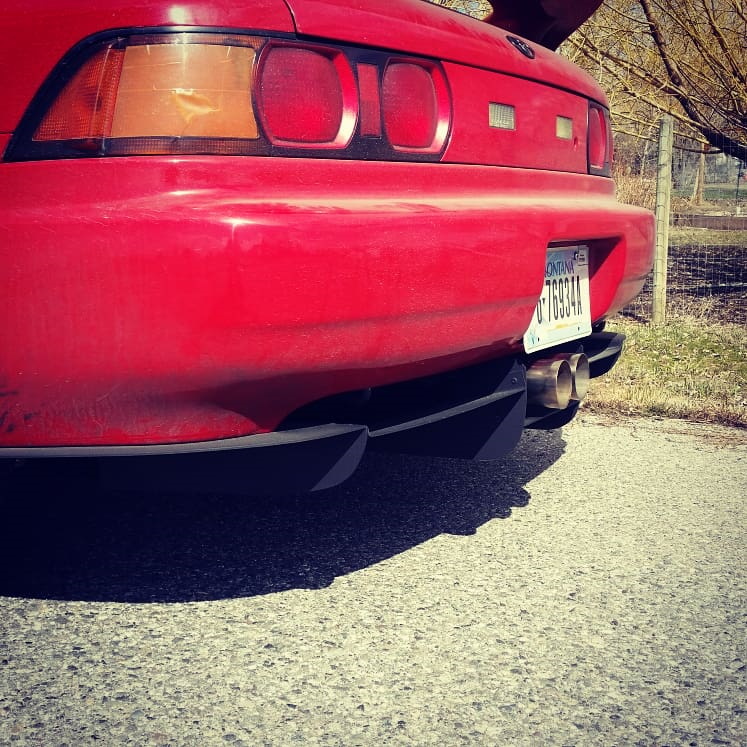
And here's the whole thing finished in rubberized under coating. This helps with vibration as well as provides a relatively durable and easily touched up finish that gives the whole thing the subtle, stock-ish look I was going for. You can see here the new panel under the cross member with the flare toward the back, and the re-worked side tunnels with the corners welded back in. The under body is closed in about as much as I can given the need to clear the oil pan and y-pipe. If the cross member panel was spaced down a bit it might be possible to fully close this out, but this would position that panel lower than the stock underbody plastics. It might also be possible to thermal form a piece of plastic to cover the oil pan while being smooth, even if not completely flat. Always room for improvement!
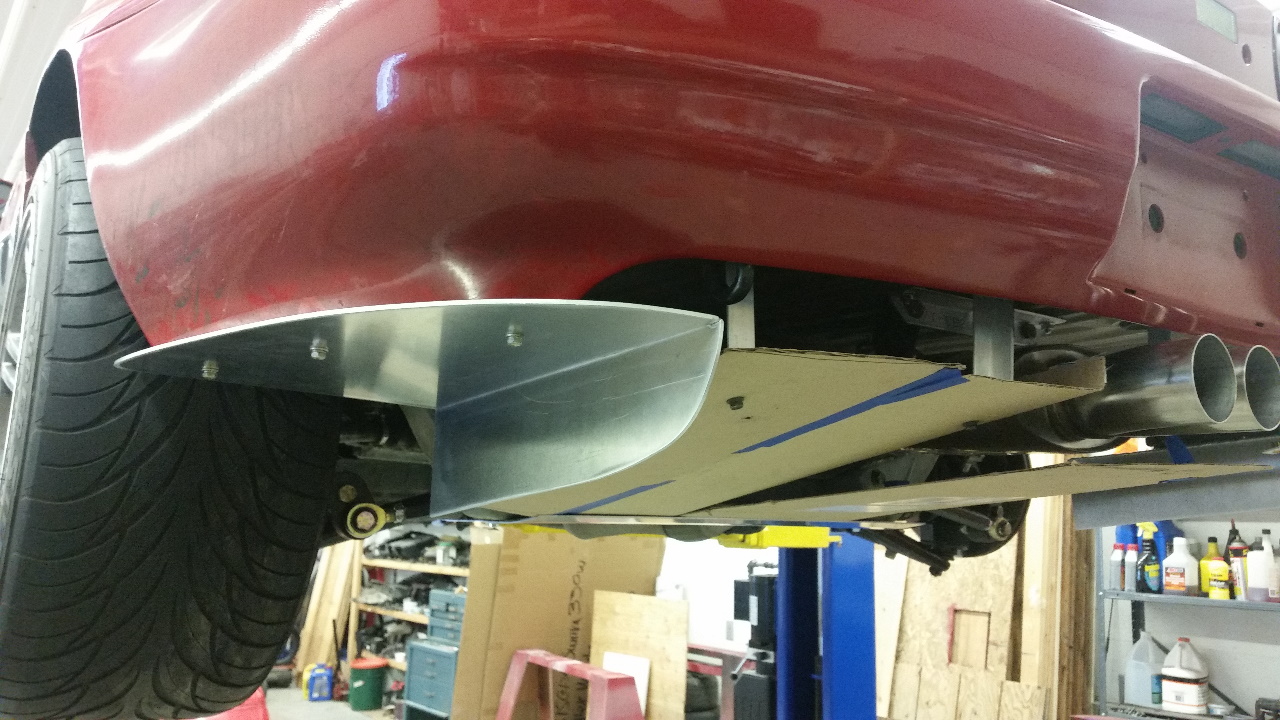
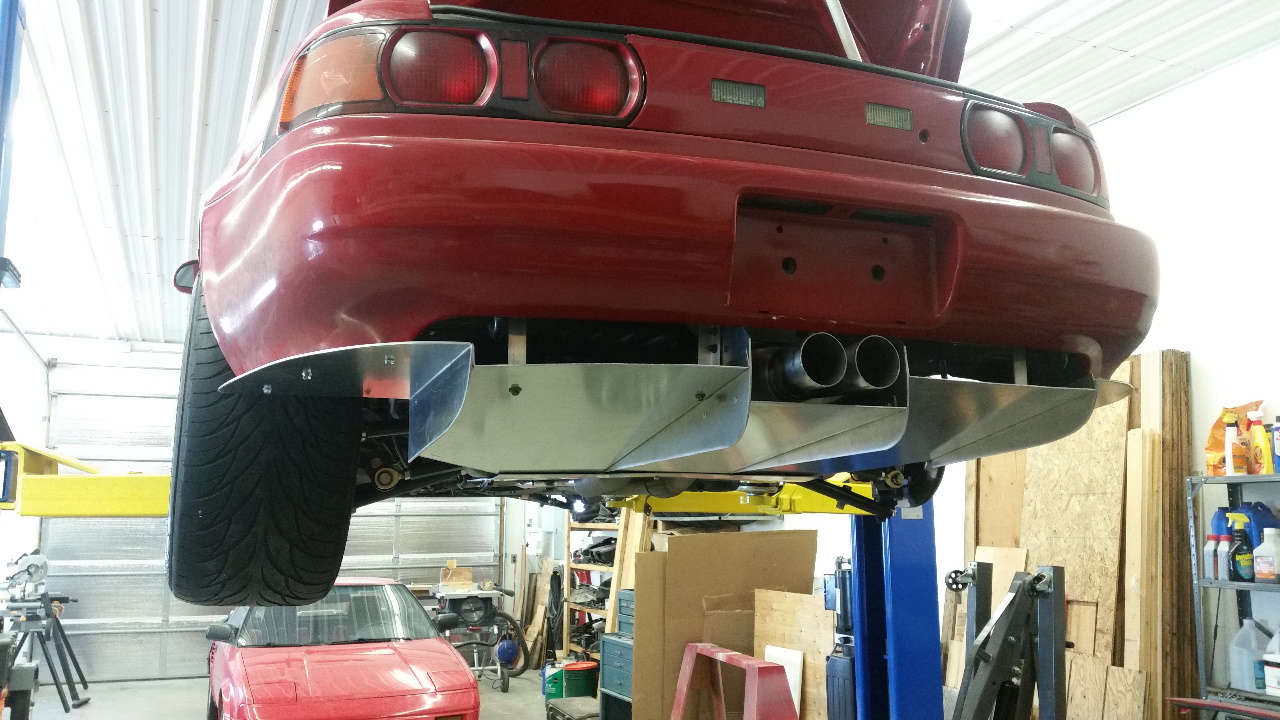
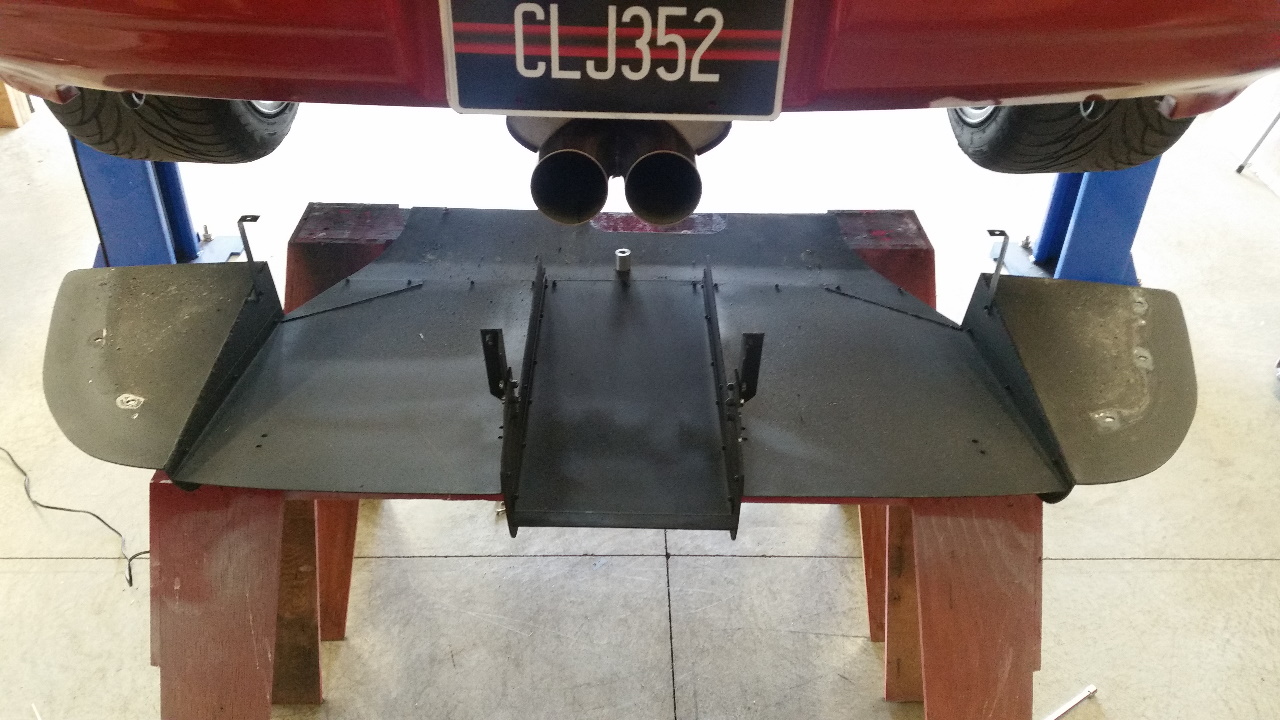
And here's the finished diffuser sitting on sawhorses under the car. At this point the cross member panel was riveted to the main diffuser. This proved to make it a real pain to install and remove, so I later changed this joint to a few screws / rivnuts so that the diffuser could be removed with the cross member panel remaining attached.
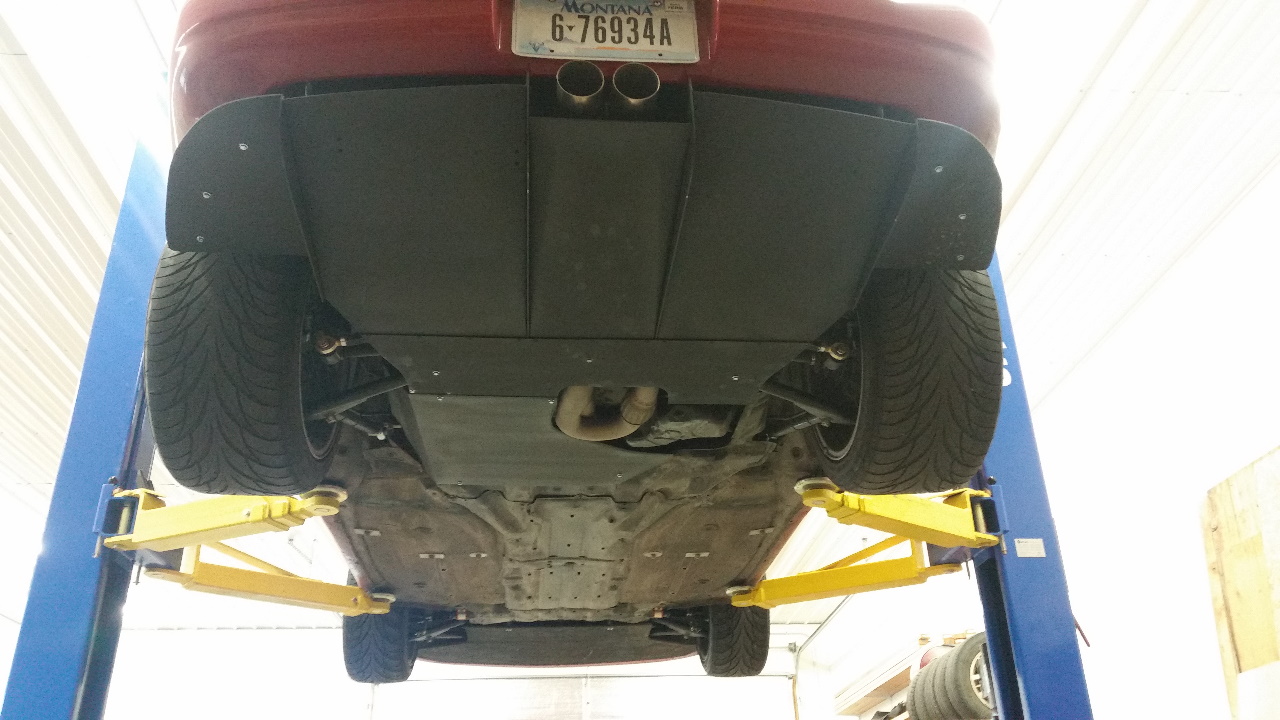
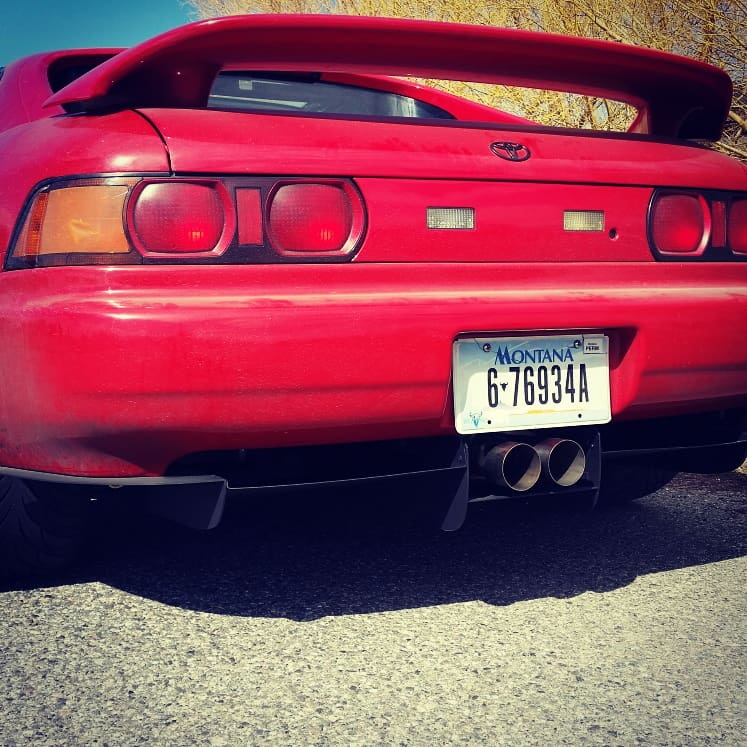
And here's a couple shots of my dirty car with the diffuser installed. Does it work? I honestly have no idea. In theory I think it should, someday I might do some A-B testing on the track with it to try to find out for sure. It looks cool at least!
 |
 |